HP Mini 110-3100 HP Mini 110 and Compaq Mini CQ10 - Maintenance and Service Gu - Page 65
Slide the keyboard, back until the keyboard cable and connector are accessible.
 |
View all HP Mini 110-3100 manuals
Add to My Manuals
Save this manual to your list of manuals |
Page 65 highlights
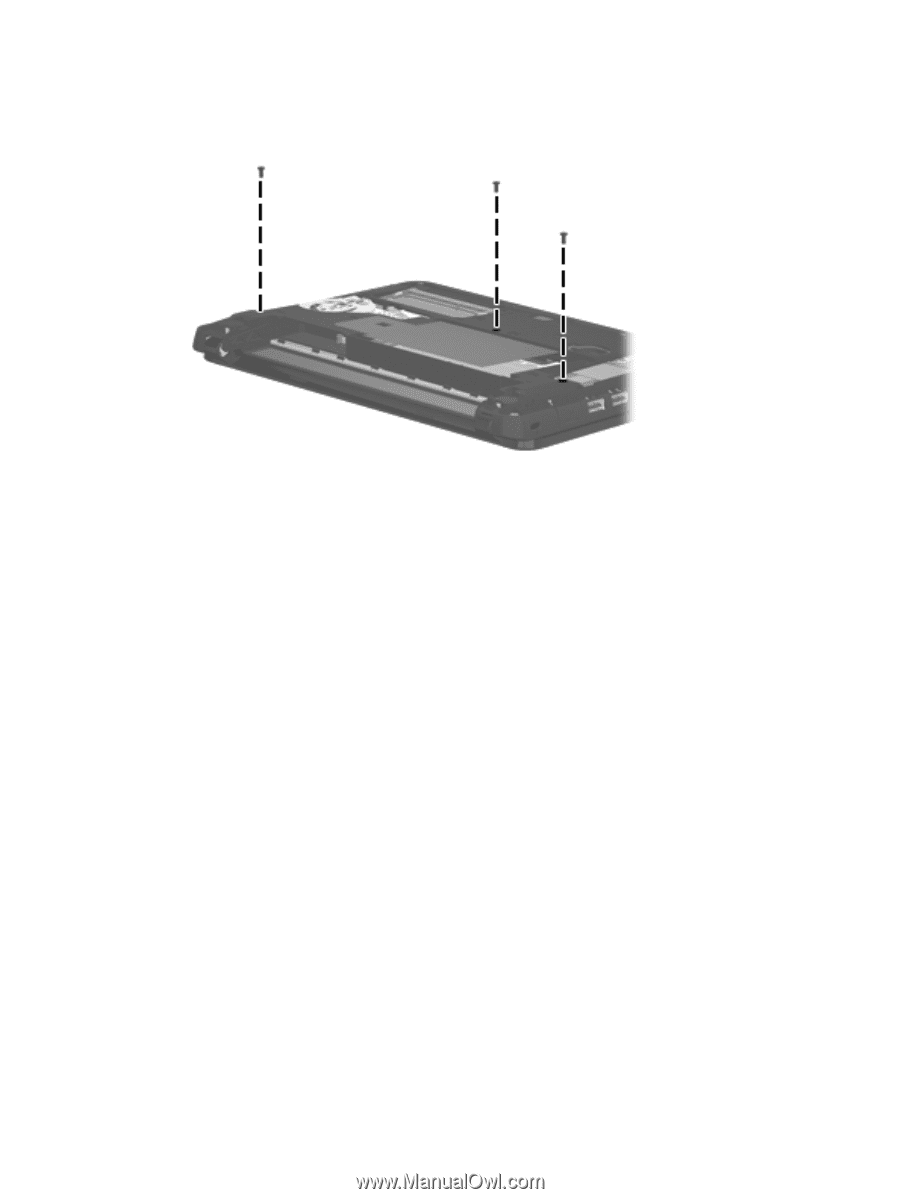
Remove the keyboard: 1. Remove the three Phillips PM2.0×6.0 screws that secure the keyboard to the computer. 2. Turn the computer right-side up, with the front toward you. 3. Open the computer as far as it will open. 4. Lift the rear edge of the keyboard (1) until it rests at an angle. 5. Slide the keyboard (2) back until the keyboard cable and connector are accessible. Component replacement procedures 55
-
 1
1 -
2
-
3
-
4
-
5
-
6
-
7
-
8
-
9
-
10
-
11
-
12
-
13
-
14
-
15
-
16
-
17
-
18
-
19
-
20
-
21
-
22
-
23
-
24
-
25
-
26
-
27
-
28
-
29
-
30
-
31
-
32
-
33
-
34
-
35
-
36
-
37
-
38
-
39
-
40
-
41
-
42
-
43
-
44
-
45
-
46
-
47
-
48
-
49
-
50
-
51
-
52
-
53
-
54
-
55
-
56
-
57
-
58
-
59
-
 60
60 -
 61
61 -
 62
62 -
 63
63 -
 64
64 -
 65
65 -
 66
66 -
 67
67 -
 68
68 -
 69
69 -
 70
70 -
71
-
72
-
73
-
74
-
75
-
76
-
77
-
78
-
79
-
80
-
81
-
82
-
83
-
84
-
85
-
86
-
87
-
88
-
89
-
90
-
91
-
92
-
93
-
94
-
95
-
96
-
97
-
98
-
99
-
100
-
101
-
102
-
103
-
104
-
105
-
106
-
107
-
108
-
109
-
110
-
111
-
112
-
113
-
114
-
115
 |
 |
Remove the keyboard:
1.
Remove the three Phillips PM2.0×6.0 screws that secure the keyboard to the computer.
2.
Turn the computer right-side up, with the front toward you.
3.
Open the computer as far as it will open.
4.
Lift the rear edge of the keyboard
(1)
until it rests at an angle.
5.
Slide the keyboard
(2)
back until the keyboard cable and connector are accessible.
Component replacement procedures
55