HP ProBook 4545s HP ProBook 4545s Notebook PC - Maintenance and Service Guide - Page 84
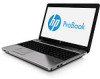
Remove two Torx T8M2.5×7.0 screws from each of the two hinges, Removal and replacement procedures
 |
View all HP ProBook 4545s manuals
Add to My Manuals
Save this manual to your list of manuals |
Page 84 highlights
3. Remove the WLAN cable from the cable raceway (1) and from the cable clips (2). 4. Remove the display cable (1) from the raceway and release them from the cable clips (2). 5. Remove two Torx T8M2.5×7.0 screws from each of the two hinges (1). 76 Chapter 4 Removal and replacement procedures
-
 1
1 -
2
-
3
-
4
-
5
-
6
-
7
-
8
-
9
-
10
-
11
-
12
-
13
-
14
-
15
-
16
-
17
-
18
-
19
-
20
-
21
-
22
-
23
-
24
-
25
-
26
-
27
-
28
-
29
-
30
-
31
-
32
-
33
-
34
-
35
-
36
-
37
-
38
-
39
-
40
-
41
-
42
-
43
-
44
-
45
-
46
-
47
-
48
-
49
-
50
-
51
-
52
-
53
-
54
-
55
-
56
-
57
-
58
-
59
-
60
-
61
-
62
-
63
-
64
-
65
-
66
-
67
-
68
-
69
-
70
-
71
-
72
-
73
-
74
-
75
-
76
-
77
-
78
-
 79
79 -
 80
80 -
 81
81 -
 82
82 -
 83
83 -
 84
84 -
 85
85 -
 86
86 -
 87
87 -
 88
88 -
 89
89 -
90
-
91
-
92
-
93
-
94
-
95
-
96
-
97
-
98
-
99
-
100
-
101
-
102
-
103
-
104
-
105
-
106
-
107
-
108
-
109
-
110
-
111
-
112
-
113
-
114
-
115
-
116
-
117
-
118
-
119
 |
 |

3.
Remove the WLAN cable from the cable raceway
(1)
and from the cable clips
(2)
.
4.
Remove the display cable
(1)
from the raceway and release them from the cable clips
(2)
.
5.
Remove two Torx T8M2.5×7.0 screws from each of the two hinges
(1)
.
76
Chapter 4
Removal and replacement procedures