HP ProLiant xw2x220c Administrator's Guide HP Session Allocation Manager (HP S - Page 72
Customize View, Manage Access Devices, To Add an Access Device Manually, To Change an Access Device
 |
View all HP ProLiant xw2x220c manuals
Add to My Manuals
Save this manual to your list of manuals |
Page 72 highlights
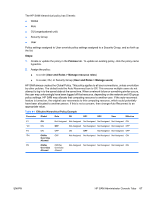
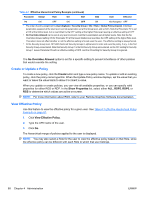
● Synchronize-Send a request directly to the resource for it to send back its current status. In normal situations, this is not needed, since the registration service sends back its status whenever there is a change in status (power on, power off, user log-in, user disconnect, and user log-off). This is useful in situations where the network was temporarily interrupted between the resource and HP SAM server in order to get the current status of the resource. ● Assign Roles-Assign new roles to the resource. This setting overrides the configuration file for the resource. If you select this option, the Resource Role Assignment window opens. Use this window to select primary and alternate roles for the resource. You can also create new roles from this window. NOTE: Once assigned to roles using the HP SAM Web Administrator console, any changes to roles in the configuration file will be ignored. To revert back to using the configuration file, delete the resource from the database, and then restart the computing resource. ● Assign Asset Groups-Assign new asset group(s) to the resource. Customize View Use this window to customize the columns that appear for the resources displayed on the Manage Resource window. You can use the arrows, or you can double-click the items in the Available and Selected boxes to move them back and forth. The single arrow moves only the selected item, while the double arrows move all items in the list. You can display a minimum of three and a maximum of six columns. Manage Access Devices To Add an Access Device Manually NOTE: The Windows XPe-based client, Blade Workstation Client, and Linux Client register access devices automatically upon connection to the HP SAM server. The XP Embedded OS image on some thin client access devices lack support needed for this to occur. For these systems, follow the instructions in the CIMWIN32 folder found in the AddOns folder in the HP SAM SoftPaq. 1. Click Create. 2. Type the serial number and friendly name. 3. You may select the Asset Groups to which this access device will have access, if you want. 4. You may select a Monitor Layout, if you want. 5. Click Save. To Change an Access Device 1. Type one or more parameters and click Search, or click Search to find all registered access devices. 2. If you want to change the settings for the access device: a. Click the Serial Number link, and then change desired settings for the access device in the dialog box. b. Click Save. 64 Chapter 4 Administration ENWW
-
 1
1 -
2
-
3
-
4
-
5
-
6
-
7
-
8
-
9
-
10
-
11
-
12
-
13
-
14
-
15
-
16
-
17
-
18
-
19
-
20
-
21
-
22
-
23
-
24
-
25
-
26
-
27
-
28
-
29
-
30
-
31
-
32
-
33
-
34
-
35
-
36
-
37
-
38
-
39
-
40
-
41
-
42
-
43
-
44
-
45
-
46
-
47
-
48
-
49
-
50
-
51
-
52
-
53
-
54
-
55
-
56
-
57
-
58
-
59
-
60
-
61
-
62
-
63
-
64
-
65
-
66
-
 67
67 -
 68
68 -
 69
69 -
 70
70 -
 71
71 -
 72
72 -
 73
73 -
 74
74 -
 75
75 -
 76
76 -
 77
77 -
78
-
79
-
80
-
81
-
82
-
83
-
84
-
85
-
86
-
87
-
88
-
89
-
90
-
91
-
92
-
93
-
94
-
95
-
96
-
97
-
98
-
99
-
100
-
101
-
102
-
103
-
104
 |
 |