HP Scitex FB910 HP Scitex FB910 Printer Series - User Manual - Page 39
Proceed, Go Online, Single sheet
 |
View all HP Scitex FB910 manuals
Add to My Manuals
Save this manual to your list of manuals |
Page 39 highlights
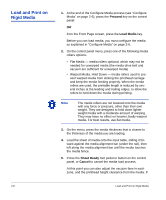
the sheet warped or not being held down, you may want to increase the vacuum or raise the head height. A lower head height reduces overspray, but increases the chance of the carriage or printheads striking the media. 6. Verify the height of the media rollers shown on the control panel, and adjust if necessary. Check and adjust the right and left sides of both media rollers (input and output). The rollers should just touch the media or remove any warping. Note Do not lower the rollers too far. On narrow media (less than 98 inches/2.5 m), it is possible to lower the input roller below the height of the media on one side, causing the media to skew. 7. Press the Proceed key. 8. Enter the media length. 9. Enter the number of sheets: • Single sheet • N-UP 10. Measure media width. The margin and imageable area are displayed, and you can adjust them. 11. Press the Proceed key. 12. Press the Go Online key. 13. Send a print job from the RIP. For multiple copy jobs, the printer control panel will prompt for the next sheet a short time before the previous sheet is done printing. Load the subsequent sheet as before, and press the Sheet Ready foot pedal or control panel button. The printer prints on the next sheet and will use the same option settings on all of the copies in the print job. Load and Print on Rigid Media 2-9
-
 1
1 -
2
-
3
-
4
-
5
-
6
-
7
-
8
-
9
-
10
-
11
-
12
-
13
-
14
-
15
-
16
-
17
-
18
-
19
-
20
-
21
-
22
-
23
-
24
-
25
-
26
-
27
-
28
-
29
-
30
-
31
-
32
-
33
-
 34
34 -
 35
35 -
 36
36 -
 37
37 -
 38
38 -
 39
39 -
 40
40 -
 41
41 -
 42
42 -
 43
43 -
 44
44 -
45
-
46
-
47
-
48
-
49
-
50
-
51
-
52
-
53
-
54
-
55
-
56
-
57
-
58
-
59
-
60
-
61
-
62
-
63
-
64
-
65
-
66
-
67
-
68
-
69
-
70
-
71
-
72
-
73
-
74
-
75
-
76
-
77
-
78
-
79
-
80
-
81
-
82
-
83
-
84
-
85
-
86
-
87
-
88
-
89
-
90
-
91
-
92
-
93
-
94
-
95
-
96
-
97
-
98
-
99
-
100
-
101
-
102
-
103
-
104
-
105
-
106
-
107
-
108
-
109
-
110
-
111
-
112
-
113
-
114
-
115
-
116
-
117
-
118
-
119
-
120
-
121
-
122
-
123
-
124
-
125
-
126
-
127
-
128
-
129
-
130
-
131
-
132
-
133
-
134
-
135
-
136
-
137
-
138
-
139
-
140
-
141
-
142
-
143
-
144
-
145
-
146
-
147
-
148
 |
 |