HP Surestore 80fx Adding 2 Drives to the C1150 Series Jukebox - C1154-90001 - Page 10
enclosure for clarity
 |
View all HP Surestore 80fx manuals
Add to My Manuals
Save this manual to your list of manuals |
Page 10 highlights
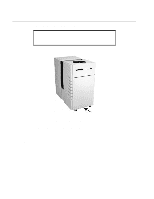
c. Insert the single drive into the enclosure and position it near the cables at the rear, and in the upper portion of the enclosure - do not mount the drive at this point - the drive interface cable and clip must be mounted in the next step. d. Connect the drive interface cable and clip. Put the clip near the drive end of the cable. (Mounting the clip is shown separate from the drive enclosure for clarity in Figure 6.) Place the cable/drive connectors near each other. Remove the covering on the adhesive on the back of the clip and press the clip into the position shown in Figure 7. Connect the drive interface connector to the drive. Figure 6: Clip placement on drive interface cable Figure 7: Drive interface cable/cable clip positioning 10
-
 1
1 -
2
-
3
-
4
-
 5
5 -
 6
6 -
 7
7 -
 8
8 -
 9
9 -
 10
10 -
 11
11 -
 12
12 -
 13
13 -
 14
14
 |
 |

10
c.
Insert the single drive into the enclosure and position it near the cables at the rear, and in the
upper portion of the enclosure — do not mount the drive at this point — the drive interface
cable and clip must be mounted in the next step.
d.
Connect the drive interface cable and clip.
Put the clip near the drive end of the cable. (Mounting the clip is shown separate from the drive
enclosure for clarity in Figure 6.)
Place the cable/drive connectors near each other. Remove the covering on the adhesive on the
back of the clip and press the clip into the position shown in Figure 7. Connect the drive inter-
face connector to the drive.
Figure 6: Clip placement on drive interface cable
Figure 7: Drive interface cable/cable clip positioning