HP Surestore 80fx Adding 2 Drives to the C1150 Series Jukebox - C1154-90001 - Page 11
screws on the left side of the drive enclosure and tighten, to secure the enclo
 |
View all HP Surestore 80fx manuals
Add to My Manuals
Save this manual to your list of manuals |
Page 11 highlights
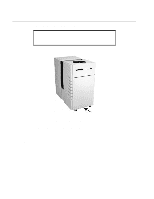
e. Connect the SCSI and drive power cables to the drive. f. Mount the drive into the enclosure using 4 T-10 screws; 2 on each side. g. Replace each drive enclosure's top cable access plate by inserting and tightening the T-10 screw on each side of the plate. 5. Mount the enclosures into the chassis. Slide the drive enclosures into the enclosure stack such that the slots on the bottom of each side of the enclosure slide over the tabs sticking out from each side of the stack. Two tabs near the front of the stack will support the rear portion of the enclosure. (See the next Figure.) After inserting the drive enclosure, try moving the drive up and down a little. If the tabs are engaging the slots correctly, you should not be able to move the drive. Refer to Figure 8. Figure 8: Front slot on drive enclosure and stack tabs a. Insert the T-20 screws (on the left side of the drive enclosure) and tighten, to secure the enclo- sure. 6. Attach the following cables to the interposer PCA, as illustrated in Figure 9 and 10. a. drive interface cables b. SCSI cables c. fan power cables d. drive power cables. 11
-
 1
1 -
2
-
3
-
4
-
5
-
 6
6 -
 7
7 -
 8
8 -
 9
9 -
 10
10 -
 11
11 -
 12
12 -
 13
13 -
 14
14
 |
 |
