HP Vs15 HP Flat Panel Monitor - (English) vf52 Users Guide - Page 13
Displaying the OSD Main Menu, Selecting Items in the OSD Menu, Changing Settings by, using the OSD
 |
UPC - 829160547435
View all HP Vs15 manuals
Add to My Manuals
Save this manual to your list of manuals |
Page 13 highlights
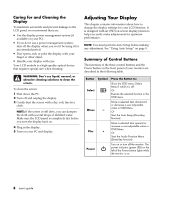
Displaying the OSD "Main Menu" You can use the OSD features to change the screen settings of your display. To display the OSD "Main Menu", press the 'Select' button. The following table briefly describes each of the items in the OSD "Main Menu". Item Description Auto Automatically adjust the display settings by using this "Auto Setup" icon. See "Using Auto Setup" on page 9. Management Open the "Management" submenu where you can select Brightness, Contrast or the image position for further adjustment. See "Adjusting the "Management" Submenu" on page 10. Clock/Phase Open the "Clock/Phase" submenu where you can select Clock or Phase for further adjustment. See " Adjusting the "Clock/Phase" Submenu" on page 12. Color Open the "Color" submenu where you can select Color Temperature, RGB and Black Level for further adjustment. See "Adjusting the "Color" Submenu" on page 12. OSD Display Factory Recall Open the "OSD Display" submenu where you can select H. position or V. position of the OSD display for further adjustment. See " Adjusting the "OSD Display" Submenu" on page 14. Recall factory-setting values back. See "Adjusting the Factory Recall" on page 14. Languages Open the "Languages" submenu where you can select one of the five languages for your preference in display OSD messages. See "Selecting Language for Your Preference" on page 15. Exit Close and exit the OSD main menu. Selecting Items in the OSD Menu To select items in the OSD "Main Menu", you will use the '+' (plus) or '-' (minus) buttons on the front panel of the monitor to highlight the item, then you will press the 'Select' button. To select items in the OSD submenus, you will use all three control buttons. To select a specific submenu, you use the '+' or '-' buttons to move forward or backward to the item to be adjusted, and then select it by pressing the 'Select' button. Changing Settings by using the OSD Menu Using Auto Setup You can easily optimize the screen performance for the monitor VGA interface by using the Auto button and the auto-adjustment pattern software on the CD-ROM disc that came with the monitor. To perform the Auto Setup using the Auto button, you should follow the steps below: 1 Insert the CD-ROM disc into a drive on the PC. 2 Run the software file Adjustment Pattern.exe (from the CD-ROM drive) to display a setup test pattern. 3 Press the 'Auto' button (by pressing the '-' button when the OSD "Main Menu" is not shown) to produce a stable, centered image. To perform the Auto Setup function by using the Main Menu, you should follow the steps below: 1 Press the 'Select' button to show the OSD "Main Menu". 2 The 'Auto' icon should be highlighted already. user's guide 9
-
 1
1 -
2
-
3
-
4
-
5
-
6
-
7
-
 8
8 -
 9
9 -
 10
10 -
 11
11 -
 12
12 -
 13
13 -
 14
14 -
 15
15 -
 16
16 -
 17
17 -
 18
18 -
19
-
20
-
21
-
22
-
23
-
24
-
25
-
26
 |
 |
