HP W1907 User’s Guide f1903 LCD Monitor
HP W1907 - 19" LCD Monitor Manual
 |
UPC - 882780774636
View all HP W1907 manuals
Add to My Manuals
Save this manual to your list of manuals |
HP W1907 manual content summary:
- HP W1907 | User’s Guide f1903 LCD Monitor - Page 1
User's Guide f1903 LCD Monitor - HP W1907 | User’s Guide f1903 LCD Monitor - Page 2
RIGHTS APPLICABLE TO THE SALE OF THIS PRODUCT OR SERVICE TO YOU. HP assumes no responsibility for HP. Hewlett-Packard Company P.O. Box 4010 Cupertino, CA 95015-4010 USA © 2003 Hewlett-Packard Development Company, L.P. All rights reserved. Hewlett-Packard is a registered trademark of Hewlett-Packard - HP W1907 | User’s Guide f1903 LCD Monitor - Page 3
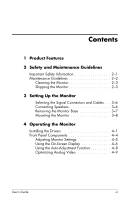
the Signal Connectors and Cables. . . 3-6 Connecting Speakers 3-6 Removing the Monitor Base 3-7 Mounting the Monitor 3-8 4 Operating the Monitor Installing the Drivers 4-1 Front Panel Components 4-4 Adjusting Monitor Settings 4-5 Using the On-Screen Display 4-6 Using the Auto-Adjustment - HP W1907 | User’s Guide f1903 LCD Monitor - Page 4
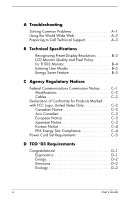
A Troubleshooting Solving Common Problems A-1 Using the World Wide Web A-3 Preparing to Call Technical Support A-3 B Technical Specifications Recognizing Preset Display Resolutions B-3 LCD Monitor Quality and Pixel Policy for f1903 Monitor B-4 Entering User Modes B-5 Energy Saver Feature B-5 - HP W1907 | User’s Guide f1903 LCD Monitor - Page 5
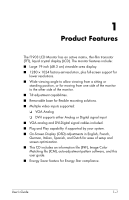
1 Product Features The f1903 LCD Monitor has an active matrix, thin-film transistor (TFT), liquid crystal display (LCD). The monitor features include: ■ Large 19-inch (48.3 cm) viewable area display. ■ 1280 × 1024 factory-set resolution, plus full-screen support for lower resolutions. ■ Wide viewing - HP W1907 | User’s Guide f1903 LCD Monitor - Page 6
Product Features ■ Compliant with the following regulated specifications: ❏ EPA ENERGY STAR ❏ European Union CE Directives ❏ Swedish MPR II 1990 ❏ Swedish TCO '03 With select models, the monitor comes with a set of Harmon Kardon speakers with a separate power supply. 1-2 User's Guide - HP W1907 | User’s Guide f1903 LCD Monitor - Page 7
cord. Ä CAUTION: For the protection of your monitor, as well as your computer, connect all power cords for your computer and its peripheral devices (such as a monitor, printer, scanner) to some form of surge protection so you can replace your equipment if surge protection fails. User's Guide 2-1 - HP W1907 | User’s Guide f1903 LCD Monitor - Page 8
cabinet or attempt to service this product yourself. Adjust only those controls that are covered in the operating instructions. If your monitor is not operating properly or has been dropped or damaged, contact your HP authorized dealer, reseller, or service provider. ■ Adjust only those controls - HP W1907 | User’s Guide f1903 LCD Monitor - Page 9
. Ä CAUTION: Do not use benzene, thinner, ammonia, or any volatile substance to clean the monitor screen or cabinet. These chemicals may damage the monitor. Never use water to clean an LCD screen. Shipping the Monitor Keep the original packing box in a storage area. You may need it later if you move - HP W1907 | User’s Guide f1903 LCD Monitor - Page 10
Safety and Maintenance Guidelines 2-4 User's Guide - HP W1907 | User’s Guide f1903 LCD Monitor - Page 11
these steps: 1. Place the monitor in a convenient, well-ventilated location near your computer. 2. Connect one end of the monitor signal cable to the video connector on the rear panel of the computer, and the other end to the back of the monitor. Connecting the VGA Signal Cable User's Guide 3-1 - HP W1907 | User’s Guide f1903 LCD Monitor - Page 12
cable to the DVI connector on the monitor, you must connect the other end of the DVI-D cable to the DVI connector on the computer. Connect one end of the power cable to the back of the monitor, and the other end to an electrical wall outlet. Connecting the DVI-D Signal Cable 3-2 User's Guide - HP W1907 | User’s Guide f1903 LCD Monitor - Page 13
Setting Up the Monitor 3. Connect one end of the power cable to the back of the monitor, and the other end to a power source. Connecting the Power Cable User's Guide 3-3 - HP W1907 | User’s Guide f1903 LCD Monitor - Page 14
Setting Up the Monitor 4. Adjust the monitor as needed for your comfort using the monitor's tilt, swivel, and height adjustment capabilities. -5˚ 20˚ -35˚ 35˚ 3-4 User's Guide - HP W1907 | User’s Guide f1903 LCD Monitor - Page 15
step on or trip over them. Do not pull on a cord or cable. When unplugging from the electrical outlet, grasp the cord by the plug. Ä CAUTION: Burn-in image damage may occur on monitors that display the same static image on screen for a prolonged period of time. To avoid burn-in image damage - HP W1907 | User’s Guide f1903 LCD Monitor - Page 16
Setting Up the Monitor Selecting the Signal Connectors and Cables There are two signal input connectors: One VGA connector and one DVI-I connector. The monitor will automatically determine which inputs have valid video signals. The inputs can be selected through the On-Screen Display (OSD) feature - HP W1907 | User’s Guide f1903 LCD Monitor - Page 17
fixture. Read the caution and warning statements below before beginning the procedure. Ä CAUTION: Before beginning to disassemble the monitor, be sure the monitor is turned off and the power and signal cables are both disconnected. Lay the front bezel down on a soft area to prevent it from getting - HP W1907 | User’s Guide f1903 LCD Monitor - Page 18
remove the signal and power cables from the back of the monitor. 2. Remove the four screws as shown in the following illustration. Ä CAUTION: Ensure that the bottom of the monitor base is positioned over a table or desktop before removing the base from the monitor. 3. Remove the monitor base from - HP W1907 | User’s Guide f1903 LCD Monitor - Page 19
CD-ROM disc that came with the monitor. You can also download the latest version of a driver from the HP Monitors Support Web site. Go to http://www.hp.com select your country/region, and then follow the links to the support page for monitors. Windows 2000 users ✎ The procedure for installing the - HP W1907 | User’s Guide f1903 LCD Monitor - Page 20
Update Driver and click Next. 8. Select the recommended option and then click Next. 9. Select the Specify a Location box and then click Next. 10. Find and open the hp_f1903.inf file on the CD-ROM disc in the Drivers directory, and click OK. 11. Click Next to install the selected monitor. Windows - HP W1907 | User’s Guide f1903 LCD Monitor - Page 21
monitor. If the installation procedure of the monitor driver for the Windows 2000, Windows Me, or Windows XP operating system is different, or if you need more detailed installation information, please refer to the Microsoft Windows information that came with the computer. User's Guide 4-3 - HP W1907 | User’s Guide f1903 LCD Monitor - Page 22
settings menu and adjusts settings. • When OSD is inactive, selects the DVI-I signal input setting. 5 Select/Auto • When OSD is active, acts as an Enter (Select) key to select setting screen options. • When OSD is inactive, performs an auto-adjustment to optimize image quality. 4-4 User's Guide - HP W1907 | User’s Guide f1903 LCD Monitor - Page 23
Press the menu button on the front panel of your monitor to view the On-Screen Display (OSD) Menu. The Main Controls window pops up and you can make adjustments to your monitor's various features. Use the left arrow and right arrow keys in the menu window to make your adjustments. User's Guide 4-5 - HP W1907 | User’s Guide f1903 LCD Monitor - Page 24
access the Basic OSD Menu, press the Menu button on the monitor's front panel. Basic OSD Menu Levels Menu Level 1 Menu Level 2 Brightness Adjustment Scale Contrast Adjustment Scale Auto Adjustment Advanced Menu Exit To access the Advanced OSD Menu, press the menu button again, or select - HP W1907 | User’s Guide f1903 LCD Monitor - Page 25
Operating the Monitor Advanced OSD Menu Levels Level 1 Level 2 Level 3 Image Control Auto Adjustment "Adjusting Message" Horizontal Position Adjustment Scale Vertical Position Adjustment Scale Clock Adjustment Scale Clock Phase Adjustment Scale Cancel Save and Return ✎ The Video - HP W1907 | User’s Guide f1903 LCD Monitor - Page 26
Input Controls Input Selection Analog (D-SUB) Analog (DVI) Digital (DVI) Auto Detect Cancel Save and Return Factory Reset Yes No Exit Using the Auto-Adjustment Function You can easily optimize the screen performance for the VGA interface by using the Auto button and the auto-adjustment - HP W1907 | User’s Guide f1903 LCD Monitor - Page 27
provided on the CD-ROM. ✎ When adjusting the Clock and Clock Phase values, if the monitor images become distorted, continue adjusting the values until the distortion disappears. To restore the factory settings, select Yes from the Factory Reset menu in the on-screen display. User's Guide 4-9 - HP W1907 | User’s Guide f1903 LCD Monitor - Page 28
Operating the Monitor 4-10 User's Guide - HP W1907 | User’s Guide f1903 LCD Monitor - Page 29
3, "Setting Up the Monitor," for more information. Press any key on the keyboard or move the mouse to turn off the screen blanking utility. Press the Auto button on the front panel. If this does not correct the image, press the Menu button to open the Basic OSD Menu, and adjust the brightness and - HP W1907 | User’s Guide f1903 LCD Monitor - Page 30
Troubleshooting Problem Image is not centered. "No Connection, Check Signal Cable" is displayed on screen. "Out of Range. Set Monitor to 1280 x 1024 @ 60Hz" is displayed on screen. Possible Cause Position may need adjustment. Monitor video cable is disconnected. Video resolution and/or refresh - HP W1907 | User’s Guide f1903 LCD Monitor - Page 31
services, refer to the support Web site at: http://www.hp.com Preparing to Call Technical Support If you cannot solve a problem using the troubleshooting tips in this section, you may need to call technical support. Have the following available when you call: ■ The monitor ■ Monitor model number - HP W1907 | User’s Guide f1903 LCD Monitor - Page 32
Troubleshooting A-4 User's Guide - HP W1907 | User’s Guide f1903 LCD Monitor - Page 33
Specifications f1903 Flat Panel Monitor Display Type 19.0 inches TFT LCD 48.3 cm Viewable Image Size Tilt Swivel 19.0-inch diagonal -5 to 20o (max) Depth Width 15.8 inches 20.6 inches 8.5 inches 16.6 inches 400.0 mm 525.0 mm 215.4 mm 422.5 mm Maximum Graphics Resolution 1280 x 1024 (75 Hz) - HP W1907 | User’s Guide f1903 LCD Monitor - Page 34
Technical Specifications f1903 Flat Panel Monitor (Continued) Horizontal Frequency (analog mode) 30 to 82 kHz Power Consumption - HP W1907 | User’s Guide f1903 LCD Monitor - Page 35
Recognizing Preset Display Resolutions The display resolutions listed below are the most commonly used modes and are set as factory defaults. This monitor automatically recognizes these preset modes and they will appear properly sized and centered on the screen. Factory Preset Display Modes - HP W1907 | User’s Guide f1903 LCD Monitor - Page 36
at a supported resolution and refresh rate, from a distance of approximately 50 cm (16 in.). HP expects that, over time, the industry will continue to improve its ability to produce displays with fewer cosmetic imperfections and HP will adjust guidelines as improvements are made. B-4 User's Guide - HP W1907 | User’s Guide f1903 LCD Monitor - Page 37
monitor detects the absence of either the horizontal sync signal and/or the vertical sync signal. Upon detecting the absence of these signals, the monitor screen is blanked, the backlight the monitor will return to its normal operating mode. Refer to your computer manual for instructions on setting - HP W1907 | User’s Guide f1903 LCD Monitor - Page 38
Technical Specifications B-6 User's Guide - HP W1907 | User’s Guide f1903 LCD Monitor - Page 39
radiate radio frequency energy and, if not installed and used in accordance with the instructions, may cause harmful interference to radio communications. However, there is no guarantee that interference Consult the dealer or an experienced radio or television technician for help. User's Guide C-1 - HP W1907 | User’s Guide f1903 LCD Monitor - Page 40
approved by Hewlett-Packard Company may void the user's authority to operate the equipment. Cables Connections to this device must be made with shielded cables with metallic RFI/EMI connector hoods to maintain compliance with FCC Rules and Regulations. Declaration of Conformity for Products Marked - HP W1907 | User’s Guide f1903 LCD Monitor - Page 41
toutes les exigences du Règlement sur le matériel brouilleur du Canada. European Notice Products with the CE Marking comply with both the EMC Directive (89/336/EEC) and Harmonics ■ EN61000-3-3 (IEC61000-3-3) - Power Line Flicker ■ EN60950 (IEC950) - Product Safety Japanese Notice User's Guide C-3 - HP W1907 | User’s Guide f1903 LCD Monitor - Page 42
. As an Energy Star Partner, Hewlett-Packard Company has determined that this product meets the Energy Star guidelines for energy efficiency. Specific details on using the energy saving features can be found in the energy saver or power management section of the computer manual. C-4 User's Guide - HP W1907 | User’s Guide f1903 LCD Monitor - Page 43
monitor to operate on input voltages between 100-120V or 200-240V . The power cord set (flexible cord or wall plug) received with the monitor product and for the voltage and current marked on the product on the product. In addition to use, contact your HP authorized service provider. A power cord - HP W1907 | User’s Guide f1903 LCD Monitor - Page 44
Agency Regulatory Notices C-6 User's Guide - HP W1907 | User’s Guide f1903 LCD Monitor - Page 45
and environmental requirements in the world. This makes for a high performance product, designed with the user in focus that also minimizes the impact on to reduce sight and strain problems. Important parameters are luminance, contrast, resolution, reflectance, color rendition, and image stability - HP W1907 | User’s Guide f1903 LCD Monitor - Page 46
Emissions ■ Electromagnetic fields. ■ Noise emissions. Ecology ■ The product must be prepared for recycling and the manufacturer must have a ■ For information on the HP recycling program, refer to the HP Web site at: http://www.hp.com/hpinfo/globalcitizenship/environment/ recycle D-2 User's Guide
-
 1
1 -
 2
2 -
 3
3 -
 4
4 -
 5
5 -
 6
6 -
 7
7 -
8
-
9
-
10
-
11
-
12
-
13
-
14
-
15
-
16
-
17
-
18
-
19
-
20
-
21
-
22
-
23
-
24
-
25
-
26
-
27
-
28
-
29
-
30
-
31
-
32
-
33
-
34
-
35
-
36
-
37
-
38
-
39
-
40
-
41
-
42
-
43
-
44
-
45
-
46
 |
 |

User’s Guide
f1903 LCD Monitor