HP Wireless USB Network Adapter hn215w HP Ethernet Network Interface Card hn23 - Page 5
installing the Ethernet card
 |
View all HP Wireless USB Network Adapter hn215w manuals
Add to My Manuals
Save this manual to your list of manuals |
Page 5 highlights
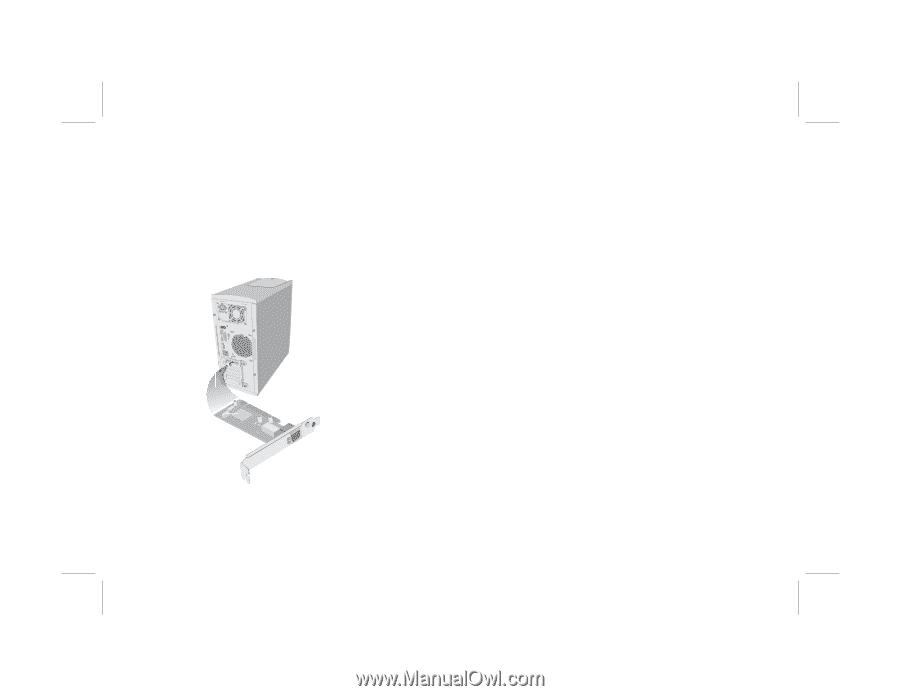
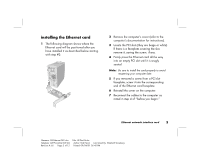
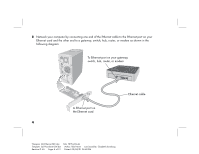
installing the Ethernet card 1 The following diagram shows where the Ethernet card will be positioned after you have installed it as described below starting with step #2: 2 Remove the computer's cover (refer to the computer's documentation for instructions). 3 Locate the PCI slots (they are beige or white). If there is a faceplate covering the slot, remove it, saving the screw, if any. 4 Firmly press the Ethernet card all the way into an empty PCI slot until it is snugly seated. Note: Be sure to install the card properly to avoid reopening your computer later. 5 If you removed a screw from a PCI slot faceplate, screw it into the corresponding end of the Ethernet card faceplate. 6 Reinstall the cover on the computer. 7 Reconnect the cables to the computer as noted in step 4 of "before you begin." Ethernet network interface card 3 Filename: QS Ethernet NIC.doc Template: QS Phoneline GW.dot Revision #: 65 Page: 3 of 12 Title: HP-Print2k.dot Author: Rob Heiret Last Saved By: Elizabeth Stoneburg Printed: 09/04/01 05:48 PM
-
 1
1 -
 2
2 -
 3
3 -
 4
4 -
 5
5 -
 6
6 -
 7
7 -
 8
8 -
 9
9 -
 10
10 -
 11
11 -
12
 |
 |