HP d260 Business Desktop d260 Series, Service Reference Guide, First Edition
HP d260 - Microtower Desktop PC Manual
 |
View all HP d260 manuals
Add to My Manuals
Save this manual to your list of manuals |
HP d260 manual content summary:
- HP d260 | Business Desktop d260 Series, Service Reference Guide, First Edition - Page 1
service reference guide Business Desktop d260 Series 1st Edition This document provides information on the removal and replacement of all parts as well as information on troubleshooting, Desktop Management, setup utilities, Parallel ATA drives, safety, routine care, connector pin assignments, POST - HP d260 | Business Desktop d260 Series, Service Reference Guide, First Edition - Page 2
- HP d260 | Business Desktop d260 Series, Service Reference Guide, First Edition - Page 3
Service Reference Guide Business Desktop d260 Series 1st Edition Document Part Number: 377977-AA1 November 2004 - HP d260 | Business Desktop d260 Series, Service Reference Guide, First Edition - Page 4
, and is subject to change without notice. The warranties for HP products are set forth in the express limited warranty statements accompanying equipment or loss of information. Service Reference Guide Business Desktop d260 Series First Edition (November 2004) Document Part Number: 377977-AA1 - HP d260 | Business Desktop d260 Series, Service Reference Guide, First Edition - Page 5
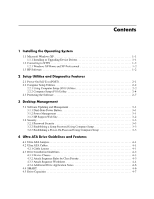
1-1 1.1.1 Installing or Upgrading Device Drivers 1-1 1.2 Converting to NTFS 1-2 1.2.1 Windows XP Home and XP Professional 1-2 1.3 HP Software 1-2 3 Desktop Management 3.1 Software Updating and Management 3-1 3.1.1 Dual-State Power Button 3-1 3.1.2 Power Management 3-1 3.1.3 HP Support Web - HP d260 | Business Desktop d260 Series, Service Reference Guide, First Edition - Page 6
a Diskette Drive 6-11 6.7.4 Removing a 3.5" Hard Drive 6-11 6.8 Front USB Device 6-13 6.9 Processor and Heatsink 6-15 6.10System Board 6-17 6.11Battery 6-18 6.11.1Type 1 Battery Holder 6-19 6.11.2Type 2 Battery Holder 6-20 6.12Power Supply 6-21 Service Reference Guide, d260 377977-AA1 iv - HP d260 | Business Desktop d260 Series, Service Reference Guide, First Edition - Page 7
A Connector Pin Assignments B Power Cord Set Requirements C POST Error Messages D Troubleshooting Without Diagnostics E Memory F System Specifications Index Contents Service Reference Guide, d260 377977-AA1 v - HP d260 | Business Desktop d260 Series, Service Reference Guide, First Edition - Page 8
Contents vi 377977-AA1 Service Reference Guide, d260 - HP d260 | Business Desktop d260 Series, Service Reference Guide, First Edition - Page 9
- HP d260 | Business Desktop d260 Series, Service Reference Guide, First Edition - Page 10
if necessary, automatically convert a FAT32 drive to NTFS. 1.3 HP Software The Microsoft Windows XP Home or Windows XP Professional operating system is the supported OS. All software including OS will be user-installed. Certain drivers and utilities are available only in selected languages. You can - HP d260 | Business Desktop d260 Series, Service Reference Guide, First Edition - Page 11
the computer system when contacting Customer Support. These tools can also be used to: ■ Change factory default settings and to set or change the system configuration, which may be necessary when you add or remove hardware. ■ Determine if all of the devices installed on the computer are recognized - HP d260 | Business Desktop d260 Series, Service Reference Guide, First Edition - Page 12
change, or verify the system configuration including settings for processor, graphics, memory, audio, storage, communications, and input devices enabled with or without a keyboard or mouse attached. When attached to the system, the keyboard and mouse remain locked until Service Reference Guide, d260 - HP d260 | Business Desktop d260 Series, Service Reference Guide, First Edition - Page 13
changes because the CMOS could become corrupted. It is safe to turn off all power to the computer after you exit the F10 Setup screen. Service Reference Guide, d260 377977-AA1 2-3 - HP d260 | Business Desktop d260 Series, Service Reference Guide, First Edition - Page 14
hard drive is the secondary master drive. Auto detects which hard drive is the secondary slave drive. This category determines whether or not the computer will stop if an error is detected during powering up. Specifies the boot order for all devices. 2-4 377977-AA1 Service Reference Guide, d260 - HP d260 | Business Desktop d260 Series, Service Reference Guide, First Edition - Page 15
keyboard is present when the Computer boots. Absent: keyboard not detected (Default) Present: keyboard detected Selects the size of memory S1/POS: Power on Suspend • S3/STR: Suspend to RAM(Default) Sets the system status after AC power loss. • Power Service Reference Guide, d260 377977-AA1 2-5 - HP d260 | Business Desktop d260 Series, Service Reference Guide, First Edition - Page 16
- HP d260 | Business Desktop d260 Series, Service Reference Guide, First Edition - Page 17
the supervisor password is set up. • Setup: Password prompt appears when BIOS is executed. • Always: Password verification is checked every time the computer boots or backup utility documentation for instructions on making backup copies of data files. Service Reference Guide, d260 377977-AA1 2-7 - HP d260 | Business Desktop d260 Series, Service Reference Guide, First Edition - Page 18
Setup Utilities and Diagnostics Features 2-8 377977-AA1 Service Reference Guide, d260 - HP d260 | Business Desktop d260 Series, Service Reference Guide, First Edition - Page 19
tab. 3. In the Power Button section, select the desired power button setting. After configuring the power button to function as a suspend button, press the power button to put the Properties, right click on the Windows Desktop, then choose Properties. Service Reference Guide, d260 377977-AA1 3-1 - HP d260 | Business Desktop d260 Series, Service Reference Guide, First Edition - Page 20
HP http://www.hp.com\in. http://www.hp.com.cn (China) or - HP d260 | Business Desktop d260 Series, Service Reference Guide, First Edition - Page 21
the computer off, then on again, and press the F10 key again to access the utility. 3. Select Security, then Power-On Password and follow the instructions on the screen. 4. Before exiting, click File > Save Changes and Exit. Service Reference Guide, d260 377977-AA1 3-3 - HP d260 | Business Desktop d260 Series, Service Reference Guide, First Edition - Page 22
Desktop Management Entering a Power-On Password To enter a power-on password, new password takes effect the next time you turn on the computer. ✎ Refer to the "National Keyboard Delimiter Characters" section in this chapter for information about the alternate delimiter characters. The power-on - HP d260 | Business Desktop d260 Series, Service Reference Guide, First Edition - Page 23
Desktop Management Deleting a Power-On or Setup Password 1. Turn on or restart the computer. If you are in Windows, click Start > Shut CMOS jumper to pin 1-2, then connect the Clear CMOS jumper to pin 2-3 to Normal mode. Close and restart the computer. Service Reference Guide, d260 377977-AA1 3-5 - HP d260 | Business Desktop d260 Series, Service Reference Guide, First Edition - Page 24
Desktop Management 3-6 377977-AA1 Service Reference Guide, d260 - HP d260 | Business Desktop d260 Series, Service Reference Guide, First Edition - Page 25
drive, refer to the documentation included with the drive kit to ensure proper cable installation and configuration. ✎ All drives on a controller channel need to have their jumpers either in the if the drive's jumper is in the cable-select position. Service Reference Guide, d260 377977-AA1 4-1 - HP d260 | Business Desktop d260 Series, Service Reference Guide, First Edition - Page 26
0" instead of "Device 0" and "Drive 1" instead of "Device 1". 4.3 Drive Installation Guidelines Most computer system boards have two ATA (IDE) controller channels with a dedicated device class of the drives and by specific attach sequence rules. 4-2 377977-AA1 Service Reference Guide, d260 - HP d260 | Business Desktop d260 Series, Service Reference Guide, First Edition - Page 27
the device class number, the faster the device and the more bandwidth required. ■ Drives installed in the Device 0 positions on both the primary and secondary controllers receive the greatest first before following the General Attach Sequence Rule. Service Reference Guide, d260 377977-AA1 4-3 - HP d260 | Business Desktop d260 Series, Service Reference Guide, First Edition - Page 28
determine the best drive installation sequence. Device Name Attach Sequence Worksheet Device Class Position Number Controller Name Device Number Two examples of how to use the worksheet are: ■ Three device installation ■ Four device installation 4-4 377977-AA1 Service Reference Guide, d260 - HP d260 | Business Desktop d260 Series, Service Reference Guide, First Edition - Page 29
= Class 2 ■ CD-ROM drive = Class 3 Attach Sequence Worksheet - Three Device Installation (Sample) Device Name Device Class Position Number Controller Name Device Number Ultra ATA-100 hard 1 ■ DVD-CDR/W drive = Class 2 ■ ZIP-250 drive = Class 4 Service Reference Guide, d260 377977-AA1 4-5 - HP d260 | Business Desktop d260 Series, Service Reference Guide, First Edition - Page 30
and Features Attach Sequence Worksheet - Four Device Installation (Sample) Device Name Device Class Position Number Controller Analysis and Recording Technology (SMART) ATA drives for the HP Personal Computers have built-in drive failure prediction that warns AA1 Service Reference Guide, d260 - HP d260 | Business Desktop d260 Series, Service Reference Guide, First Edition - Page 31
Windows NT/2000/XP Windows NT/2000/XP Maximum Size Partition 32 GB 32 GB 128 GB 2TB Drive 128 GB 2 TB 128 GB 2TB Service Reference Guide, d260 377977-AA1 4-7 - HP d260 | Business Desktop d260 Series, Service Reference Guide, First Edition - Page 32
Ultra ATA Drive Guidelines and Features 4-8 377977-AA1 Service Reference Guide, d260 - HP d260 | Business Desktop d260 Series, Service Reference Guide, First Edition - Page 33
to the procedures and precautions described in this chapter is essential for proper service. Ä CAUTION: When the computer is plugged into an AC power source voltage system board or component damage. 5.1 Chassis Designations 5.1.1 Microtower Type Service Reference Guide, d260 377977-AA1 5-1 - HP d260 | Business Desktop d260 Series, Service Reference Guide, First Edition - Page 34
packaging. ■ Keep electrostatic sensitive parts in their containers until they arrive at static-free stations. ■ Place items on a grounded surface before removing them from their container. equipment to prevent static electricity damage to equipment: 5-2 377977-AA1 Service Reference Guide, d260 - HP d260 | Business Desktop d260 Series, Service Reference Guide, First Edition - Page 35
assemblies by the case or PCB laminate. Handle them only at static-free work areas. ■ Turn off power and input signals before inserting and Field service kits ■ Static awareness labels ■ Wrist straps and footwear straps providing one-megohm +/- 10% resistance Service Reference Guide, d260 377977- - HP d260 | Business Desktop d260 Series, Service Reference Guide, First Edition - Page 36
when cleaning with liquids or damp cloths. 4. Always unplug the computer before cleaning the keyboard, mouse, or air vents. 5. Disconnect the keyboard before cleaning it. 6. Wear safety glasses equipped with side shields when cleaning the keyboard. 5-4 377977-AA1 Service Reference Guide, d260 - HP d260 | Business Desktop d260 Series, Service Reference Guide, First Edition - Page 37
■ After cleaning, always wipe the unit with a clean, lint-free cloth. ■ Occasionally clean the air vents on the computer. Lint the space bar) from the keyboard. If these keys are improperly removed or installed, the keyboard may not function properly. ■ Service Reference Guide, d260 377977-AA1 5-5 - HP d260 | Business Desktop d260 Series, Service Reference Guide, First Edition - Page 38
. If an incorrect screw is used during the reassembly process, it can damage the unit. HP strongly recommends that all screws removed during disassembly be kept with the part that was removed, then placed away from the work area to prevent damage. 5-6 377977-AA1 Service Reference Guide, d260 - HP d260 | Business Desktop d260 Series, Service Reference Guide, First Edition - Page 39
, crush, puncture, short external contacts, dispose in water or fire, or expose it to temperatures higher than 140ºF (60ºC). Ä CAUTION: Batteries, battery packs, and accumulators should not be disposed of together with the general household waste. Service Reference Guide, d260 377977-AA1 5-7 - HP d260 | Business Desktop d260 Series, Service Reference Guide, First Edition - Page 40
Identifying the Chassis, Routine Care, and Disassembly Preparation 5-8 377977-AA1 Service Reference Guide, d260 - HP d260 | Business Desktop d260 Series, Service Reference Guide, First Edition - Page 41
Removal and Replacement Procedures Microtower Type Chassis Adherence to the procedures and precautions described in this chapter is essential for proper service. After completing all ; using the wrong screw in an application may damage the unit. Service Reference Guide, d260 377977-AA1 6-1 - HP d260 | Business Desktop d260 Series, Service Reference Guide, First Edition - Page 42
to upgrade memory or an expansion card. Remove the left and right access panels to upgrade a drive. 3. Slide the access panel back about 1 inch (2.5 cm), then lift it away from and off the unit. To replace the access panel, reverse the removal steps. 6-2 377977-AA1 Service Reference Guide, d260 - HP d260 | Business Desktop d260 Series, Service Reference Guide, First Edition - Page 43
replacing the front bezel, ensure that the top of the front bezel is flush with the top of the chassis before pressing it into place. Service Reference Guide, d260 377977-AA1 6-3 - HP d260 | Business Desktop d260 Series, Service Reference Guide, First Edition - Page 44
Removal and Replacement Procedures - Microtower Type Chassis 6.4 Front Drive Bezels 1. Prepare the computer for disassembly (Section 6.1). 2. Remove the outwards to remove it from the main bezel. To install a bezel blank, reverse the removal procedure. 6-4 377977-AA1 Service Reference Guide, d260 - HP d260 | Business Desktop d260 Series, Service Reference Guide, First Edition - Page 45
Replacement Procedures - Microtower Type Chassis 6.4.2 Diskette Drive Bezel Pull the right retaining tab upwards. At the same time, pull the bezel outwards to remove it from the main bezel. To install a diskette drive bezel, reverse the removal procedure. Service Reference Guide, d260 377977-AA1 - HP d260 | Business Desktop d260 Series, Service Reference Guide, First Edition - Page 46
Microtower Type Chassis 6.5 Memory Modules For more information on memory used in these computers refer to Appendix E. Ä CAUTION: The memory module sockets have gold metal contacts. When upgrading the memory, it is important to use memory to work on. 6-6 377977-AA1 Service Reference Guide, d260 - HP d260 | Business Desktop d260 Series, Service Reference Guide, First Edition - Page 47
fully inserted and properly seated. Make sure the latches are in the closed position 3. 6. Repeat steps 4 and 5 for any additional modules that you want to install. To reassemble the computer, reverse the removal procedure. Service Reference Guide, d260 377977-AA1 6-7 - HP d260 | Business Desktop d260 Series, Service Reference Guide, First Edition - Page 48
expansion card socket. 11. Install the screw at the top of the expansion slot to further secure the part in the chassis. 12. Replace the access panel. 13. Connect external cables to the installed card, if needed. Reconfigure the computer, if necessary. 6-8 377977-AA1 Service Reference Guide, d260 - HP d260 | Business Desktop d260 Series, Service Reference Guide, First Edition - Page 49
Procedures - Microtower Type Chassis 6.7 Drives The computer supports up to five drives that may be installed in various configurations. This Section describes the procedure for replacing or upgrading the storage drives. A Torx T-15 screwdriver is needed to remove and install the guide screws on - HP d260 | Business Desktop d260 Series, Service Reference Guide, First Edition - Page 50
Microtower Type Chassis 6.7.2 Removing a 5.25" Drive 1. Prepare the computer for disassembly (Section 6.1). 2. Remove both the right and left access panels (Section 6.2). 3. Remove the front bezel (section 6.3). 4. Disconnect the power, data, and audio 6-10 377977-AA1 Service Reference Guide, d260 - HP d260 | Business Desktop d260 Series, Service Reference Guide, First Edition - Page 51
Removal and Replacement Procedures - Microtower Type Chassis 6.7.3 Removing a Diskette Drive 1. Prepare the installed 3.5" drives. 5. Remove the four screws, two from each side, that secure the drive in the drive cage 1. 6. Slide the drive out of the drive cage 2. Service Reference Guide, d260 - HP d260 | Business Desktop d260 Series, Service Reference Guide, First Edition - Page 52
Removal and Replacement Procedures - Microtower Type Chassis To replace the drive cage, reverse the removal procedure. 6-12 377977-AA1 Service Reference Guide, d260 - HP d260 | Business Desktop d260 Series, Service Reference Guide, First Edition - Page 53
Removal and Replacement Procedures - Microtower Type Chassis 6.8 Front USB Device 1. Prepare the computer for disassembly (Section 6.1). 2. Remove the right access panel ( the chassis 1, then slide the USB housing up to release it from the chassis 2. Service Reference Guide, d260 377977-AA1 6-13 - HP d260 | Business Desktop d260 Series, Service Reference Guide, First Edition - Page 54
Removal and Replacement Procedures - Microtower Type Chassis 6. Remove the two screws that secure the USB d248 models have only one capacitor on the board. To install the USB board and the USB housing to the chassis, reverse the removal procedures. 6-14 377977-AA1 Service Reference Guide, d260 - HP d260 | Business Desktop d260 Series, Service Reference Guide, First Edition - Page 55
Removal and Replacement Procedures - Microtower Type Chassis 6.9 Processor and Heatsink 6.9.1 Removing Northwood cooler 1. Prepare the computer for disassembly (Section 6.1). 2. 6.2). 3. Lay the computer down on its side to make it easier to work on. Service Reference Guide, d260 377977-AA1 6-15 - HP d260 | Business Desktop d260 Series, Service Reference Guide, First Edition - Page 56
CAUTION: For Cel 2.0 Ghz (309578-001) and P4 2.4 GHz/533/1MB (394384-001) box CPU, the fansink shipped with Box CPU should not be used. Please use respective thermal solution created for d260 (377348-001 for Cel 2.0 Ghz and "378157-001" for P4 2.4 GHz/533/1MB) - HP d260 | Business Desktop d260 Series, Service Reference Guide, First Edition - Page 57
Removal and Replacement Procedures - Microtower Type Chassis 6.10 System Board 1. Prepare the computer for 2. To install the system board, reverse the removal procedure. ✎ The system board shown may be different from the one installed in your computer. Service Reference Guide, d260 377977-AA1 - HP d260 | Business Desktop d260 Series, Service Reference Guide, First Edition - Page 58
to remove an expansion card to gain access to the battery. 3. Locate the battery and battery holder on the system board. 4. Depending on the type of battery holder on the system board, complete the following instructions to replace the battery: 6-18 377977-AA1 Service Reference Guide, d260 - HP d260 | Business Desktop d260 Series, Service Reference Guide, First Edition - Page 59
clamp snaps over the other edge of the battery. 4. Replace the computer cover or access panel. 5. Plug in the computer and turn on power to the computer. 6. Reset the date and time, your passwords, and any special system setups, using Computer Setup. Service Reference Guide, d260 377977-AA1 6-19 - HP d260 | Business Desktop d260 Series, Service Reference Guide, First Edition - Page 60
secures the battery in the proper position. 4. Replace the computer cover or access panel. 5. Plug in the computer and turn on power to the computer. 6. Reset the date and time, your passwords, and any special system setups, using Computer Setup. 6-20 377977-AA1 Service Reference Guide, d260 - HP d260 | Business Desktop d260 Series, Service Reference Guide, First Edition - Page 61
Removal and Replacement Procedures - Microtower Type Chassis 6.12 Power Supply Å WARNING: Voltage to install the power supply with the chassis turned upside down. This will give you better control when installing the first power supply retaining screw. Service Reference Guide, d260 377977-AA1 - HP d260 | Business Desktop d260 Series, Service Reference Guide, First Edition - Page 62
Removal and Replacement Procedures - Microtower Type Chassis 6-22 377977-AA1 Service Reference Guide, d260 - HP d260 | Business Desktop d260 Series, Service Reference Guide, First Edition - Page 63
of these connectors may not be used on the product being serviced. Enhanced Keyboard Connector and Icon Pin Signal 1 Data 2 Unused 3 Ground (-) Transmit Data 3 (+) Receive Data 4 Unused 5 Unused 6 (-) Receive Data 7 Unused 8 Unused Service Reference Guide, d260 377977-AA1 A-1 - HP d260 | Business Desktop d260 Series, Service Reference Guide, First Edition - Page 64
Request to Send Clear to Send Ring Indicator (5V if powered) USB Connector and Icon Pin Signal 1 +5 VDC 2 - Data 3 + Data 4 Ground Microphone Connector and Icon (1/8" miniphone) Pin 1 (Tip) 2 (Ring) 3 (Shield) Signal Audio Power Ground A-2 377977-AA1 Service Reference Guide, d260 - HP d260 | Business Desktop d260 Series, Service Reference Guide, First Edition - Page 65
Audio Connector and Icon (1/8" miniphone) Pin 1 (Tip) 2 (Ring) 3 (Shield) Signal Audio_In_Left Audio_In_Right Ground Line-Out Audio Connector and Icon (1/8" miniphone) Pin 1 (Tip) 2 (Ring and Icon Pin Signal 1 GND 2 GND 3 +12 V 4 12 V Service Reference Guide, d260 377977-AA1 A-3 - HP d260 | Business Desktop d260 Series, Service Reference Guide, First Edition - Page 66
Pin Signal 11 +3.3 V 12 -12 V 13 GND 14 PSON/ SLP S5# 15 GND Pin Signal 16 GND 17 GND 18 open* 19 +5 V 20 +5 V A-4 377977-AA1 Service Reference Guide, d260 - HP d260 | Business Desktop d260 Series, Service Reference Guide, First Edition - Page 67
power cord set requirements, contact your authorized HP dealer, reseller, or service provider. General Requirements The requirements listed below configuration of an EN 60 320/IEC 320 Standard Sheet C13 connector, for mating with appliance inlet on the Switch Box. Service Reference Guide, d260 - HP d260 | Business Desktop d260 Series, Service Reference Guide, First Edition - Page 68
Country-Specific Requirements D260 is only for China Market, it is CCC certified. B-2 377977-AA1 Service Reference Guide, d260 - HP d260 | Business Desktop d260 Series, Service Reference Guide, First Edition - Page 69
Failure... Fatal memory parity error. System halts after displaying this message. BIOS could not boot from the device. This message is usually followed by information about the specific device. Invalid Boot Diskette Drive Not Ready Diskette in drive A: not bootable. BIOS could not configure drive - HP d260 | Business Desktop d260 Series, Service Reference Guide, First Edition - Page 70
configured as a Primary/ Master/Slave failed an ATAPI compatibility test. Device configured as a Secondary/ Master/Slave failed an ATAPI compatibility test. BIOS then flash the system BIOS. Reset the jumper to pins 1-2 (Lock). Replace the system board. C-2 377977-AA1 Service Reference Guide, d260 - HP d260 | Business Desktop d260 Series, Service Reference Guide, First Edition - Page 71
under Control Panel or in F10 Setup depending on the operating system. If problem persists, replace the RTC battery. Replace the RTC battery. Restart the computer, use the F10 Key to access Computer Setup. Select Load Default Settings > Save and Exit. Service Reference Guide, d260 377977-AA1 C-3 - HP d260 | Business Desktop d260 Series, Service Reference Guide, First Edition - Page 72
that none of the keys are depressed. Replace keyboard. Replace system board. Reconnect keyboard with computer turned off. Check connector for bent or missing pins. Ensure that none of the keys are depressed. Replace keyboard. Replace system board. C-4 377977-AA1 Service Reference Guide, d260 - HP d260 | Business Desktop d260 Series, Service Reference Guide, First Edition - Page 73
the keyboard is operating correctly. ■ Check all cables for loose or incorrect connections. ■ Reconfigure the computer after installing a non-Plug and Play expansion board or other option, such as a diskette drive. ■ Are all of the necessary device drivers installed? ■ Have all printer drivers been - HP d260 | Business Desktop d260 Series, Service Reference Guide, First Edition - Page 74
Problems Solving Minor Problems Problem to USB keyboard or mouse. battery. Computer appears to pause periodically. Network driver installed properly. Hard drive is full. Transfer data from the hard drive to create more space on the hard drive. D-2 377977-AA1 Service Reference Guide, d260 - HP d260 | Business Desktop d260 Series, Service Reference Guide, First Edition - Page 75
Solving Minor Problems (Continued) Problem Cause Computer plugged onto the system board header. Ensure the fan is fully/properly seated or installed. 3. Replace the processor fan. 4. Reseat processor heatsink and verify that the the system board. Service Reference Guide, d260 377977-AA1 D-3 - HP d260 | Business Desktop d260 Series, Service Reference Guide, First Edition - Page 76
Solving Power Supply Problems Solving Power Supply Problems Problem Cause Power supply shuts down fully/properly seated or installed. 3. Replace the processor fan. 4. Reseat processor heatsink and verify that the fan assembly is properly attached. D-4 377977-AA1 Service Reference Guide, d260 - HP d260 | Business Desktop d260 Series, Service Reference Guide, First Edition - Page 77
Diskette Problems Solving Diskette Problems Problem Cause Diskette a removable hard drive that has DriveLock security enabled. (This feature supported on select models only.) Diskette is not formatted. Diskette is write- prompt: FORMAT A: /F:1440 Service Reference Guide, d260 377977-AA1 D-5 - HP d260 | Business Desktop d260 Series, Service Reference Guide, First Edition - Page 78
has occurred with a disk transaction. The directory structure is bad, or there is a problem with a file. Diskette drive cannot read a diskette. "Invalid system disk" message is Setup and disable Diskette MBR Validation in Storage > Storage Options. D-6 377977-AA1 Service Reference Guide, d260 - HP d260 | Business Desktop d260 Series, Service Reference Guide, First Edition - Page 79
. 3. Install system files for the appropriate operating system if necessary. Run Computer Setup and enable the hard drive entry in the Boot Device Priority. Reinstall the second Ultra ATA hard drive using an 80-conductor cable (standard on select models.) Service Reference Guide, d260 377977-AA1 - HP d260 | Business Desktop d260 Series, Service Reference Guide, First Edition - Page 80
Solving Hard Drive Problems (Continued) Problem Cause Solution Both slow and fast UATA devices are on the same data cable. Connect slower UATA devices for four or more seconds to turn off the power. 3. Restart the computer using the power button. D-8 377977-AA1 Service Reference Guide, d260 - HP d260 | Business Desktop d260 Series, Service Reference Guide, First Edition - Page 81
Problems Solving Display Problems Problem Cause Solution Blank screen (no video). The cable connections are not correct. Check the cable connections from the monitor to the computer and to the electrical outlet. Screen blanking utility installed . 2. Using the keyboard arrow keys, select - HP d260 | Business Desktop d260 Series, Service Reference Guide, First Edition - Page 82
Solving Display Problems (Continued) Problem Cause Monitor does not is securely connected to the graphics card and the monitor. Install the video drivers included in the upgrade kit. Change requested resolution. 1. Be sure the monitor settings. D-10 377977-AA1 Service Reference Guide, d260 - HP d260 | Business Desktop d260 Series, Service Reference Guide, First Edition - Page 83
Problems (Continued) Problem support that particular symbol. Solution 1. Select the monitor's Auto-Adjustment option in the monitor's on-screen display menu. 2. Manually synchronize the Clock and Clock Phase on-screen display functions. Download . Service Reference Guide, d260 377977-AA1 D-11 - HP d260 | Business Desktop d260 Series, Service Reference Guide, First Edition - Page 84
Solving Audio Problems Solving Audio Problems Problem Cause Solution Sound does not come out of the speaker or headphones. Software volume control is turned down. Double . Otherwise, the computer will shut down and you will lose your data. D-12 377977-AA1 Service Reference Guide, d260 - HP d260 | Business Desktop d260 Series, Service Reference Guide, First Edition - Page 85
used by other open applications. The hard disk may be full. Shut down all open processor-intensive applications. 1. Before recording, make sure there is enough free space on the hard disk. 2. Try recording the audio file in a compressed format. Service Reference Guide, d260 377977-AA1 D-13 - HP d260 | Business Desktop d260 Series, Service Reference Guide, First Edition - Page 86
test. Reconnect all cables. Install the correct printer driver for the application. Reconnect all cables. Reset the printer by turning it off for one minute, then turn it back on. 1. Check the paper tray and refill it if it is empty. 2. Select online. D-14 377977-AA1 Service Reference Guide, d260 - HP d260 | Business Desktop d260 Series, Service Reference Guide, First Edition - Page 87
Keyboard and Mouse Problems Solving Keyboard Problems Problem Cause Solution Keyboard commands and typing are not recognized by the computer. Keyboard connector is not properly connected. 1. Turn off the computer. 2. Reconnect the keyboard it. Service Reference Guide, d260 377977-AA1 D-15 - HP d260 | Business Desktop d260 Series, Service Reference Guide, First Edition - Page 88
came with the system to determine if you are using the correct memory modules and to verify the proper installation. 2. Observe the beeps and LED lights on the front of the computer. See Appendix C "POST Error Messages" to determine possible causes. D-16 377977-AA1 Service Reference Guide, d260 - HP d260 | Business Desktop d260 Series, Service Reference Guide, First Edition - Page 89
Power LED remains Green, followed by computer beeps. Memory is installed incorrectly or is bad. 1. Reseat DIMMs. 2. Replace DIMMs one at a time to isolate the faulty module. 3. Replace third-party memory with HP memory. 4. Replace the system board. Service Reference Guide, d260 377977-AA1 D-17 - HP d260 | Business Desktop d260 Series, Service Reference Guide, First Edition - Page 90
connector. There is a problem with the cable or drivers. Disable auto-sensing drivers are loaded and that the driver parameters match the configuration of the network controller. 2. Make sure the correct network client and protocol is installed. D-18 377977-AA1 Service Reference Guide, d260 - HP d260 | Business Desktop d260 Series, Service Reference Guide, First Edition - Page 91
Installation. New network card may be defective or may not meet industry-standard specifications. The network controller is not configured is present, and that the Remote System Installation Server contains the NIC drivers for your NIC. Flash the ROM. Service Reference Guide, d260 377977-AA1 D-19 - HP d260 | Business Desktop d260 Series, Service Reference Guide, First Edition - Page 92
systems that support ECC memory, HP does not support mixing ECC and non-ECC memory. Otherwise, the system will not boot the operating system. Solving Memory Problems Problem Cause System will not boot or does not function properly after installing additional memory modules. Memory module is - HP d260 | Business Desktop d260 Series, Service Reference Guide, First Edition - Page 93
Solving Processor Problems . Solving Processor Problems Problem Cause Poor performance is experienced. Processor is hot. Solution 1. Make sure the (some fans only operate when needed). 3. Make sure the processor heatsink is installed properly. Service Reference Guide, d260 377977-AA1 D-21 - HP d260 | Business Desktop d260 Series, Service Reference Guide, First Edition - Page 94
driver is not loaded. Drive is not connected properly or not properly configured. Movie will not play in the DVD drive. Cannot eject compact disc (tray-load unit). Movie may be regionalized for a different country. Decoder software is not installed as audio or video Service Reference Guide, d260 - HP d260 | Business Desktop d260 Series, Service Reference Guide, First Edition - Page 95
Problems (Continued) Problem Cause Solution Recording audio Install the Drive Key after the operating system boots. Solving Internet Access Problems Solving Internet Access Problems Problem Cause Unable to connect to the Internet. Internet Service the Web browser is installed and set up to - HP d260 | Business Desktop d260 Series, Service Reference Guide, First Edition - Page 96
the "PC" LED light on the front of the cable/DSL modem will be on.) IP address is not configured properly. Contact the ISP for the correct IP address. Cookies are corrupted. Windows XP 1. Select Start > Control ISP and launch the desired program. D-24 377977-AA1 Service Reference Guide, d260 - HP d260 | Business Desktop d260 Series, Service Reference Guide, First Edition - Page 97
Solving Internet Access Problems (Continued) Problem Cause Solution Internet takes too long to download Web sites. Modem is not is enabled. 9. If there are further problems, click the Troubleshoot button and follow the on-screen instructions. Service Reference Guide, d260 377977-AA1 D-25 - HP d260 | Business Desktop d260 Series, Service Reference Guide, First Edition - Page 98
D-26 377977-AA1 Service Reference Guide, d260 - HP d260 | Business Desktop d260 Series, Service Reference Guide, First Edition - Page 99
) information. ■ 128Mbit, 256 Mbit, and 512Mbit non-ECC memory technologies ■ Single and double-sided DIMMs may be used DIMMs constructed with x8 and x16 DDR devices and x4 SDRAM are not supported. ✎ The system will not start using unsupported DIMMs. Service Reference Guide, d260 377977-AA1 E-1 - HP d260 | Business Desktop d260 Series, Service Reference Guide, First Edition - Page 100
four memory sockets in dual channel mode, you must use four identical DIMMs for dual channel performance. The system will automatically operate in single channel mode or a higher-performing dual channel mode, depending on how the DIMMs are installed. E-2 377977-AA1 Service Reference Guide, d260 - HP d260 | Business Desktop d260 Series, Service Reference Guide, First Edition - Page 101
- HP d260 | Business Desktop d260 Series, Service Reference Guide, First Edition - Page 102
drive) System BIOS Winbond W49LF004A4M BAward BIOS code ACPI supported. S3 will be default Hardware are monitor supported Power Management Wake on USB from ACPI S1,S3 Wake on PS/2 Keyboard/mouse from ACPI S1,S3,S4 and S5 Energy Star compliant F-2 377977-AA1 Service Reference Guide, d260 - HP d260 | Business Desktop d260 Series, Service Reference Guide, First Edition - Page 103
Mainboard Layout Orientation Label BAT1 CD_IN CLS_CMOS COM1 CPU_FAN Component Battery CD IN Connector Clear CMOS Serial Port CPU connector Service Reference Guide, d260 377977-AA1 F-3 - HP d260 | Business Desktop d260 Series, Service Reference Guide, First Edition - Page 104
connector Secondery IDE connector, CPU Slot BIOS Firmware North Bridge Chipset South Bridge Chipset Super I/O Controler VGA Slot Realtek LAN IC Realtek Audio IC LAN disable/enable header Boot Block Lock jumper 12V connector position System Fan position F-4 377977-AA1 Service Reference Guide, d260 - HP d260 | Business Desktop d260 Series, Service Reference Guide, First Edition - Page 105
Signal Names GPIO GPIO LAN DISABLEJ Pin Signal Names 2 +3.3V 4 +5V 6 +5V 8 PWROK 10 +12V 12 -12V 14 SLP S5# 16 Ground 18 N/C 20 +5V Service Reference Guide, d260 377977-AA1 F-5 - HP d260 | Business Desktop d260 Series, Service Reference Guide, First Edition - Page 106
FANPWM1 FANIO1 FAN2 Pin 1 2 3 Signal Names Ground FANPWM2 FANIO2 CD-IN Connector Pin 1 2 3 4 Signal Names CD L CD GND CD GND CD R PS/2 Keyboard (Pruple in Color) & Mouse (Green in Color) Keyboard & Mouse Pin 1, 7 2, 8 Signal Names Data CD GND F-6 377977-AA1 Service Reference Guide, d260 - HP d260 | Business Desktop d260 Series, Service Reference Guide, First Edition - Page 107
6, 12 Signal Names (Continued) Ground +5V (fused) Clock No connector ✎ Pins 1-7 for keyboard and 7-12 for mouse. JP10 (Boot Block Lock Jumper) J10 1pin & 2pin EMPTY CMOS Lock 4,8 10 Signal Name Power(Fused) USBP0-, USBP1USBP0+, USBP1+ Ground T*D+ Service Reference Guide, d260 377977-AA1 F-7 - HP d260 | Business Desktop d260 Series, Service Reference Guide, First Edition - Page 108
bit 2 5 Data bit 3 6 Data bit 4 7 Data bit 5 8 Data bit 6 9 Data bit 7 10 ACK # 11 Busy 12 Error 13 Select Pin Signal Names 14 Auto Feed # 15 Fault # 16 INIT # 17 SLCT IN # 18 Ground 19 Ground 20 Ground 21 Ground 22 Ground 23 Ground 24 Ground 25 Ground - HP d260 | Business Desktop d260 Series, Service Reference Guide, First Edition - Page 109
Host Data 1 17 Host Data 0 19 Ground 21 DDRQ0 (DDRQ1) 23 I/O Write # Signal Name DCD Serial In # Serial Out # DTR Ground DSR TRS CTS Rl(ring-in) Pin Signal Names 2 Ground 4 Host Data 8 6 Host Data 9 8 Host Data 10 10 Host Data 11 12 Host Data 12 14 Host Data 13 16 - HP d260 | Business Desktop d260 Series, Service Reference Guide, First Edition - Page 110
DRVDEN1 Index # Motor Enable A # Drive Select B # Drive Select A # Motor Enable B # DIR # STEP # Write Data # Write Gate # Track 00 # Write Protect # Read Data # F-10 377977-AA1 Service Reference Guide, d260 - HP d260 | Business Desktop d260 Series, Service Reference Guide, First Edition - Page 111
4 and Celeron Cel (2.0 GHz~3.06 GHz) & P4 (2.4 GHz~3.4GHz) - HP d260 | Business Desktop d260 Series, Service Reference Guide, First Edition - Page 112
momory voltage 2.6V Support memory module package 184-pin DIMM Support to parity check feature yes Support to Error Correction Code (ECC) NO feature Memory module combinations You can install memory modules in any combination as long as they match the above specifications. Controls and - HP d260 | Business Desktop d260 Series, Service Reference Guide, First Edition - Page 113
Block Diagram Service Reference Guide, d260 377977-AA1 F-13 - HP d260 | Business Desktop d260 Series, Service Reference Guide, First Edition - Page 114
- 3 4 9 5 6 8 7 Label 1 Icon 2 3 4 5 6 7 8 9 10 Color Black Description Optical driver USB ports Pink Microphone-in port(front) Lime Speaker-out/Line-out port Floppy drive eject button Power Button HDD LED Power LED HP Logo FDD LED F-14 377977-AA1 Service Reference Guide, d260 - HP d260 | Business Desktop d260 Series, Service Reference Guide, First Edition - Page 115
2 Icon 3 4 5 6 7 8 Color Green Description Power code socket PS/2 mouse port Purple PS/2 keyboard port Tear or Serial port Turquoise Burgundy Parallel/printer port Gold CRT/LCD Monitor port White Network port Pink Microphone-in port(rear) Service Reference Guide, d260 377977-AA1 F-15 - HP d260 | Business Desktop d260 Series, Service Reference Guide, First Edition - Page 116
Label 9 Icon (Continued) Color Description (Continued) Light Blue Audio-in/Line-in jack 10 Lime Audio-out/Line-out jack 11-12 White USB Port F-16 377977-AA1 Service Reference Guide, d260 - HP d260 | Business Desktop d260 Series, Service Reference Guide, First Edition - Page 117
CMOS Setup 2-4 utilities 2-2 connector pin assignments A-1 to ?? country-specific power cord set requirements B-2 D date and time display D-2 device drivers installing/upgrading 1-1 obtaining 1-2 disassembly preparation microtower type 2 6-1 drive cable select 4-1 capacities 4-7 device designation - HP d260 | Business Desktop d260 Series, Service Reference Guide, First Edition - Page 118
Drive Key D-23 hard drive D-7 installing hardware D-16 Internet access D-23 keyboard D-15 memory D-20 network D-18 optical drives D-22 power supply D-4 printer D-14 processor microtower type 2 removal and replacement 6-15 protecting software 2-7 Service Reference Guide, d260 377977-AA1 Index-2 - HP d260 | Business Desktop d260 Series, Service Reference Guide, First Edition - Page 119
system board microtower type 2 removal and replacement 6-17 system information, Computer Setup 2-4 T tools, required 5-6 24-pin power pin assignments A-4 U USB pin assignments A-2 W Wake-on-LAN feature D-18 warnings battery 5-7 wrench, tamper-resistant 5-6 Service Reference Guide, d260 377977-AA1 - HP d260 | Business Desktop d260 Series, Service Reference Guide, First Edition - Page 120
Index Service Reference Guide, d260 377977-AA1 Index-4
-
 1
1 -
 2
2 -
 3
3 -
 4
4 -
 5
5 -
 6
6 -
 7
7 -
8
-
9
-
10
-
11
-
12
-
13
-
14
-
15
-
16
-
17
-
18
-
19
-
20
-
21
-
22
-
23
-
24
-
25
-
26
-
27
-
28
-
29
-
30
-
31
-
32
-
33
-
34
-
35
-
36
-
37
-
38
-
39
-
40
-
41
-
42
-
43
-
44
-
45
-
46
-
47
-
48
-
49
-
50
-
51
-
52
-
53
-
54
-
55
-
56
-
57
-
58
-
59
-
60
-
61
-
62
-
63
-
64
-
65
-
66
-
67
-
68
-
69
-
70
-
71
-
72
-
73
-
74
-
75
-
76
-
77
-
78
-
79
-
80
-
81
-
82
-
83
-
84
-
85
-
86
-
87
-
88
-
89
-
90
-
91
-
92
-
93
-
94
-
95
-
96
-
97
-
98
-
99
-
100
-
101
-
102
-
103
-
104
-
105
-
106
-
107
-
108
-
109
-
110
-
111
-
112
-
113
-
114
-
115
-
116
-
117
-
118
-
119
-
120
 |
 |

service reference guide
Business Desktop d260 Series
1st Edition
This document provides information on the removal and replacement of all
parts as well as information on troubleshooting, Desktop Management, setup
utilities, Parallel ATA drives, safety, routine care, connector pin assignments,
POST error messages, and diagnostic indicator lights.
Document Part Number 377977-AA1