Hitachi D10VH Instruction Manual - Page 12
Attaching, hook., Optional, accessory, For hook side-attaching, Fig. 7, For hook A top-attaching, - electric drill
 |
UPC - 717709007499
View all Hitachi D10VH manuals
Add to My Manuals
Save this manual to your list of manuals |
Page 12 highlights
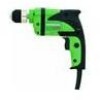
English 10. Attaching the hook. (Optional accessory) For hook (side-attaching) (Fig. 7) Fix the hook firmly on the desired side of the gear cover using M10 bolt which is supplied with hook. For hook (A) (top-attaching) (Fig. 8) To attach the hook (A), it is necessary to disassemble the handle portion which covered the tool's electrical system. For your continued safety and electrical shock protection, installing the hook (A) on this drill should ONLY be performed by a HITACHI AUTHORIZED SERVICE CENTER. CAUTION: When the power tool is used with a hook fixed to it, pay attention to the following points: ⅷ Before hanging the main unit from the waist belt, make sure that the drill has come to a complete stop. While it is suspended from the waist belt, the power plug must be disconnected from the power source. ⅷ Do not walk about with the power tool hanging from the waist belot. ⅷ In the case of operation in a high place, it is dangerous to drop the tool accidentally. If the hook is deformed or hung from the wrong position, there is danger that the hook will slip off and the tool will fall. Be careful to avoid danger. ⅷ In making a through hole, the power tool sometimes shakes violently when the workpiece is pierced, from example. Be careful you are not hurt by the hook even if such situation happens. Loosen Side handle Tighten Fig. 6 M10 Bolt Hook Fig. 7 Hook (A) Fig. 8 12
-
 1
1 -
2
-
3
-
4
-
5
-
6
-
 7
7 -
 8
8 -
 9
9 -
 10
10 -
 11
11 -
 12
12 -
 13
13 -
 14
14 -
 15
15 -
 16
16 -
 17
17 -
18
-
19
-
20
-
21
-
22
-
23
-
24
-
25
-
26
-
27
-
28
-
29
-
30
-
31
-
32
-
33
-
34
-
35
-
36
-
37
-
38
-
39
-
40
-
41
-
42
-
43
-
44
 |
 |
