Hitachi D10VH Instruction Manual - Page 13
HOW TO USE - drill parts
 |
UPC - 717709007499
View all Hitachi D10VH manuals
Add to My Manuals
Save this manual to your list of manuals |
Page 13 highlights
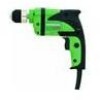
English HOW TO USE CAUTION: To prevent accidents, make sure to turn the switch off and disconnect the plug from the receptacle when the drill bits and other various parts are installed or removed. The power switch should also be turned off during a work break and after work. 1. Switch operation ⅜ When the trigger switch is depressed, the tool rotates. When the trigger is released, the tool stops. ⅜ The rotational speed of the drill can be Stopper controlled by varying the amount that the Trigger switch is pulled. Speed is low when the trigger switch is pulled slightly and increases as the trigger switch is pulled Speed control dial Low speed High speed more. ⅜ The desired rotation speed can be pre- selected with the speed control dial. Turn the speed control dial clockwise for higher speed and counterclockwise for Fig. 9 lower speed. (Fig. 9) ⅜ Pulling the trigger and pushing the stopper, it keeps the switched-on condition which is convenient for continuous running. When switching off, the stopper can be disconnected by pulling the trigger again. 2. Drilling ⅜ When drilling, start the drill slowly, and gradually increasing speed as you drill. ⅜ Always apply pressure in a straight line with the bit. Use enough pressure to keep drilling, but do not push hard enough to stall the motor or deflect the bit. ⅜ To minimize stalling or breaking through the material, reduce pressure on drill and ease the bit through the last part of the hole. ⅜ If the drill stalls, release the trigger immediately, remove the bit from the work and start again. Do not click the trigger on and off in an attempt to start a stalled drill. This can damage the drill. ⅜ The larger the drill bit diameter, the larger the reactive force on your arm. Be careful not to lose control of the drill because of this reactive force. To maintain firm control, establish a good foothold, use side handle, hold the drill tightly with both hand, and ensure that the drill is vertical to the material being drilled. 13
-
 1
1 -
2
-
3
-
4
-
5
-
6
-
7
-
 8
8 -
 9
9 -
 10
10 -
 11
11 -
 12
12 -
 13
13 -
 14
14 -
 15
15 -
 16
16 -
 17
17 -
 18
18 -
19
-
20
-
21
-
22
-
23
-
24
-
25
-
26
-
27
-
28
-
29
-
30
-
31
-
32
-
33
-
34
-
35
-
36
-
37
-
38
-
39
-
40
-
41
-
42
-
43
-
44
 |
 |
