Hitachi DZ-MV550A Owners Guide - Page 128
Adding Scenes To Play List Editing Play List
 |
View all Hitachi DZ-MV550A manuals
Add to My Manuals
Save this manual to your list of manuals |
Page 128 highlights
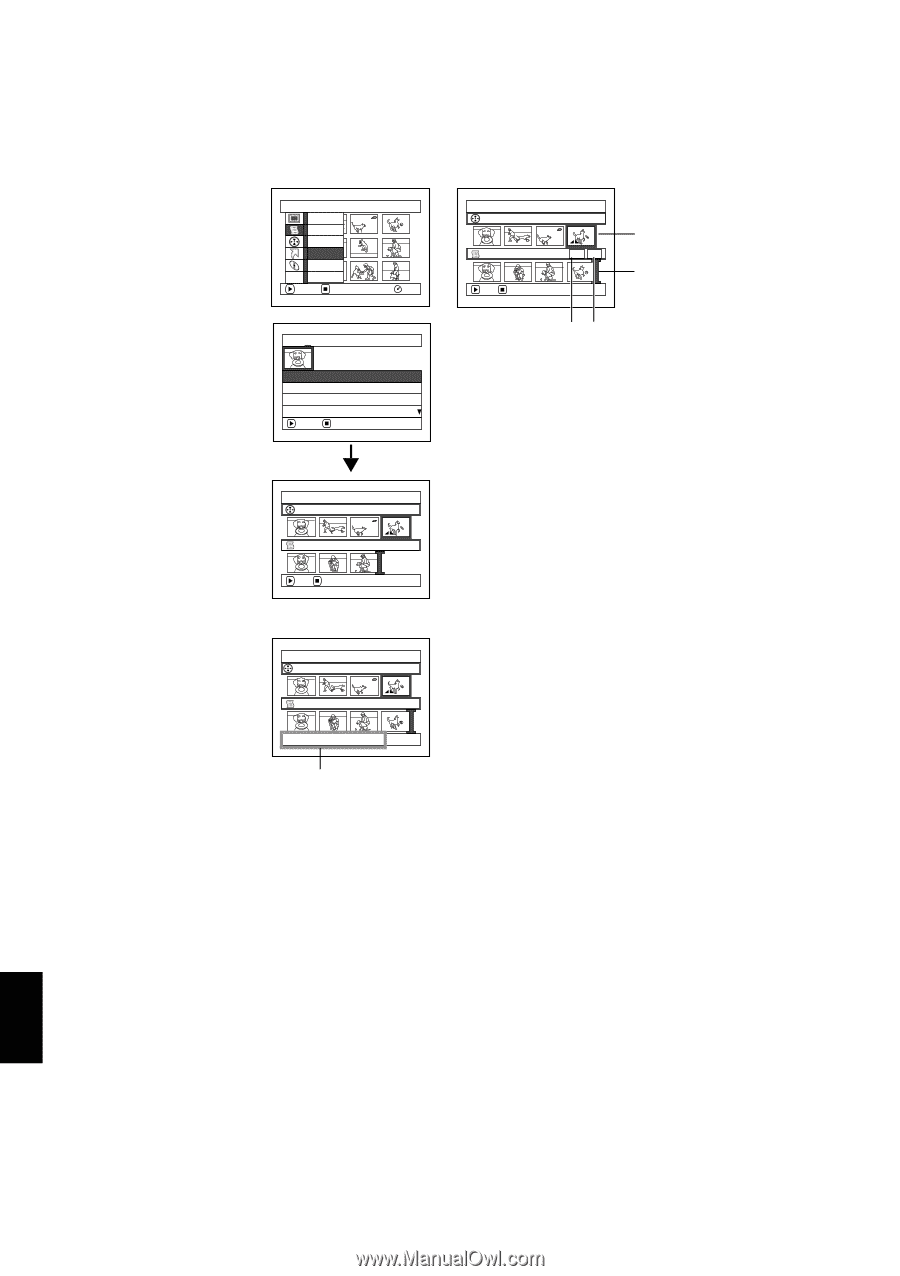
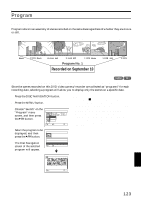
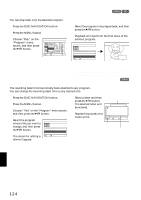
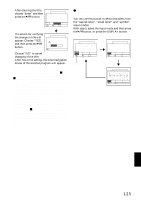
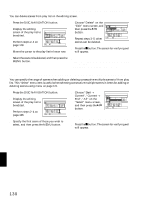
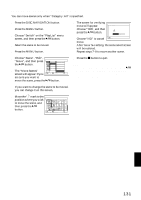
ADDING SCENES TO PLAY LIST (EDITING PLAY LIST) 1 Press the DISC NAVIGATION button. 2 Press the MENU button. 5 Tilt the joystick down to move the cursor to the lower row, and tilt it to left or right to select the point where the scene is to be inserted. 3 Choose "Edit" on the "PlayList" menu screen, and then press the A button. 4 Use the play list select screen to select the play list to which you wish to add scenes, and then press the A button. The scenes of the program that was displayed in step 1 will appear in the upper row, and the scenes of selected play list will appear in the lower row. PlayList Sw i t c h Play Create Ed i t Ti tle ETC D e l e t e ENTER RETURN RAM Ed i t P layL i s t 01 8 / 3 0 / 2004 12 : 3 0PM 02 9 / 1 0 / 2004 8 : 0 0AM 03 9 / 1 2 / 2004 9 : 3 0AM 04 9 / 2 0 / 2004 3 : 1 5PM ENTER RETURN Ed i t P layL i s t A l l Progr ams 004/014 PlayList No.01 007/007 ADD EX I T Note: If the DISPLAY button is pressed when the thumbnails are displayed, the recording date/time of the selected scene will appear across the bottom of screen. Press DISPLAY button again to restore the previous screen. Ed i t P layL i s t A l l Prog r ams 004/014 PlayList No.01 008/008 8 / 3 0 / 2 0 0 4 1 2 : 3 0: 0 0PM Recording date/time Ed i t P layL i s t A l l Progr ams 004/014 PlayList No.01 008/008 ADD EX I T Scene to be added Insertion position *1 *2 *1: Number of scene before insertion position cursor *2: Number of all scenes on play list 6 Tilt the joystick up to move the cursor to the upper row, and tilt it to left or right to point the cursor to the scene to be added. 7 Press the A button to copy the scene. After adding scenes is completed, the edited play list will appear. Repeat steps 5−7 to add other scenes. 8 Press the C button: The screen for verifying exit will appear. Note: • The cursor shows the position where the scene is to be added. • You can also select multiple scenes (P.108). • Pressing C in the middle of adding scenes will display the screen for verifying an exit from "Edit PlayList". Choose "YES" to exit the edition of play list. Choosing "NO" will restore the "Edit PlayList" screen. • If you press the MENU button in step 5 or 6, the submenu screen for editing play list will appear. You can also use this submenu to add scenes (see page 112). English 128
-
 1
1 -
2
-
3
-
4
-
5
-
6
-
7
-
8
-
9
-
10
-
11
-
12
-
13
-
14
-
15
-
16
-
17
-
18
-
19
-
20
-
21
-
22
-
23
-
24
-
25
-
26
-
27
-
28
-
29
-
30
-
31
-
32
-
33
-
34
-
35
-
36
-
37
-
38
-
39
-
40
-
41
-
42
-
43
-
44
-
45
-
46
-
47
-
48
-
49
-
50
-
51
-
52
-
53
-
54
-
55
-
56
-
57
-
58
-
59
-
60
-
61
-
62
-
63
-
64
-
65
-
66
-
67
-
68
-
69
-
70
-
71
-
72
-
73
-
74
-
75
-
76
-
77
-
78
-
79
-
80
-
81
-
82
-
83
-
84
-
85
-
86
-
87
-
88
-
89
-
90
-
91
-
92
-
93
-
94
-
95
-
96
-
97
-
98
-
99
-
100
-
101
-
102
-
103
-
104
-
105
-
106
-
107
-
108
-
109
-
110
-
111
-
112
-
113
-
114
-
115
-
116
-
117
-
118
-
119
-
120
-
121
-
122
-
 123
123 -
 124
124 -
 125
125 -
 126
126 -
 127
127 -
 128
128 -
 129
129 -
 130
130 -
 131
131 -
 132
132 -
 133
133 -
134
-
135
-
136
-
137
-
138
-
139
-
140
-
141
-
142
-
143
-
144
-
145
-
146
-
147
-
148
-
149
-
150
-
151
-
152
-
153
-
154
-
155
-
156
-
157
-
158
-
159
-
160
-
161
-
162
-
163
-
164
-
165
-
166
-
167
-
168
-
169
-
170
-
171
-
172
-
173
-
174
-
175
-
176
-
177
-
178
-
179
-
180
-
181
-
182
-
183
-
184
-
185
-
186
-
187
 |
 |