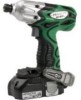
Hitachi WH18DFL Instruction Manual - Page 14
screwdriver No. 1. Fig. 10
 |
UPC - 717709012752
View all Hitachi WH18DFL manuals
Add to My Manuals
Save this manual to your list of manuals |
Page 14 highlights
English (c) Install the hook and spring on the other side and securely fasten with screw. (Fig. 6) NOTE: Pay attention to the spring orientation. Install the spring with larger diameter away from you (Fig. 8). Remove the hook cover by pushing in the direction of the arrow. (Fig. 11) Arrow Larger diameter Fig. 8 1.2 Using as an auxiliary light (1) Press the switch to turn off the light. If forgotten, the light will turn off automatically after 15 minutes. (2) The direction of the light can be adjusted within the range of hook positions 1 - 5. (Fig. 9) 45 3 2 1 Switch Hook cover Fig. 11 (2) Remove the old batteries and insert the new batteries. Align with the hook indications and position the plus (+) and minus (-) terminals correctly. (Fig. 12) Hook main body Indentation Protuberance AAAA batteries Protuberance Indentation Hook cover Fig. 12 Fig. 9 Hook ⅜ Lighting time AAAA manganese batteries: approx. 15 hrs. AAAA alkali batteries: approx. 30 hrs. CAUTION: Do not look directly into the light. Such actions could result in eye injury. 1.3 Replacing the batteries (1) Loosen the hook screw with a phillips-head screwdriver (No. 1). (Fig. 10) Hook Screw Phillips - head screwdriver Fig. 10 14 (3) Align the indentation in the hook main body with the protuberance of the hook cover, press the hook cover in the direction opposite to that of the arrow shown in Fig. 11 and then tighten the screw. Use commercially available AAAA batteries (1.5 V). NOTE: Do not tighten the screw excessively. Such action could strip the screw threads. CAUTION: ● Failure to observe the following can result in battery leakage, rust or malfunction. Position the plus (+) and minus (-) terminals correctly. Replace both batteries at the same time. Do not mix old and new batteries. Remove exhausted batteries from the hook immediately. ● Do not discard batteries together with normal trash and do not throw batteries into fire. ● Store batteries out of the reach of children. ● Use batteries correctly in accordance with the battery specifications and indications. 2. Installing the bit Always follow the following procedure to install driver bit. (Fig. 13)
-
 1
1 -
2
-
3
-
4
-
5
-
6
-
7
-
8
-
 9
9 -
 10
10 -
 11
11 -
 12
12 -
 13
13 -
 14
14 -
 15
15 -
 16
16 -
 17
17 -
 18
18 -
 19
19 -
20
-
21
-
22
-
23
-
24
-
25
-
26
-
27
-
28
-
29
-
30
-
31
-
32
-
33
-
34
-
35
-
36
-
37
-
38
-
39
-
40
-
41
-
42
-
43
-
44
-
45
-
46
-
47
-
48
-
49
-
50
-
51
-
52
-
53
-
54
-
55
-
56
 |
 |
