Honeywell #HZ-7000 Owners Manual - Page 3
Models HZ-7000, HZ-7010 and HZ-7020 - hz 7040
 |
UPC - 092926341749
View all Honeywell #HZ-7000 manuals
Add to My Manuals
Save this manual to your list of manuals |
Page 3 highlights
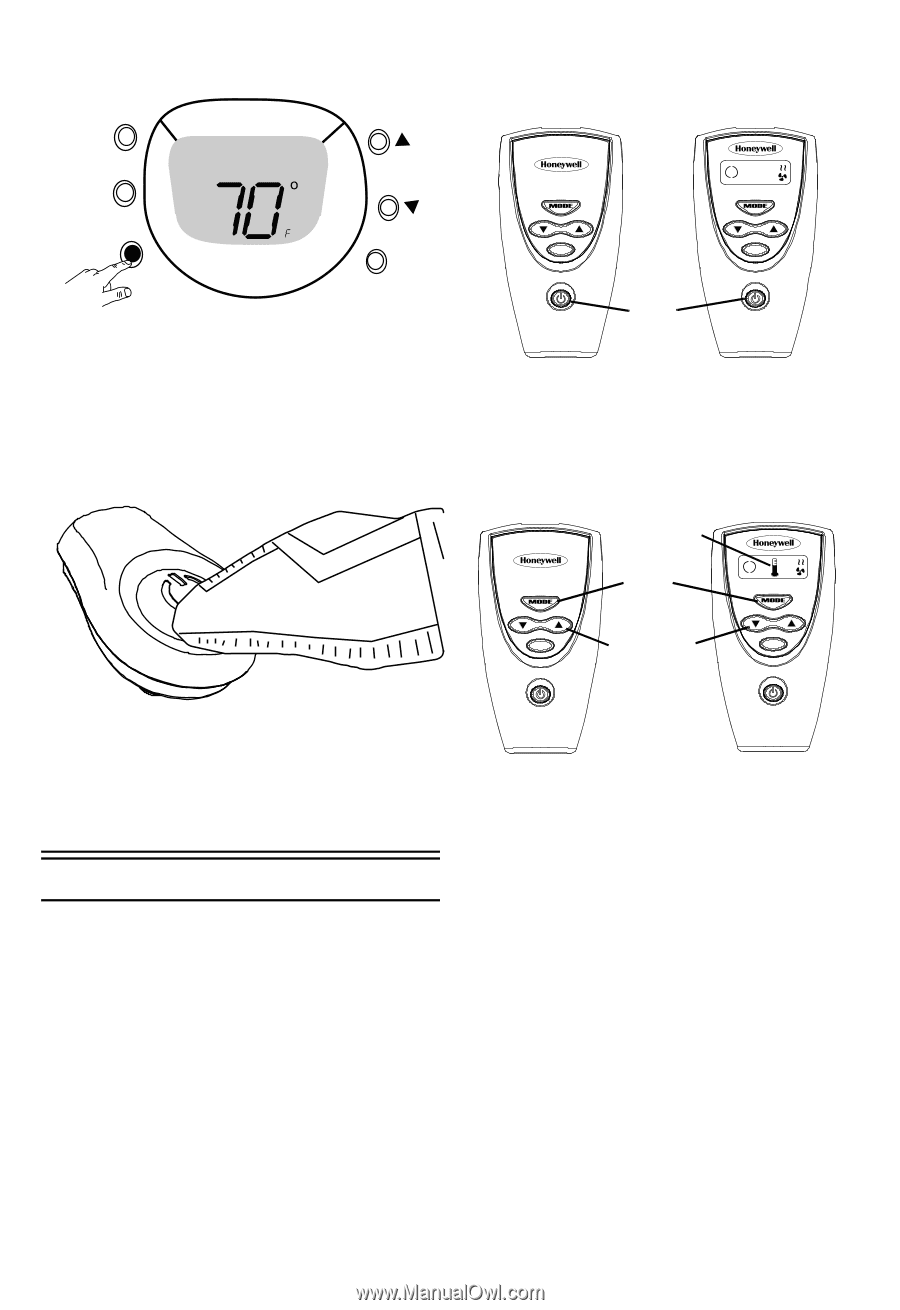
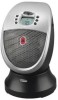
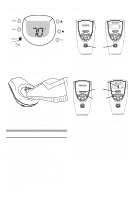
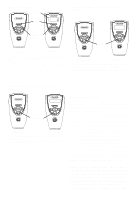
BACK-LIT DISPLAY (HZ-7000, HZ-7010 SERIES) POWER: Power Mode Back-Lit F/C • The Back-lit feature provides light to the heater display and functions in any power or mode setting. • Press the Back-lit button to toggle this feature on and off. FOOT PEDAL (HZ-7010 SERIES) Power Basic Remote LCD Remote • Press Power once to start the heater on High Power, Continuous Run. • Press Power again to change to Low Power, Continuous Run. • Press Power a third time to turn the heater off. MODE: SET TEMPERATURE Temperature Mode Adjust Up or Down • The Foot Pedal works the same as the Power button. • Press the Foot Pedal once to start the heater on High Power, Continuous Run. • Press the Foot Pedal again to change to Low Power, Continuous Run. • Press the Foot Pedal a third time to turn the heater off. REMOTE CONTROL OPERATION Two (2) AAA batteries required. Models HZ-7030 and HZ-7040: Remote Control included when originally purchased. Models HZ-7000, HZ-7010 and HZ-7020: Remote Control may be purchased separately at www.honeywellconsumerproducts.com. Basic Remote LCD Remote • Press Mode until the Temperature icon blinks on the Control Panel. The current room temperature will also appear on the Control Panel. • Use the Up or Down arrows to set the desired temperature. • The Temperature icon will stop blinking and the current room temperature will reappear after the desired temperature is set. • The heater will turn-off shortly after the desired temperature is reached and the Power light above the display will blink. • The heater will turn back on when the room temperature drops approximately 2 degrees below the desired temperature. The Power light will stop blinking and will remain lit. The Remote Control works the same as the corresponding buttons on the Control Panel. The Control Panel display on the heater will show the appropriate icons when the various functions are activated. 3
-
 1
1 -
 2
2 -
 3
3 -
 4
4 -
 5
5
 |
 |