Honeywell MS3000 Owner's Manual - Page 1
Honeywell MS3000 Manual
 |
View all Honeywell MS3000 manuals
Add to My Manuals
Save this manual to your list of manuals |
Page 1 highlights
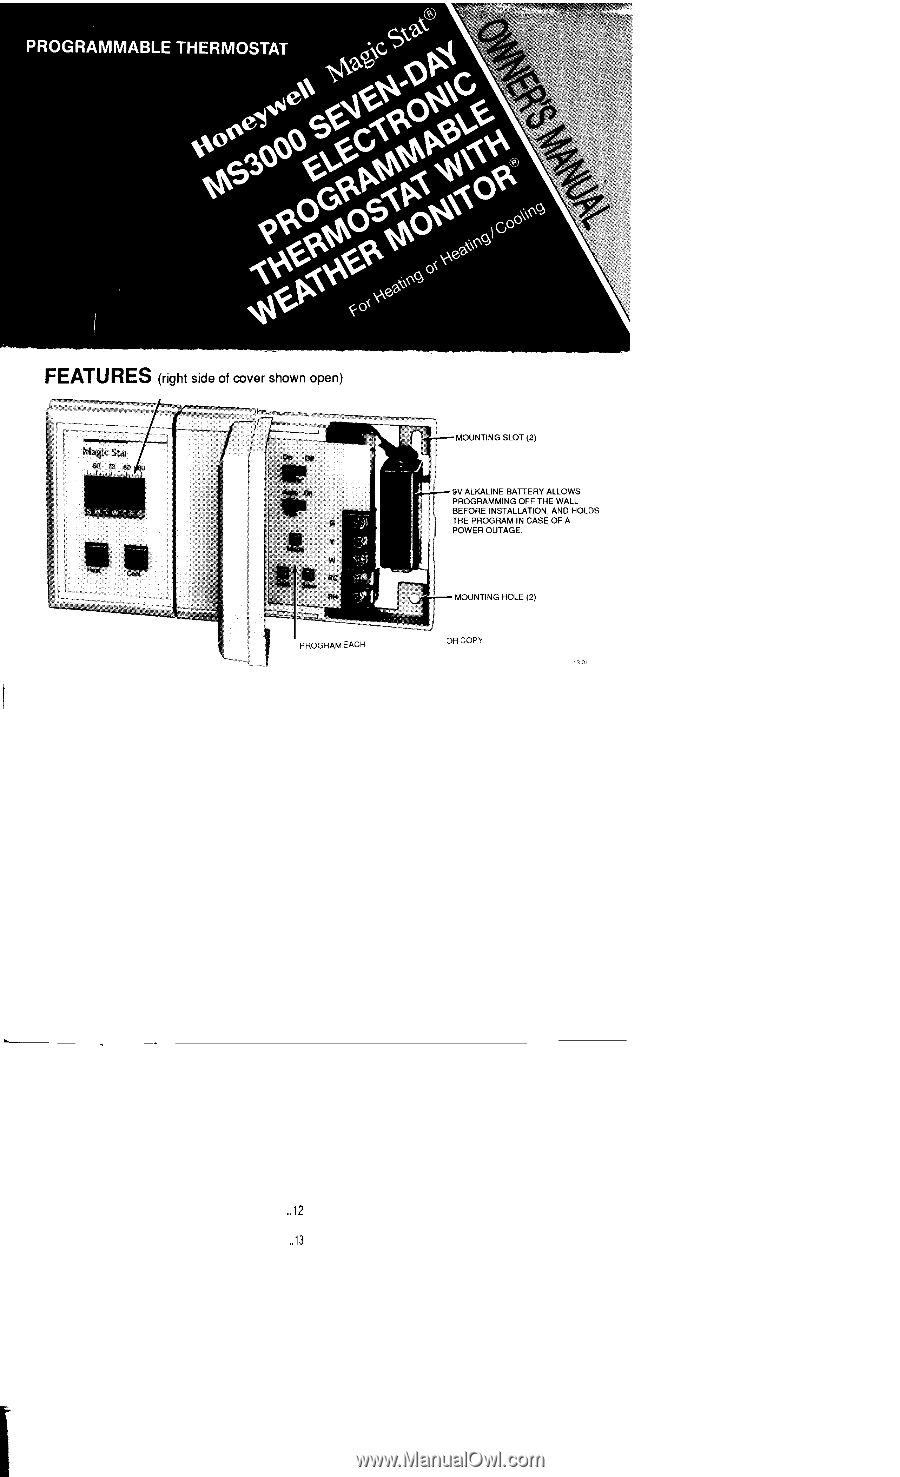
, DISPLAY WINDOW See pages 1-3 for description of keys. .! I PROGRAM EACH DAY DIFFERENTLY OR copy THE FIRST DAYS PROGRAM TO ALL 7 DAYS ,30, , SIMPLE PROGRAMMING It's easy to program the thermostat to fit your lifestyle. 1. Move the power switch to ON. 2. Hold MODE key until 12:00 AM shows in display. 3. Use SLOW key to set the time of your first program. Hold to go forward; tap to go back. 4. Use HEAT and COOL keys to set temperatures for your first program. For heat, hold HEAT key to go higher, tap to go lower. For air conditioning, hold COOL to go lower, tap to go higher. 5. Set all other programs by repeating steps 3 & 4. Press MODE to lock in for all 7 days. 6. Hold MODE until SET CLOCK shows in display. Use FAST, then SLOW to move to current time and day. (Clock only accurate to within 10 minutes. ) Tap MODE to lock in (temperature and set point indicators will appear). 7. To review programs, hold FAST or SLOW key. -.. _. TABLE OF CONTENTS Quick Reference to the Keys I Maintaining Your Thermostat 28 Replacing the Battery 28 Installing the Battery 4 Recalibrating the Thermostat 29 The "Waiting" Indicator During Programming Your Thermostat 5 Air Conditioning 30 Set the Program Schedule and Temperatures 5 Your Personal Program 31 Set the Current Day and Time 10 Check Your Settings I2 Troubleshooting Guide 32 Option-Adding an Extra Nighttime Set Point l3 index 36 Set the Fan Switch 14 Relay Ordering Information 37 Changing Your Program 15 Making Permanent Program Changes . ...15 Limited One-Year Warranty 41 Erasing the Entire Program 18 Making Temporary Program Changes . ...19 Changing for Daylight-Saving or Standard Time 25 I
-
 1
1 -
 2
2 -
 3
3 -
 4
4 -
 5
5 -
 6
6 -
 7
7 -
8
-
9
-
10
-
11
-
12
-
13
-
14
-
15
 |
 |