Hoover U5468900 Manual - Page 3
Assembling cleaner - parts
 |
UPC - 719881163956
View all Hoover U5468900 manuals
Add to My Manuals
Save this manual to your list of manuals |
Page 3 highlights
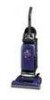
1. Assembling cleanerNot This cleaner was inspected and packaged carefully before being shipped from the factory. If you should happen to need assistance during assembly or operation, Visit us online at www.hoover.com to find the service outlet nearest you (click on the "Service" button) OR Call 1-800-944-9200 for an automated referral of authorized service outlet locations (U.S. only) OR Call 1-330-499-9499 to speak with a representative in our Consumer Response Center. Carton contents 1-1 C D A B E Remove all parts from carton and identify each item shown. Make sure all parts are located before disposing of packing. A. Handle section B. Cleaner body C. Hose rack D. Hose, cleaning tools and wands E. Handle bolts and nuts packet (in bag with owner's manual) Note: The white switch lock above the ON/OFF switch aids in the assembly of your cleaner. Assembly can be continued if the switch lock is missing. However, do not remove the switch lock until assembly is completed. STEP 1 Attach rack and handle 1-2 1-3 B 1-4 C A Open tool cover on handle section (A). Attach hose rack to handle section by fitting hooks (B) on rack over slots (C) on handle section. Align hole on rack with circular tab on handle. Continued § 3
-
 1
1 -
 2
2 -
 3
3 -
 4
4 -
 5
5 -
 6
6 -
 7
7 -
 8
8 -
 9
9 -
10
-
11
-
12
 |
 |
