Hoover UH71209 Product Manual
Hoover UH71209 Manual
 |
View all Hoover UH71209 manuals
Add to My Manuals
Save this manual to your list of manuals |
Hoover UH71209 manual content summary:
- Hoover UH71209 | Product Manual - Page 1
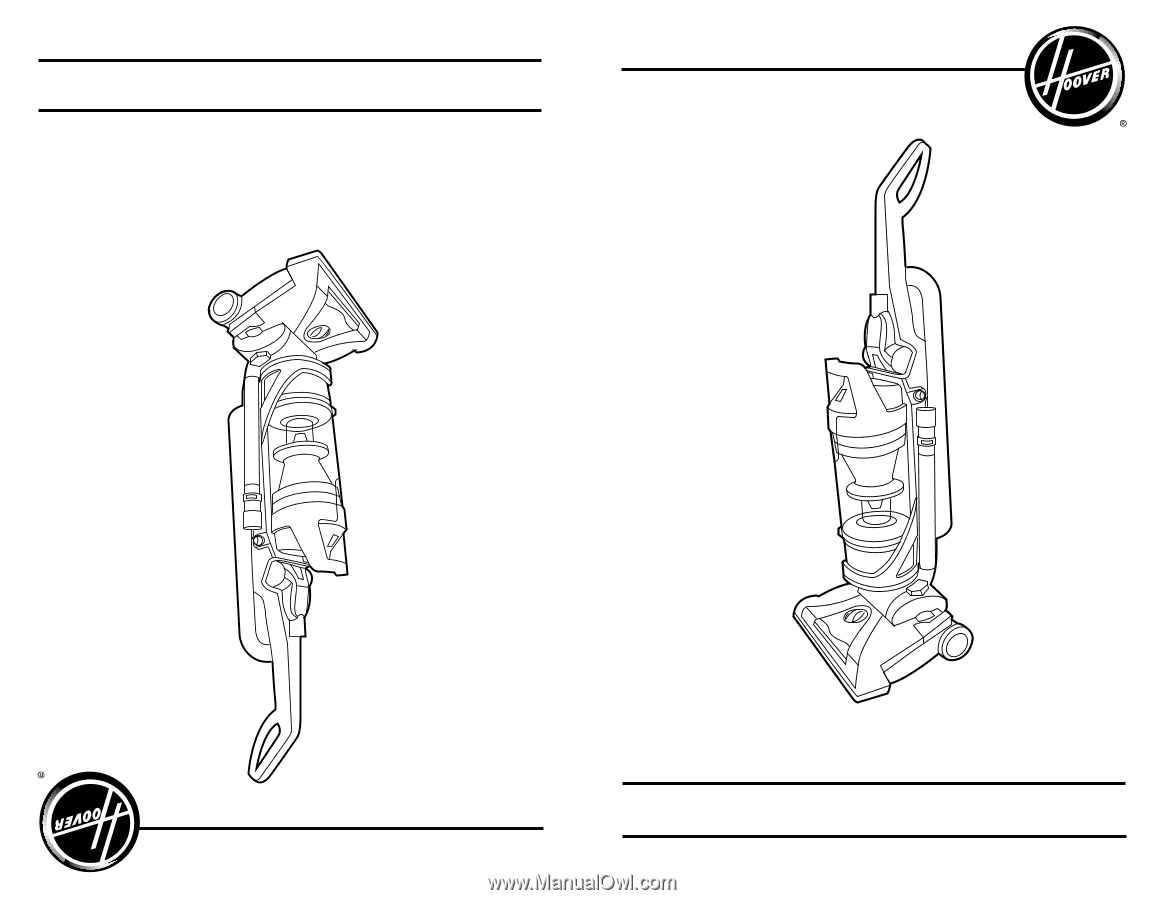
. All Rights Reserved. #961151029 ID103889-R1 Guide d'utilisation Instructions d'utilisation et d'entretien www.hoover.com www.hoover.com Owner's Manual Operating and Servicing Instructions Español - página E1 IMPORTANT : LIRE CES INSTRUCTIONS ATTENTIVEMENT AVANT D'UTILISER L'ASPIRATEUR. Vous - Hoover UH71209 | Product Manual - Page 2
Maintenance ...8 Dirt Cup...9 Filters...9 Brushroll...11 Belt...11 Hose...12 Turbo Tool ...12 Troubleshooting 13 Service...14 Warranty...15 Merci d' vacuum) MFG. CODE Thank you for choosing a HOOVER® product. Please enter the complete model and Manufacturing Code in the spaces provided. Model - Hoover UH71209 | Product Manual - Page 3
Dirt Cup and/or Filters in place. matches, Turn off all controls before unplugging. unless brushroll is turned OFF. and moving parts service center prior to continuing use. CONSIGNES DE SÉCURITÉ IMPORTANTES RANGER ET CONSERVER CES INSTRUCTIONS as described in this manual. Use only manufacturer's - Hoover UH71209 | Product Manual - Page 4
• Brushroll continues to turn while product is turned on and handle is in upright position unless brushroll is turned OFF. To avoid damage causer le cancer ou, entraîner des malformations congénitales ou d'autres troubles de la reproduction. SE LAVER LES MAINS APRÈS L'UTILISATION DE L'APPAREIL. - Hoover UH71209 | Product Manual - Page 5
front lower handle as shown. 1.2 1.3 Make sure all parts are located before disposing of packing materials. identify each item shown. Remove all parts from carton and G *Varies per model. Carton contents A. Handle B. Vacuum Base C. Telescoping Wand D. Crevice Tool E. Turbo Tool* F. Dusting - Hoover UH71209 | Product Manual - Page 6
length. (Do not pull the cord past the red tape.) ON-OFF Switch 2.2 Plug cord into electrical outlet. To turn vacuum ON, push ON/OFF switch (A) once. To turn vacuum OFF, push switch again. 2. FUNCIONAMIENTO CARACTÉRISTIQUES 1. Poignée** 2.1 1 2. Bouton marche/arrêt 3. Bouton de dégagement du - Hoover UH71209 | Product Manual - Page 7
(Tools may vary per model) 3.1 A B Tools allow for cleaning surfaces above the floor and for reaching hard to clean areas. The vacuum is ready for tool maintaining good cleaning performance. IMPORTANT If the vacuum is difficult to push, push down and turn knob to the next higher setting. CARPET - Hoover UH71209 | Product Manual - Page 8
and/or filter made 1. Clean rinsable filter and/or filter made with PROBLEM POSSIBLE CAUSE POSSIBLE SOLUTION Familiarize yourself with these home maintenance tasks as proper use and care of your vacuum will ensure continued cleaning effectiveness. The System Check Indicator located at (A), alerts - Hoover UH71209 | Product Manual - Page 9
24 hours. 4.8 What to Buy: Rinsable Filter When used and maintained properly, your Rinsable Filter should not need replacement within the warranty period. If desired, additional filter is available at Hoover.com or call 1-800-944-9200. Ask for Hoover® Part No. 304087001. Vide-poussière: Quand le - Hoover UH71209 | Product Manual - Page 10
Filter should not need replacement within the warranty period. If desired, additional filter is available at Hoover. com or call 1-800-944-9200. Ask for Hoover® Part cleaning or servicing. Do not use vacuum without dirt cup or filters in place. Do not use vacuum without dirt cup or filters in place. - Hoover UH71209 | Product Manual - Page 11
located under the bottom plate of the vacuum and should be checked from time to time to be sure it is in good condition. When To Replace To reduce the risk of injury from moving parts - Unplug before servicing. ! CAUTION ! BELT 4.17 4.18 ! CAUTION ! Not to be used for grooming a pet. Courroie - Hoover UH71209 | Product Manual - Page 12
model ! Not to be used for grooming a pet. 4.23 Turn tool so bottom faces up. Rotate the latches (A) on any debris and/ or hair from brushroll. Replace bottom plate by aligning tabs along front edge To reduce the risk of injury from moving parts Unplug before servicing. 4.23 A 4.24 B TURBO Tool - Hoover UH71209 | Product Manual - Page 13
vacuum to cool for 30min. (This willl reset the thermal protector) 1. Clean Rinsable Filter and or Filter made with HEPA media - Pg. 9 and 10. 2. Empty dirt cup - Pg. 9. 3. Replace belt injury - Unplug before cleaning or servicing. 5. TROUBLESHOOTING If a minor problem occurs, it usually can be - Hoover UH71209 | Product Manual - Page 14
Hoover® service and genuine Hoover® parts, locate the nearest Authorized Hoover® Warranty Service Dealer (Depot) by: • Checking the Yellow Pages under "Vacuum Cleaners" or "Household". • Visit our website at hoover.com (U.S. Customers) or hoover.ca (Canadian customers). Follow the service - Hoover UH71209 | Product Manual - Page 15
Manual, your HOOVER house calls. However, if you mail your product to a Hoover® Authorized Warranty Service replacement or repair performed under this Warranty. THIS WARRANTY IS THE EXCLUSIVE WARRANTY AND REMEDY PROVIDED BY HOOVER dans le Guide de l'utilisateur négligence de la part du propriétaire du - Hoover UH71209 | Product Manual - Page 16
- Hoover UH71209 | Product Manual - Page 17
MANUAL DEL PROPIETARIO Instrucciones de Funcionamiento y Servicio www.hoover.com IMPORTANTE: LEA ATENTAMENTE ANTES DE ENSAMBLAR Y USAR. ¿Tiene alguna pregunta o inquietud? Para obtener asistencia, llame al Servicio de atención al cliente al 1-800 944 - Hoover UH71209 | Product Manual - Page 18
el uso y el mantenimiento de su producto HOOVER® se realicen en condiciones de uso doméstico normales y según el Manual del usuario, el producto estará garantizado contra TIPO O NATURALEZA CON RESPECTO AL PROPIETARIO O A CUALQUIER PARTE QUE REALICE UN RECLAMO A TRAVÉS DEL PROPIETARIO, YA SEA - Hoover UH71209 | Product Manual - Page 19
-944-9200. No envíe su aspiradora a Hoover®, Inc., Company en Glenwillow para realizar el especifica en la etiqueta de datos en la parte inferior de la aspiradora. • Haga funcionar • Use el producto sólo como se describe en este manual. Use sólo los accesorios y productos recomendados por el fabricante. - Hoover UH71209 | Product Manual - Page 20
• Sujete el enchufe cuando enrolle el cordón en la bobina. No permita que el enchufe dé latigazos al enrollarlo. • Desenchufe el aparato antes de conectar el accesorio de mano turbo accionado. • No aspire ningún objeto que se esté quemando o que libere humo, como cigarrillos, fósforos o cenizas - Hoover UH71209 | Product Manual - Page 21
muestra. 1.2 1.3 Ubicación de los accesorios 1.4 Asegure el clip del Accesorio de Turbo (A) sobre los rebordes en el lateral del mango. Conecte la parte inferior del accesorio de mano turboaccionado y gire dentro del clip hasta que esté seguro. 1.5 Coloque el accesorio para hendiduras en el tubo - Hoover UH71209 | Product Manual - Page 22
metálica) (D) y deséchela. 4.21 4.20 Con las letras en la parte exterior de la correa, deslice la nueva correa sobre D el eje del motor (barra correas adicionales en Hoover.com o en el 1 800-944-9200. Cuando compre una correa nueva para estos modelos, pida la correa HOOVER® nº 562289001. E11 - Hoover UH71209 | Product Manual - Page 23
, su filtro no necesita reemplazarse dentro del período de garantía. Si lo desea, hay filtros adicionales disponibles. Solicite la pieza n.° 411018001 de Hoover®. 4.13 A El modelo real puede no coincidir con E10 las imágenes que se muestran. Ajuste de la altura para alfombras 2.5 C 2.4 Para - Hoover UH71209 | Product Manual - Page 24
Cómo limpiar los accesorios Para limpiar la manguera y el accesorio manual eléctrico, pase un trapo húmedo. NO sumerja en agua que cierre bien. 4.5 Coloque primero la parte inferior del contenedor para polvo dentro del cuerpo el filtro adicionales en Hoover.com o al 1-800-944-9200 Si
-
 1
1 -
 2
2 -
 3
3 -
 4
4 -
 5
5 -
 6
6 -
 7
7 -
8
-
9
-
10
-
11
-
12
-
13
-
14
-
15
-
16
-
17
-
18
-
19
-
20
-
21
-
22
-
23
-
24
 |
 |
www.hoover.com
OWNER’S MANUAL
Operating and Servicing Instructions
©2011 Techtronic Floor Care Technology Limited. All Rights Reserved. #961151029 ID103889-R1
THIS PRODUCT IS INTENDED FOR HOUSEHOLD USE ONLY.
IF USED COMMERCIALLY WARRANTY IS VOID.
Español - página E1
IMPORTANT: READ CAREFULLY BEFORE ASSEMBLY AND USE.
Questions or concerns? For assistance, please call Customer Service at 1-800-944-9200
Mon-Fri 8am-7pm EST.
PLEASE DO NOT RETURN THIS PRODUCT TO THE STORE.
www.hoover.com
GUIDE D’UTILISATION
Instructions d’utilisation et d’entretien
©2011 Techtronic Floor Care Technology Limited. Tous droits réservés. #961151029
ID103889-R1
L’UTILISATION DE CE PRODUIT À DES FINS COMMERCIALES
INVALIDE LA PRÉSENTE GARANTIE.
IMPORTANT : LIRE CES INSTRUCTIONS ATTENTIVEMENT AVANT
D’UTILISER L’ASPIRATEUR.
Vous avez des questions ou des inquiétudes? Veuillez appeler le service à la clientèle au
1 800 9449200 du lundi au vendredi, de 8 h à 19 h (HNE).
VEUILLEZ NE PAS RETOURNER CE PRODUIT AU MAGASIN.