Hotpoint GSM1800NBB Installation Instructions
Hotpoint GSM1800NBB Manual
 |
View all Hotpoint GSM1800NBB manuals
Add to My Manuals
Save this manual to your list of manuals |
Hotpoint GSM1800NBB manual content summary:
- Hotpoint GSM1800NBB | Installation Instructions - Page 1
COVER AND SCREW MUST BE USED DURING THE ELECTRICAL CONNECTION STEPS TO AVOID THE RISK OF FIRE OR ELECTRIC SHOCK. SEE INSTALLATION INSTRUCTIONS. #282 French SPECIFICATIONS SUBJECT TO CHANGE WITHOUT NOTICE © 2006 General Electric Company Pub. No. 49-55020 Part No. 165D4700P340 ND 06C-1690 (4/06) - Hotpoint GSM1800NBB | Installation Instructions - Page 2
instructions with your Owner's Manual for future reference. • Skill Level - Installation of this dishwasher requires basic mechanical and electrical skills. Proper installation is the responsibility of the installer. Product failure due to improper installation is not covered under the GE Appliance - Hotpoint GSM1800NBB | Installation Instructions - Page 3
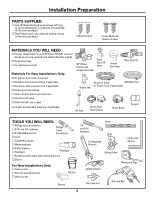
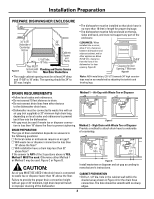
Installation Preparation PARTS SUPPLIED: Two #8 Phillips flat head wood screws, 5/8" long to secure dishwasher to underside of countertop (in and Compression Nut Hand Shut-Off Valve Thread Seal Tape Wire Nuts (3) Electrical Cable Hot Water line (or Power Cord, if applicable) Waste Tee Air - Hotpoint GSM1800NBB | Installation Instructions - Page 4
, sides and back, and must not support any part of the enclosure. CLEARANCES: When installed into a corner, allow 2" min. clearance between dishwasher and adjacent cabinet, wall or other appliances. Allow 25-5/8" min. clearance from the front of the dishwasher for door opening. Figure B Countertop - Hotpoint GSM1800NBB | Installation Instructions - Page 5
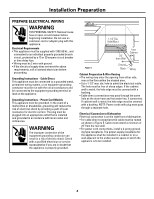
Instructions - Power Cord Models This appliance must be grounded. In the event of a malfunction or breakdown, grounding will reduce the risk of electrical shock by providing a path of least resistance for electric current. The plug must be plugged into an appropriate outlet that is installed - Hotpoint GSM1800NBB | Installation Instructions - Page 6
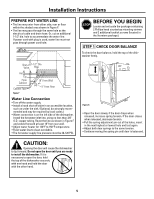
Installation Instructions PREPARE HOT WATER LINE • The line may enter from either side, rear or floor within the shaded area shown in Figure F. • The line may pass through the same hole as the electrical connection is on the left side of the dishwasher. Install the hot water inlet line, using no - Hotpoint GSM1800NBB | Installation Instructions - Page 7
Installation Instructions STEP 2 ADJUST LEVELING LEGS • Move the dishwasher close to the installation location and lay it on its back. Adjust to Installation Height STEP 4 INSTALL POWER CORD Skip this step if dishwasher will be direct wired. The power cord and connections must comply with the - Hotpoint GSM1800NBB | Installation Instructions - Page 8
Installation Instructions STEP 6 POSITION WATER LINE AND HOUSE WIRING • Position water supply line and house wiring on the floor of the opening to avoid interference with base of dishwasher and components under dishwasher. STEP 8 SLIDE DISHWASHER PARTIALLY INTO CABINET DO NOT PUSH AGAINST FRONT - Hotpoint GSM1800NBB | Installation Instructions - Page 9
Installation Instructions STEP 9 POSITION DISHWASHER UNDER COUNTERTOP • Check to be sure that wires are secure under the dishwasher and not pinched or in contact with door springs or other dishwasher components. TIP: Check tub insulation blanket, if equipped. It should be positioned so it is not - Hotpoint GSM1800NBB | Installation Instructions - Page 10
Installation Instructions STEP 11 SECURE DISHWASHER TO CABINET The dishwasher must be secured to the countertop. • Position the dishwasher so that the tub flange aligns with the front face of the cabinet frame. IMPORTANT: Check to be sure the dishwasher is centered in the opening and there is no - Hotpoint GSM1800NBB | Installation Instructions - Page 11
Installation Instructions STEP 13 CONNECT DRAIN LINE FOLLOW ALL LOCAL CODES AND ORDINANCES. The drain hose molded end will fit 5/8", 3/4" or 1" diameter connections on the air gap, waste tee or disposer. Cut on the marked line as required for your installation. Cutting Lines DRAIN LINE - Hotpoint GSM1800NBB | Installation Instructions - Page 12
after installing your dishwasher to avoid charges for a service call that is not covered by your warranty. Check to be sure power is OFF. Open door and remove all foam and paper packaging. Locate the Owner's Manual in the literature package. Read the Owner's Manual for operating instructions. Check - Hotpoint GSM1800NBB | Installation Instructions - Page 13
Installation Instructions STEP 16 DISHWASHER WET TEST Turn on power supply (or plug power cord into outlet, if equipped). Turn dial to Normal "Wash" position. Close door. Check to be sure that water enters the dishwasher. If water does not enter the dishwasher, check to be sure that water and power
-
 1
1 -
 2
2 -
 3
3 -
 4
4 -
 5
5 -
 6
6 -
 7
7 -
8
-
9
-
10
-
11
-
12
-
13
 |
 |
GE Consumer & Industrial
Appliances
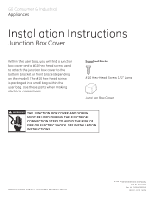
Installation
Instructions
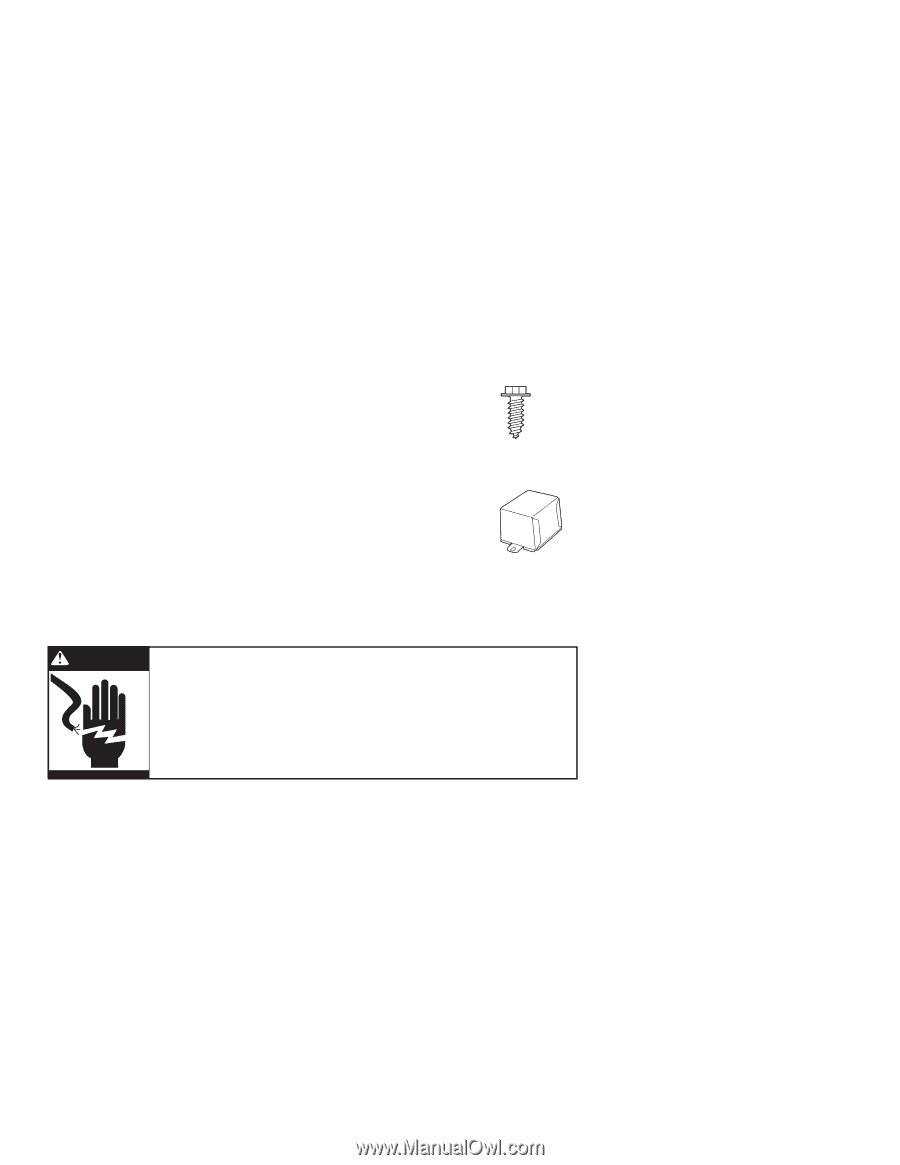
Junction Box Cover
Supplied Parts:
#10
Hex-Head Screw 1/2"
Long
Junction Box Cover
Within this user bag, you will find a junction
box cover and a #10 hex head screw used
to attach the junction box cover to the
bottom bracket or front brace (depending
on the model). The #10 hex-head screw
is packaged in a small bag within the
user bag. Use these parts when making
electrical
connections.
© 2006 General Electric Company
Pub. No.
49-55020
Part No. 165D4700P340
ND
06C-1690 (4/06)
SPECIFICATIONS SUBJECT TO CHANGE WITHOUT NOTICE
THE JUNCTION BOX COVER AND SCREW
MUST BE USED DURING THE ELECTRICAL
CONNECTION STEPS TO AVOID THE RISK OF
FIRE OR ELECTRIC SHOCK. SEE INSTALLATION
INSTRUCTIONS.
WARNING