Hotpoint GSM1800NBB Installation Instructions - Page 8
Step 8, Slide Dishwasher, Partially Into Cabinet, Step 7, Insert Drain Hose, Through Cabinet, Step 6 - installation
 |
View all Hotpoint GSM1800NBB manuals
Add to My Manuals
Save this manual to your list of manuals |
Page 8 highlights
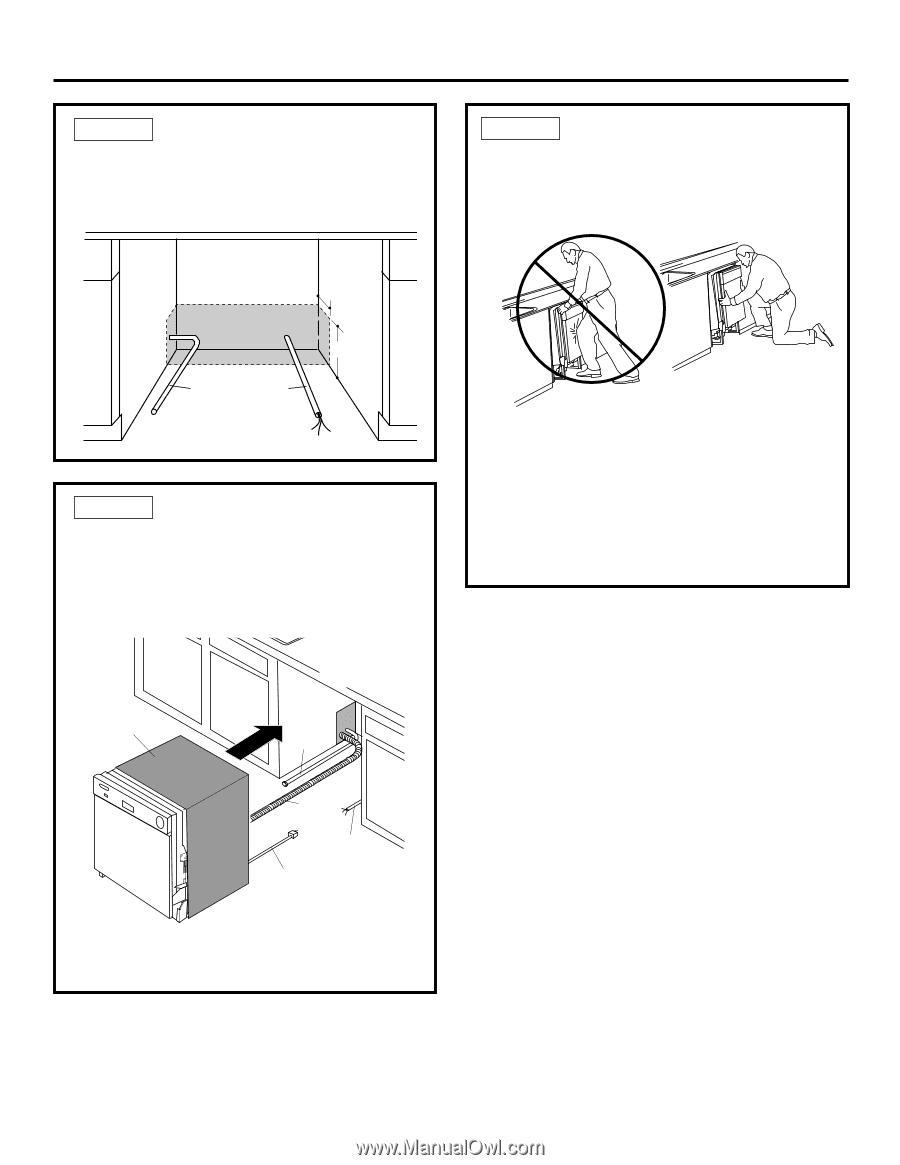
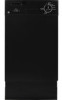
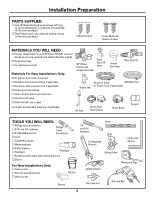
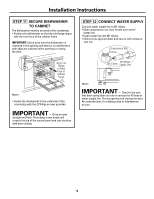
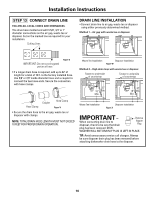
Installation Instructions STEP 6 POSITION WATER LINE AND HOUSE WIRING • Position water supply line and house wiring on the floor of the opening to avoid interference with base of dishwasher and components under dishwasher. STEP 8 SLIDE DISHWASHER PARTIALLY INTO CABINET DO NOT PUSH AGAINST FRONT PANEL WITH KNEES. DAMAGE WILL OCCUR. • Slide dishwasher into the opening a few inches at a time. 4" 6" Water House Line Wiring Figure M STEP 7 INSERT DRAIN HOSE THROUGH CABINET • Upright the dishwasher and position in front of the opening. Insert drain hose into cabinet wall hole. If a power cord is used, guide the end through a separate hole. Maximum Drain Hose Length 10' Insulation Blanket Water Line Do Not Push Against Front Door Panel With Knee. Damage to The Figure O Door Panel Will Occur. • As you proceed, pull the drain hose through the opening under the sink. Stop pushing when the dishwasher is a few inches forward of adjacent cabinetry. • Make sure drain hose is not kinked under the dishwasher and there is no interference with the water line and wiring or any other component. Drain Hose House Wiring Power Cord (If Used) Figure N TIP: Position water line and house wiring on the floor to avoid interference with base of dishwasher. 7
-
 1
1 -
2
-
 3
3 -
 4
4 -
 5
5 -
 6
6 -
 7
7 -
 8
8 -
 9
9 -
 10
10 -
 11
11 -
 12
12 -
 13
13
 |
 |