Hotpoint HDA3500NBB Installation Instructions - Page 12
Hose Clamp
 |
View all Hotpoint HDA3500NBB manuals
Add to My Manuals
Save this manual to your list of manuals |
Page 12 highlights
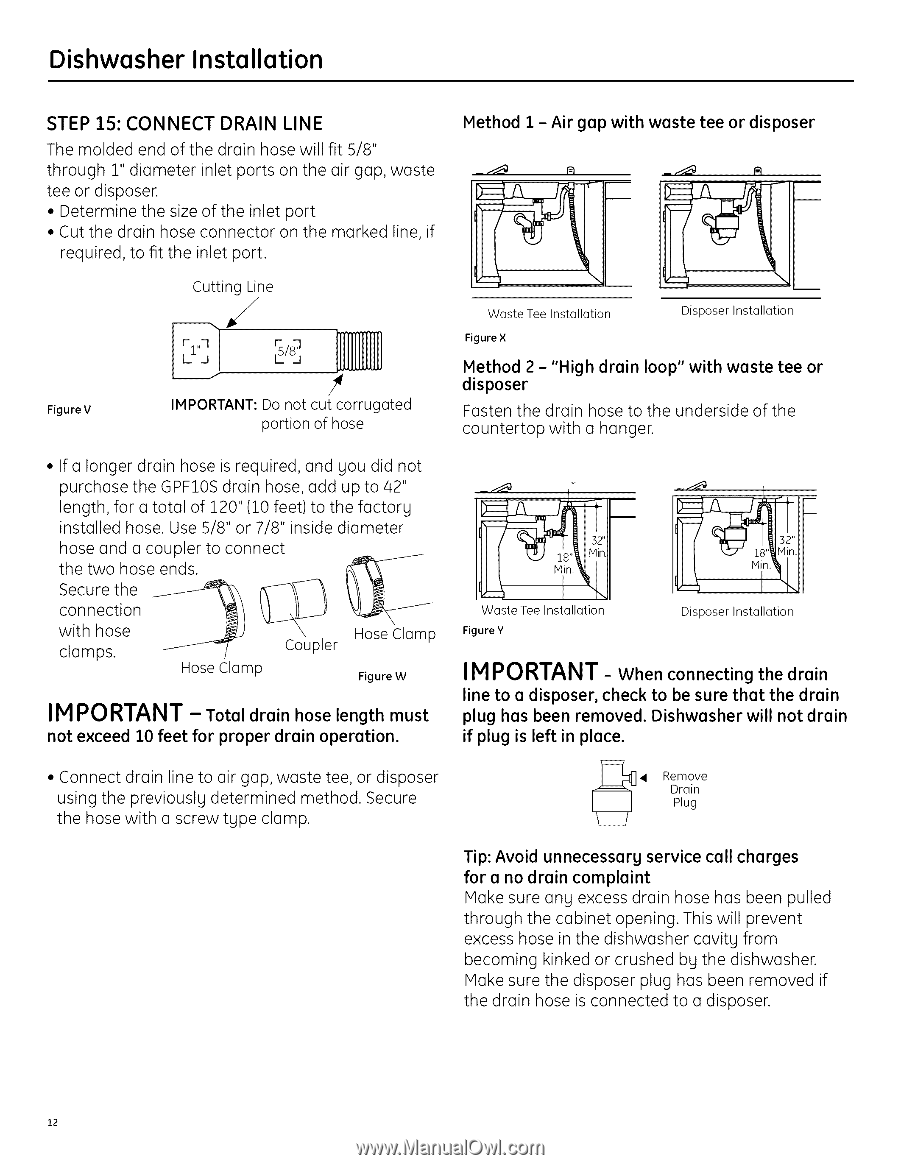
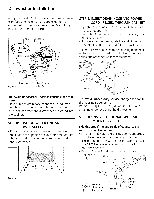
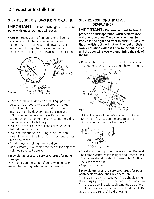
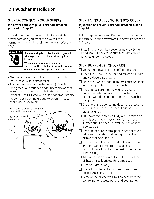
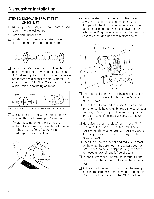
Dishwasher Installation STEP 15: CONNECT DRAIN LINE The molded end of the drain hose will fit 5/8" through 1" diameter inlet ports on the air gap, waste tee or disposer. • Determine the size of the inlet port • Cut the drain hose connector on the marked line, if required, to fit the inlet port. Method 1 - Air gap with waste tee or disposer __ r_ __ r¢ Figure V Cutting Line /. IMPORTANT: Do not cut corrugated portion of hose Waste Tee Installation Disposer Installation Figure × Method 2 - "High drain loop" with waste tee or disposer Fasten the drain hose to the underside of the countertop with a hanger. • If a longer drain hose is required, and gou did not purchase the GPF10S drain hose, add up to 42" length, for a total of 120" (10 feet) to the factorg installed hose. Use 5/8" or 7/8" inside diameter 32" hose and a coupler to connect the two hose ends. connection Sweithcurheosthee _ clamps. Hose Clamp Hose Clamp Coupler Figure W IM PORTANT - Total drain hose length must not exceed 10 feet for proper drain operation. Waste Tee Installation Figure ¥ Disposer Installation IM PORTANT - When connecting the drain line to a disposer, check to be sure that the drain plug has been removed. Dishwasher will not drain if plug is left in place. • Connect drain line to air gap, waste tee, or disposer using the previouslg determined method. Secure the hose with a screw tgpe clamp. Drain _4 RePmluogve Tip: Avoid unnecessary service call charges for a no drain complaint Make sure any excess drain hose has been pulled through the cabinet opening. This will prevent excess hose in the dishwasher cavitg from becoming kinked or crushed bg the dishwasher. Make sure the disposer plug has been removed if the drain hose is connected to a disposer.
-
 1
1 -
2
-
3
-
4
-
5
-
6
-
 7
7 -
 8
8 -
 9
9 -
 10
10 -
 11
11 -
 12
12 -
 13
13 -
 14
14 -
 15
15 -
 16
16
 |
 |