Hunter 21623 Owner's Manual - Page 12
housing labeled Connect Light Here or For Light Use.
 |
View all Hunter 21623 manuals
Add to My Manuals
Save this manual to your list of manuals |
Page 12 highlights
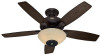
7 • Light/Speaker Assembly Installation (Continued) 7-5. Feed the two wires from the light kit up through the center hole in the lower switch housing. 7-6. Insert the threaded rod from the light kit/speaker assembly into the center hole in the lower switch housing. 7-7. Align the screw holes in the bottom of the lower switch housing with the screw holes on top of the light kit/speaker assembly, making sure the pull chain lines up with the chain guide. 7-8. Attach the light kit/speaker assembly to the lower switch housing by installing the two #6-32 round head screws . 7-9. Install the nut and washer onto the threaded rod from the light kit/speaker assembly. 7-10.Remove the wire connectors from the two wires in the switch housing labeled "Connect Light Here" or "For Light Use." Lower Switch Housing Threaded Rod Steps 7-5 - 7-6 Wires Light Kit/ Speaker Steps 7-8 - 7-9 Note: Align the fan pull chain with the chain guide. 12 45049-01 • 07/13/09 • Hunter Fan Company
-
 1
1 -
2
-
3
-
4
-
5
-
6
-
 7
7 -
 8
8 -
 9
9 -
 10
10 -
 11
11 -
 12
12 -
 13
13 -
 14
14 -
 15
15 -
 16
16 -
 17
17 -
18
-
19
-
20
 |
 |
