IBM 2621483 Setup Guide - Page 3
Setting Up Your Computer
 |
UPC - 087944548195
View all IBM 2621483 manuals
Add to My Manuals
Save this manual to your list of manuals |
Page 3 highlights
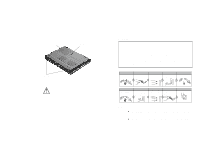
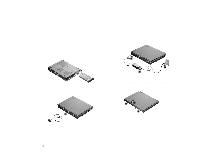
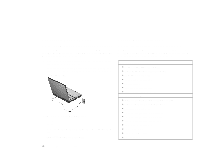
Setting Up Your Computer You are now ready to assemble and start your computer. 1. Turn the computer over and insert the battery pack into the battery compartment located near the right front end of the computer. 3. Connect the AC Adapter to the computer's power jack (at the rear of the computer) in the order shown. 1 3 2 2. If you want to connect a printer to your computer, connect one end of the printer cable to the parallel connector and the other end to your printer. Then power on the printer. 4. Open the liquid crystal display. Pull the liquid crystal display (LCD) latches (1) and open the LCD (2). Then position the LCD so that it is convenient for viewing. 1 2 1 5. Power on the computer. a. Press the power switch. b. Adjust the display's brightness (Fn+Home or Fn+End). © Copyright IBM Corporation 1999 3
-
 1
1 -
 2
2 -
 3
3 -
 4
4 -
 5
5 -
 6
6
 |
 |
