Image Fitness 4.5 Bench English Manual - Page 13
Adjusting the Weight Bench
 |
View all Image Fitness 4.5 Bench manuals
Add to My Manuals
Save this manual to your list of manuals |
Page 13 highlights
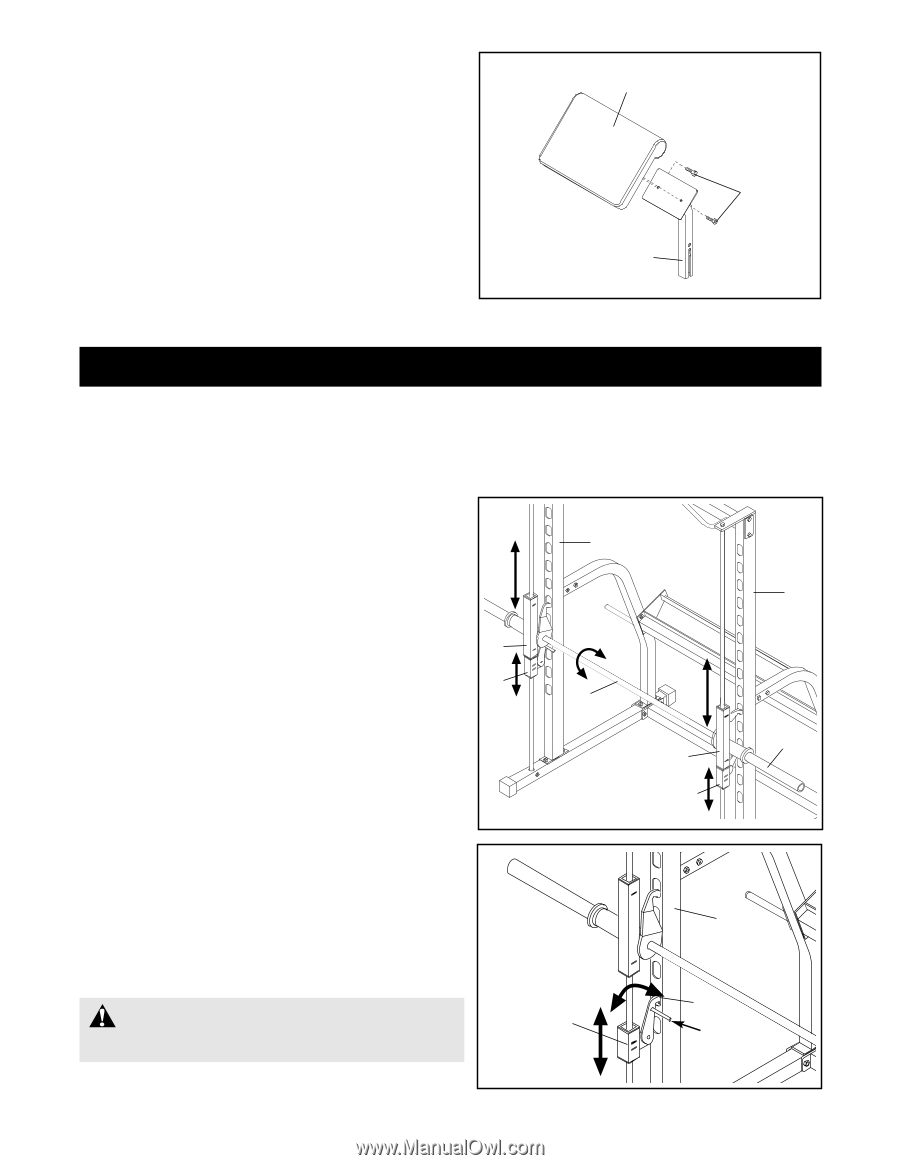
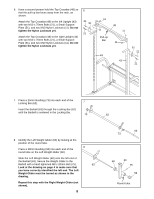
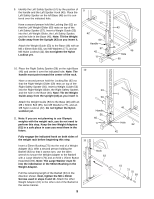
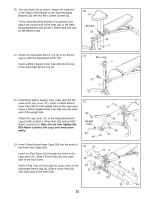
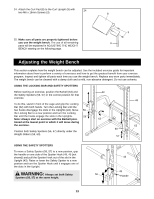
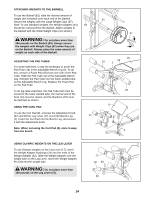
24. Attach the Curl Pad (8) to the Curl Upright (9) with 24 two M6 x 16mm Screws (3). 8 25. Make sure all parts are properly tightened before you use the weight bench. The use of all remaining parts will be explained in ADJUSTING THE WEIGHT BENCH starting on the following page. 3 9 Adjusting the Weight Bench This section explains how the weight bench can be adjusted. See the included exercise guide for important information about how to perform a variety of exercises and how to get the greatest benefit from your exercise program. Inspect and tighten all parts each time you use the weight bench. Replace any worn parts immediately. The weight bench can be cleaned with a damp cloth and a mild, non-abrasive detergent. Do not use solvents. USING THE LOCKING BAR AND SAFETY SPOTTERS Before starting an exercise, position the Barbell (63) and 43 the Safety Spotters (56, 57) in the correct position for that exercise. 43 To do this, stand in front of the cage and grip the Locking Bar (62) with both hands. Turn the Locking Bar until the two hooks disengage the slots in the Uprights (43). Move 59 the Locking Bar to a new position and turn the Locking Bar until the hooks engage the slots in the Uprights. 56 Note: Always start an exercise with the Barbell posi- 62 tioned at the lowest point to which it will move during the exercise. 63 60 Position both Safety Spotters (56, 57) directly under the Weight Gliders (59, 60). 57 USING THE SAFETY SPOTTERS To move a Safety Spotter (56, 57) to a new position, grip the handle on one side of the Spotter Hook (49, 45 [not shown]) and pull the Spotter Hook out of the slot in the Upright (43). Raise or lower the Safety Spotter to a new position and turn the Spotter Hook until it engages one of the slots in the Upright. WARNING: Always set both Safety 56 Spotters (56, 57) at the same height. 43 49 Handle 13
-
 1
1 -
2
-
3
-
4
-
5
-
6
-
7
-
 8
8 -
 9
9 -
 10
10 -
 11
11 -
 12
12 -
 13
13 -
 14
14 -
 15
15 -
 16
16 -
 17
17 -
 18
18 -
19
 |
 |