Insignia IS-HDPLTV42 User Manual (English) - Page 20
Setting the video source, Watching a TV program, Adjusting the volume, Creating a channel list
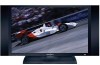 |
View all Insignia IS-HDPLTV42 manuals
Add to My Manuals
Save this manual to your list of manuals |
Page 20 highlights
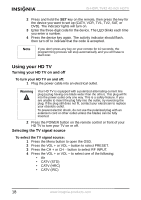
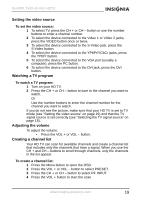
IS-HDPLTV42 42-inch HDTV Setting the video source To set the video source: 1 To select TV, press the CH + or CH - button or use the number buttons to enter a channel number. 2 To select the device connected to the Video 1 or Video 2 jacks, press the VIDEO button once or twice. 3 To select the device connected to the S-Video jack, press the S-Video button. 4 To select the device connected to the YPbPr/YCbCr jacks, press the YPbPr button. 5 To select the device connected to the VGA port (usually a computer), press the PC button. 6 To select the device connected to the DVI jack, press the DVI button. Watching a TV program To watch a TV program: 1 Turn on your HD TV. 2 Press the CH + or CH - button to tune to the channel you want to watch. Or Use the number buttons to enter the channel number for the channel you want to watch. If you do not see the picture, make sure that your HD TV is set to TV mode (see "Setting the video source" on page 19) and that the TV signal source is set correctly (see "Selecting the TV signal source" on page 18). Adjusting the volume To adjust the volume: • Press the VOL + or VOL - button. Creating a channel list Your HD TV can scan for available channels and create a channel list that includes only the channels that have a signal. When you use the CH + and CH - buttons to scroll through channels, only the channels in the list appear. To create a channel list: 1 Press the Menu button to open the OSD. 2 Press the VOL + or VOL - button to select PRESET. 3 Press the CH + or CH - button to select RF INPUT. 4 Press the VOL + button to start the scan. www.insignia-products.com 19
-
 1
1 -
2
-
3
-
4
-
5
-
6
-
7
-
8
-
9
-
10
-
11
-
12
-
13
-
14
-
 15
15 -
 16
16 -
 17
17 -
 18
18 -
 19
19 -
 20
20 -
 21
21 -
 22
22 -
 23
23 -
 24
24 -
 25
25 -
26
-
27
-
28
-
29
-
30
-
31
-
32
-
33
-
34
-
35
-
36
-
37
-
38
-
39
-
40
-
41
-
42
-
43
-
44
-
45
-
46
-
47
-
48
-
49
-
50
-
51
-
52
-
53
-
54
-
55
-
56
-
57
-
58
-
59
-
60
-
61
-
62
-
63
-
64
-
65
-
66
-
67
-
68
-
69
-
70
-
71
-
72
-
73
-
74
-
75
-
76
-
77
-
78
-
79
-
80
-
81
-
82
-
83
-
84
-
85
-
86
-
87
-
88
-
89
-
90
-
91
-
92
-
93
-
94
-
95
-
96
-
97
-
98
-
99
-
100
-
101
-
102
-
103
-
104
-
105
-
106
 |
 |