Intel ISP4400 Quick Start Guide - Page 19
Install Handles, Attach the Front Bezel to the Chassis, Removing the Server from the Rack
 |
View all Intel ISP4400 manuals
Add to My Manuals
Save this manual to your list of manuals |
Page 19 highlights
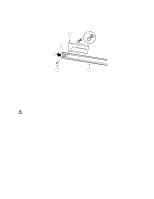
Install Handles The handles attach to the chassis. As an option, you can also attach the handles to the rack. 1. Make sure that you pull the chassis out of the rack until the safety latch snaps into place. 2. As shown in Figure 11, align the inside top and bottom handles with the top and bottom holes of the chassis. OM09999 Figure 11. Handles Aligned with Chassis 3. Place screws in the top and bottom holes on the inside edge of the handle. Tighten both screws to secure the handle to the chassis. 4. If you want to secure the handle to the vertical rack, place screws in the top and bottom holes on the outside edge of the handle. Tighten both screws. Attach the Front Bezel to the Chassis The front bezel attaches to and protects the front of the server. 1. Make sure that you pull the chassis out of the rack until the safety latch snaps into place. 2. Place the front bezel over the front of the chassis. The edge of the bezel should line up with the front edges of the chassis. The ball studs on the back of the bezel fit easily into holes on the front of the server. 3. Gently push the front bezel into the chassis. The front bezel snaps into place. Removing the Server from the Rack 1. Pull the server out until the safety latches on each side lock into place. 2. Make sure that a hand-truck or other mechanical assist unit is placed directly under the server. 3. Depress the safety latches on both sides and simultaneously pull the chassis out of the slide assembly. 4. Pull the hand-truck or other mechanical assist unit out along with the chassis. SRKA4 /ISP4400 Server System 19
-
 1
1 -
2
-
3
-
4
-
5
-
6
-
7
-
8
-
9
-
10
-
11
-
12
-
13
-
 14
14 -
 15
15 -
 16
16 -
 17
17 -
 18
18 -
 19
19 -
 20
20 -
 21
21 -
 22
22 -
 23
23 -
 24
24 -
25
-
26
-
27
-
28
-
29
-
30
-
31
-
32
-
33
-
34
-
35
-
36
 |
 |
