JVC DZ-VCA3U DZ-VCA3U 24-page Instruction Manual - Page 16
HOUR METER] display
 |
View all JVC DZ-VCA3U manuals
Add to My Manuals
Save this manual to your list of manuals |
Page 16 highlights
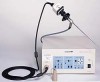
Names of parts and their functions (continued) L MENU-PAGE 2 . PAGE 2 G A MM A E NHANC E ALC L MENU-PAGE 3 . PAGE D . SHAD I NG NR M . B L AC K S YNC HOUR ME T E R 3 0 0 0 3H5 4M [GAMMA] menu Select a gamma correction or no gamma correction. Selected item Gamma 0.43 =0.43 0.45 =0.45 0.47 =0.47 0.49 =0.49 OFF No gamma correction =1.0 [ENHANCE] menu Select the contour compensation value or no-contour compensation. The leftmost on the minus side is the setting for no-contour compensation, and the other 6 levels are for contour compensation. [ALC] menu [ZONE] sub-menu Change the size of the zone where automatic sensitivity control and auto white level detection is performed. Select [FULL], [LARGE], [MEDIUM], or [SMALL] with [LEFT]/[RIGHT] button. [DET] sub-menu Select the level detection method for automatic sensitivity control from peak detection (P), average detection (A), or the combination of both. Use the [LEFT]/[RIGHT] button to select from 5 different levels. The far left is only for peak detection, while the far right is for average detection only. In between there are 3 levels for both peak and average detections. [D.SHADING] menu For correction of dynamic shading. (colour appearing on the screen in vertical direction.) No correction at the centre. ± 7 levels of correction is possible. [GREEN] sub-menu Increase the green gain at the top of the screen by setting the + side. (Reducing the green gain at the bottom of the screen.) Reduce the green gain at the top of the screen by setting the - side. (Increasing the green gain at the bottom of the screen.) [RED] sub-menu Increase the red gain at the top of the screen by setting the + side. (Reducing the red gain at the bottom of the screen.) Reduce the red gain at the top of the screen by setting the - side. (Increasing the red gain at the bottom of the screen.) [NR] menu To set frame-turning type noise reduction. HIGH : Large noise reduction effect. (In frequent moving ob- jects, the shadow may be obvious) LOW : Suppressed noise reduction setting. OFF : Noise reduction is OFF. [M.BLACK] menu Select the master black (setup) value. From the centre with no setup, change of ±3 steps each side at about 7% step is possible. [SYNC] menu Switching between sending GENLOCK basic signal, or input basic signal from other device. [HOUR METER] display Indicates accumulated time of power usage. It cannot be selected with cursor. 16
-
 1
1 -
2
-
3
-
4
-
5
-
6
-
7
-
8
-
9
-
10
-
 11
11 -
 12
12 -
 13
13 -
 14
14 -
 15
15 -
 16
16 -
 17
17 -
 18
18 -
 19
19 -
 20
20 -
 21
21 -
22
-
23
-
24
 |
 |
