JVC FS-G6 Instruction Manual - Page 14
Connecting Other Equipments
 |
View all JVC FS-G6 manuals
Add to My Manuals
Save this manual to your list of manuals |
Page 14 highlights
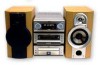
English Continued Connecting Other Equipments You can connect the following equipments to the system: • Audio equipment - used only as an analog playback device. • Audio equipment with an optical digital input terminal - used as a digital recording device. When you connect and use these equipments, refer also to the manuals supplied with them. To connect audio equipment with an optical digital input terminal By using both an optical digital cable (not supplied) and an audio cable (not supplied), connect: • Between the optical digital input terminal on the other equipment and the optical digital output terminal on XTUXG6. • Between the audio output jacks on the other equipment and the ANALOG IN jacks. To connect audio equipment without a digital output terminal Connect the audio output jacks on the other equipment and the ANALOG IN jacks, using an audio cable (not supplied). Be sure that the plugs of the audio cables and the jacks on the rear panel of the unit are color coded: White plugs and jacks are for left audio signals, and red ones for right audio signals. XT-UXG6 (AC wall outlet) To ANALOG IN To DIGITAL OUT • DO NOT connect other equipment while the power is on. • DO NOT plug in any equipment until all connections are complete. To optical digital input XT-UXG6 (AC wall outlet) To ANALOG IN To audio output Protective Plug Before connecting the other equipment, remove the protective plug from the terminal. To audio output on the other equipment • By using audio cable (not supplied), connect between the audio output jacks on the other equipment and the ANALOG IN jacks. NOW, you can plug in the system and other connected equipment FINALLY! When connecting the AC power cord into a wall outlet, the system switches to standby mode with STANDBY/ON lamp lit red. 9
-
 1
1 -
2
-
3
-
4
-
5
-
6
-
7
-
8
-
 9
9 -
 10
10 -
 11
11 -
 12
12 -
 13
13 -
 14
14 -
 15
15 -
 16
16 -
 17
17 -
 18
18 -
 19
19 -
20
-
21
-
22
-
23
-
24
-
25
-
26
-
27
-
28
-
29
-
30
-
31
-
32
-
33
-
34
-
35
-
36
-
37
-
38
-
39
-
40
 |
 |
