JVC GY-HM710U GY-HM710 ProHD Camcorder 141 page owner's manual (includes GY-HM - Page 124
Configuring Setup Files, continued
 |
View all JVC GY-HM710U manuals
Add to My Manuals
Save this manual to your list of manuals |
Page 124 highlights
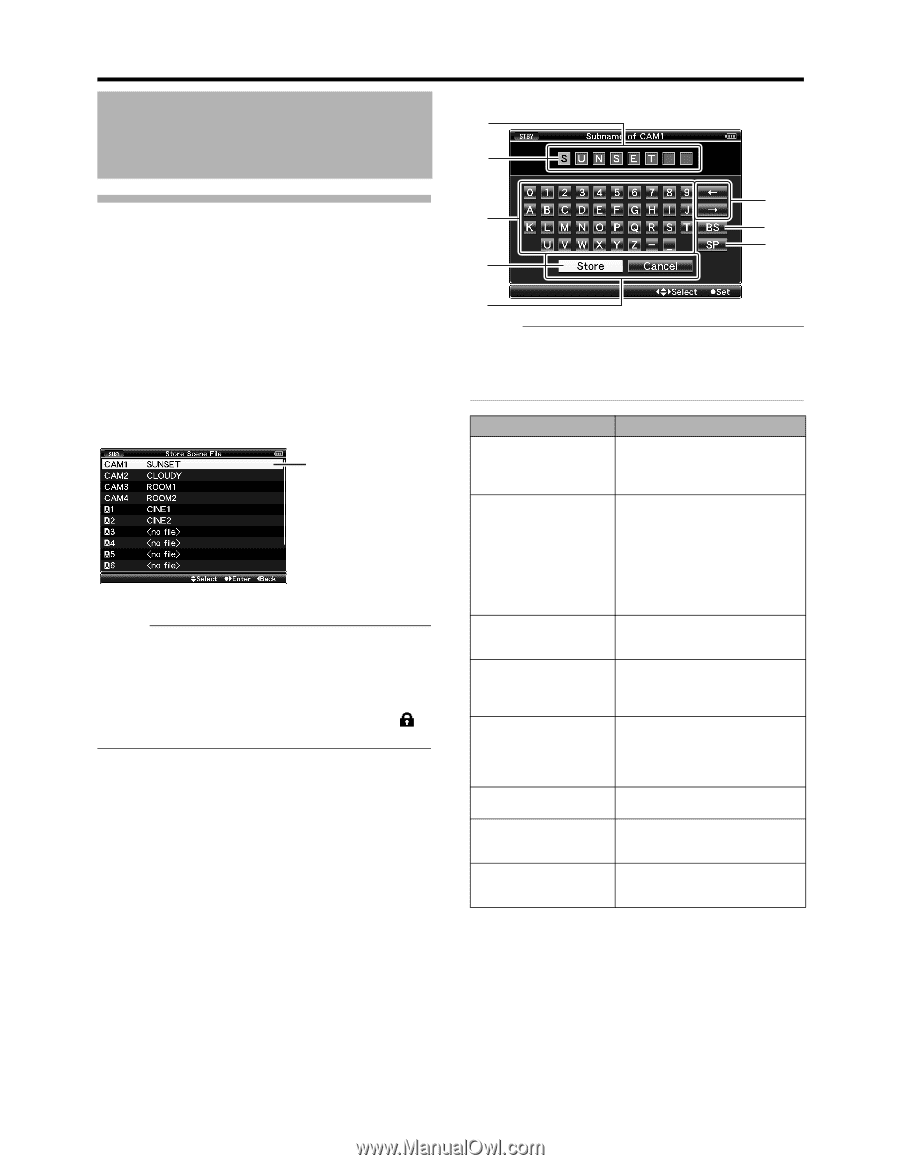
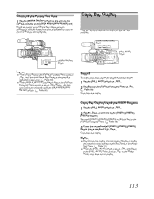
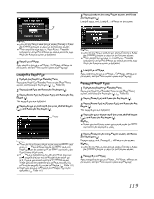
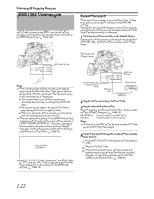
Camera Features Configuring Setup Files (continued) Saving Setup Files 1 Display the [Setup File Manage] menu. Select the [Setup File Manage] menu on the [Main Menu] screen, and press the Set button (R). (A Page 95) 2 Select [Store File] and press the Set button (R). 3 Select [Scene File] or [Picture File], and press the Set button (R). The existing files are displayed. 4 Select the file to be newly saved (or overwritten) using the cross-shaped button (JK), and press the Set button (R). Cursor [Store File] Menu Screen Memo : ● Files cannot be written in the following cases. (Displayed in gray, selection disabled) ● The inserted SDHC card is not supported (those other than SDHC Class 6/10 cards, or unformatted cards). (File name appears as A---B.) ● When a write-protected SDHC card is inserted (a mark appears beside the SDHC card icon.) 5 Name the file. Enter the subname using the software keyboard. � Operating instructions of software keyboard (A Page 71) A B F C G H D E Memo : ● When overwriting an existing file, the subname of the existing file is displayed. ● Select [Cancel] and press the Set button (R), or press the [CANCEL] button to return to the previous screen. Name A Character Entry Field B Character Cursor C Character Keys D Key Cursor E Confirmation Buttons F Arrow Keys G [BS] Backspace Key H [SP] Space Key Description Field for entering the title. You can enter up to 8 characters for the [Scene File]/[Picture File] subname. Select a character using the key cursor D, and press the Set button (R) to input the selected character at the position of the character cursor. The character cursor moves to the next position on the right each time a character is input. The cursor can be moved using the arrow keys F. Use the cross-shaped button (JKH I) to move the key cursor D to the character you want to enter. Indicates the currently selected character or item. Use the crossshaped button (JKH I) to move the cursor. Select [Store] and press the Set button (R) to confirm the title. Select [Cancel] and press the Set button (R) to abort character input and return to the previous screen. Moves the position of the character cursor B. Select [BS] and press the Set button (R) to delete the character on the left of the character cursor B. Select [SP] and press the Set button (R) to enter a space at the current position of the character cursor B. 6 Select [Store] from the confirmation buttons E, and press the Set button (R). A confirmation screen appears. 7 Select [Store] on the confirmation screen, and press the Set button (R). Saving starts, and AStoring...B appears on the screen. 118
-
 1
1 -
2
-
3
-
4
-
5
-
6
-
7
-
8
-
9
-
10
-
11
-
12
-
13
-
14
-
15
-
16
-
17
-
18
-
19
-
20
-
21
-
22
-
23
-
24
-
25
-
26
-
27
-
28
-
29
-
30
-
31
-
32
-
33
-
34
-
35
-
36
-
37
-
38
-
39
-
40
-
41
-
42
-
43
-
44
-
45
-
46
-
47
-
48
-
49
-
50
-
51
-
52
-
53
-
54
-
55
-
56
-
57
-
58
-
59
-
60
-
61
-
62
-
63
-
64
-
65
-
66
-
67
-
68
-
69
-
70
-
71
-
72
-
73
-
74
-
75
-
76
-
77
-
78
-
79
-
80
-
81
-
82
-
83
-
84
-
85
-
86
-
87
-
88
-
89
-
90
-
91
-
92
-
93
-
94
-
95
-
96
-
97
-
98
-
99
-
100
-
101
-
102
-
103
-
104
-
105
-
106
-
107
-
108
-
109
-
110
-
111
-
112
-
113
-
114
-
115
-
116
-
117
-
118
-
 119
119 -
 120
120 -
 121
121 -
 122
122 -
 123
123 -
 124
124 -
 125
125 -
 126
126 -
 127
127 -
 128
128 -
 129
129 -
130
-
131
-
132
-
133
-
134
-
135
-
136
-
137
-
138
-
139
-
140
-
141
 |
 |