JVC GZMC200 Instructions - Page 21
Video Playback, Various Playback Operations, Deleting Video Files
 |
UPC - 046838015694
View all JVC GZMC200 manuals
Add to My Manuals
Save this manual to your list of manuals |
Page 21 highlights
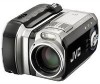
BASIC OPERATIONS EN 21 BASIC OPERATIONS Video Playback INFO Zoom Lever MODE 2 49 Power Switch Lock Button 36 5 1 Set the power switch to while pressing down the lock button located on the switch. 2 Press MODE to select . ● The index screen for videos appears. The image appears on the index screen shows the first part of the shooting. ● To switch the medium to be played back, see pages 26 and 27. 3 Press rt w e to select the video file you want to play back. 4 Press 49 to start playback. 5 To pause playback, press 49 again. To return to the index display Slide the zoom lever to W when playback is paused. To adjust the speaker volume During playback slide the zoom lever towards T to turn up the volume, or towards W to turn down the volume. To turn on/off the on-screen display Press INFO repeatedly. To check the file information Press INFO when playback is paused. Playing back files created on the PC Video files created on the PC are located in the [EXTMOV] folder. (Refer to "SOFTWARE INSTALLATION AND USB CONNECTION GUIDE".) To play these video files, press the recording start/stop button while the index screen is displayed in step 2, and then proceed to step 3 after [MPG] is displayed. ● The fast forward, rewind, slow, frame-by-frame playback, and playlist creation functions are not available for files in the [EXTMOV] folder. NOTES: ● The playback picture can be viewed in the LCD monitor or on a connected TV. (੬ pg. 25) ● At the junctions between scenes, the image may stop momentarily or the sound may be interrupted. However, this is not a malfunction. ● To join scenes cleanly, load the video files into the PC and use the provided software to combine the files. When the combined file is used to record a DVD, it will have the same clean joints between scenes as a commercial DVD. Refer to "How To Create DVDs simply" for more about DVD creation. ● The date and time are not displayed during video playback. The recording start date and time can be checked in the file information by pressing INFO when playback is paused. ● When a cable is connected to the AV connector, the sound is not heard from the speaker or headphones. Various Playback Operations High-speed search Press 3 or 5 during playback. ● Each press of the button increases the search speed for each direction. (-60x to +60x) Locating the start point of the file or skip the file Press 2 or 6 during playback or pause mode. Frame-by-frame playback Press 3 or 5 during pause mode. ● Each press of the button advances/reverses the still picture frame by frame. Slow motion playback Press 3 or 5 for 2 or more seconds during pause mode. Deleting Video Files Press , then press rt to select [EXECUTE] and press 49. ● You can select the desired file to be deleted by pressing w e. ● To delete multiple files at once, see pages 26 and 29.
-
 1
1 -
2
-
3
-
4
-
5
-
6
-
7
-
8
-
9
-
10
-
11
-
12
-
13
-
14
-
15
-
 16
16 -
 17
17 -
 18
18 -
 19
19 -
 20
20 -
 21
21 -
 22
22 -
 23
23 -
 24
24 -
 25
25 -
 26
26 -
27
-
28
-
29
-
30
-
31
-
32
-
33
-
34
-
35
-
36
-
37
-
38
-
39
-
40
-
41
-
42
-
43
-
44
 |
 |
