Kenmore 7531 Use and Care Guide - Page 9
Electrical
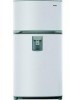 |
View all Kenmore 7531 manuals
Add to My Manuals
Save this manual to your list of manuals |
Page 9 highlights
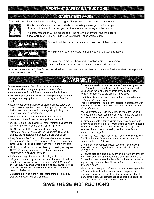
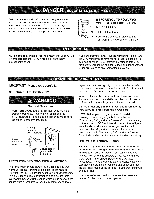
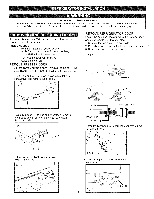
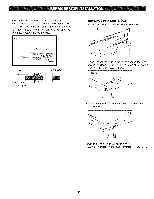
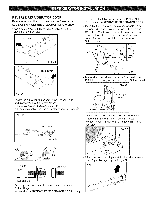
ELECTRICASLHOCK HAZARD Before you begin, either unplug the refrigerator or turn off power at the circuit breaker or fuse box. Remove food and any Adjustable Door or Utility Bins from doors. Failure to do so could result in death or serious injury. If entrance is less than 35-inches wide, the refrigerator's doors will need to be removed. TOOLS NEEDED: • 10mm or 13/32-inch socket wrench (with 2-inch extension for bottom door hinge) - No. 2 Phillips head screwdriver • Flat-head screwdriver for prying • Adjustable wrench REMOVE FREEZER DOOR Before removing the doors, remove the Base Grille. See BASE GRILLE INSTALLATION for reference. Gently pry off the Top Hinge Cover with a flat head screwdriver and remove (see Fig 1). Fig. 1 REMOVE REFRIGERATOR DOOR • Locate the quick connector next to the Bottom Hinge and disassemble with the next steps: 1. Remove locking clipQ and set aside. 2. Press back coflet and pull out water connection tube (Z). 3. Remove connector and set aside. Fig. 4 i i i i i i i I j_ I Using lOmm or 13/32-inch socket wrench, remove the 3 bolts and lift off the Top Hinge (see Fig. 2). Set parts aside. I Fig. 2 Collet. Insert lines Locking clip-- o Carefully disconnect wire harness connectors next to Bottom Hinge. Lift freezer door slightly and remove it. (Fig. 3). Set aside. Fig. 3 Fig. 5 ° Using an adjustable wrench remove Bottom Nut. '_ Fig. 6 ._ BottomNut
-
 1
1 -
2
-
3
-
 4
4 -
 5
5 -
 6
6 -
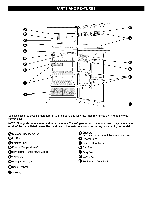 7
7 -
 8
8 -
 9
9 -
 10
10 -
 11
11 -
 12
12 -
 13
13 -
 14
14 -
15
-
16
-
17
-
18
-
19
-
20
-
21
-
22
-
23
-
24
-
25
-
26
-
27
-
28
-
29
-
30
-
31
-
32
-
33
-
34
 |
 |
