Kenwood DNR8025BT Quick Start Guide - Page 7
First Step
 |
View all Kenwood DNR8025BT manuals
Add to My Manuals
Save this manual to your list of manuals |
Page 7 highlights
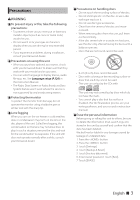
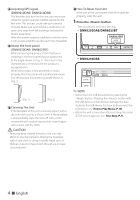
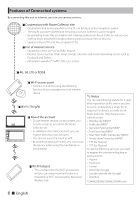
First Step Power on the unit and perform some setup steps before using. 1 Press the button. DNN9250DAB/DNR8025BT 2 Touch the corresponding key and set the item. DNR8025BT DNN6250DAB HOME 6 The unit is turned on. ✎✎NOTE • "Initial setup" also appears when the unit is reset. Language Setup Select the language used for the GUI and input methods. Default is "English (United States)". 1) Touch [Language Setup]. 2) Select a language from the list. WiFi Setup Configure settings for connection to Wi-Fi. 1) Touch [WiFi Setup]. 2) Slide Wi-Fi to ON. 3) Select the Wi-Fi access point to register from the list. 4) Enter the Password. 5) Touch [Connect]. After setting, press the < 6 > button. Date Setup Set the date and time. 1) Touch [Date Setup]. 2) Touch [Select time zone]. 3) Select a time zone. After setting, press the < 6 > button. Account Setup Set the information about the user of this unit. 1) Touch [Account Setup]. See Types of accounts, Create User Account and Set Owner Account. English ñ 7
-
 1
1 -
 2
2 -
 3
3 -
 4
4 -
 5
5 -
 6
6 -
 7
7 -
 8
8 -
 9
9 -
 10
10 -
 11
11 -
 12
12 -
13
-
14
-
15
-
16
-
17
-
18
-
19
-
20
-
21
-
22
-
23
-
24
-
25
-
26
-
27
-
28
-
29
-
30
-
31
-
32
-
33
-
34
-
35
-
36
-
37
-
38
-
39
-
40
-
41
-
42
-
43
-
44
 |
 |
