Kenwood TS-590SG Operation Manual - Page 49
Rejecting Interference, Auto Notch Filter Ssb, Manual Notch Filter Ssb/ Cw/ Fsk, Beat Cancel Ssb/ Am
 |
View all Kenwood TS-590SG manuals
Add to My Manuals
Save this manual to your list of manuals |
Page 49 highlights
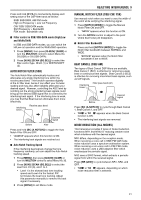
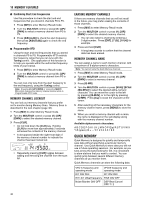
Press and hold [IF FIL] to momentarily display each setting value of the DSP filter band as follows: SSB/ SSB-DATA, AM/ FM mode: High cut Frequency > Low cut Frequency CW/ SSB/ SSB-DATA mode: Shift Frequency > Bandwidth FSK mode: Bandwidth only ■ Filter control in SSB/ SSB-DATA mode (High/Low and Width/Shift) In SSB and SSB-DATA modes, you can switch the Hi/Low cut operation and the Width/Shift operation. 1 Press [MENU], then press [Q-M.IN]/ [Q-MR] or turn the MULTI/CH control to select Menu No. 28 (SSB) or 29 (SSB-DATA). 2 Press [M.IN]/ [SCAN (SG.SEL)] to select the filter control type HI/LO (1) or WIDTH/SHIFT (2). AUTO NOTCH FILTER (SSB) The Auto Notch filter automatically locates and attenuates any single interfering tone within the receive pass band. This function operates digitally at the IF filter level, hence it can affect your S-meter reading and may also affect (slightly attenuate) your desired signal. However, controlling the AGC level by notching out the strong interfering beat signals could bring up the desired SSB signal that is covered by the interfering beat signal. If the interfering tone is weak, you may find that Beat Cancel eliminates them more effectively. Interfering tones Receive pass band Desired signal Before After Press and hold [BC (A.NOTCH)] to toggle the Auto Notch Filter ON and OFF. • " " appears when this function is ON. • The interfering beat signals are notched out. ■ Auto Notch Tracking Speed If the interfering beat signals change the tone frequency randomly, you can adjust the Auto Notch tracking speed. 1 Press [MENU], then press [Q-M.IN]/ [Q-MR] or turn the MULTI/CH control to select Menu No. 30. 2 Press [M.IN]/ [SCAN (SG.SEL)] to select the level from FIX (0), and 1 to 4. • Level 1 is the slowest beat tone tracking speed and Level 4 is the fastest. FIX terminates the beat tone tracking. Adjust this parameter manually to remove the beat signal if necessary. 3 Press [MENU] to exit Menu mode. REJECTING INTERFERENCE 9 MANUAL NOTCH FILTER (SSB/ CW/ FSK) Use manual notch when you want to vary the width of the notch while verifying the interfering signal. 1 Press [NOTCH (WIDE)] to toggle the Manual Notch Filter ON and OFF. • " " appears when this function is ON. 2 Turn the NOTCH control to adjust to the point where beat noise just disappears. ■ Notch Filter Bandwidth Press and hold [NOTCH (WIDE)] to toggle the Notch filter bandwidth between NORMAL and WIDE. • " " appears when the Notch filter bandwidth is set to WIDE. BEAT CANCEL (SSB/ AM) Two types of Beat Cancel DSP filters are available. Beat Cancel 1 (BC1) is effective for removing a weak beat or continuous beat signals. Beat Cancel 2 (BC2) is effective for removing intermittent beat signals, such as CW signals. Interfering tones Filter pass band (AF) Desired signal Before After Press [BC (A.NOTCH)] to cycle through Beat Cancel 1, Beat Cancel 2, and OFF. • " " or " " appears when the Beat Cancel function is ON. • The interfering beat signals are removed. NOISE REDUCTION (ALL MODES) This transceiver provides 2 types of Noise Reduction functions (NR1 and NR2) for reducing random noise which interferes with the desired signal. NR1 differs, depending on the reception mode. When receiving a voice call in SSB/ FM/ AM mode, noise reduction uses a spectrum subtraction system. When receiving a non-voice call in CW/ FSK mode, noise reduction uses a LMS adaptive filter which emphasizes the periodic signal. NR2 uses a SPAC format, which extracts a periodic signal from within the received signal. Press [NR (LEV)] to cycle between NR1, NR2, and OFF. • " " or " " appears, depending on which noise reduction filter is selected. 41
-
 1
1 -
2
-
3
-
4
-
5
-
6
-
7
-
8
-
9
-
10
-
11
-
12
-
13
-
14
-
15
-
16
-
17
-
18
-
19
-
20
-
21
-
22
-
23
-
24
-
25
-
26
-
27
-
28
-
29
-
30
-
31
-
32
-
33
-
34
-
35
-
36
-
37
-
38
-
39
-
40
-
41
-
42
-
43
-
 44
44 -
 45
45 -
 46
46 -
 47
47 -
 48
48 -
 49
49 -
 50
50 -
 51
51 -
 52
52 -
 53
53 -
 54
54 -
55
-
56
-
57
-
58
-
59
-
60
-
61
-
62
-
63
-
64
-
65
-
66
-
67
-
68
-
69
-
70
-
71
-
72
-
73
-
74
-
75
-
76
-
77
-
78
-
79
-
80
-
81
-
82
-
83
-
84
-
85
-
86
-
87
-
88
-
89
-
90
-
91
-
92
-
93
-
94
-
95
-
96
-
97
-
98
-
99
-
100
 |
 |
