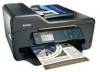
Kodak ESP9 Wireless Network Setup Guide - Page 6
Push Button Configuration, Entering a PIN, Generate WPS
 |
UPC - 041771349479
View all Kodak ESP9 manuals
Add to My Manuals
Save this manual to your list of manuals |
Page 6 highlights
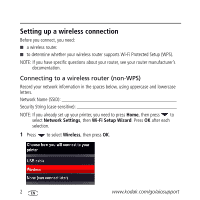
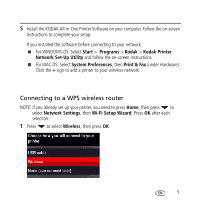
2 With WPS Connect selected, press OK. 3 Select one of the following two methods of connecting: IMPORTANT: Before you press OK on the printer, make sure you know where the router's button is, or where to enter the generated PIN. Push Button Configuration Entering a PIN NOTE: You will have two minutes to press a Press to select Generate WPS or select the WPS button. It may be PIN, then press OK. a button on the device or a virtual b In your wireless router's software, button in the device's software. locate the PIN screen. a With Push Button Configuration selected, press OK. c Enter the PIN you received from the LCD into the PIN screen. b Press or select the WPS button for your wireless router. 6 www.kodak.com/go/aiosupport
-
 1
1 -
 2
2 -
 3
3 -
 4
4 -
 5
5 -
 6
6 -
 7
7
 |
 |

6
www.kodak.com/go/aiosupport
2
With
WPS Connect
selected, press
OK
.
3
Select one of the following two methods of connecting:
IMPORTANT: Before you press
OK
on the printer, make sure you know where the
router's button is, or where to enter the generated PIN.
Push Button Configuration
Entering a PIN
NOTE: You will have two minutes to press
or select the WPS button. It may be
a button on the device or a virtual
button in the device’s software.
a
With
Push Button Configuration
selected, press
OK
.
b
Press or select the WPS button for your
wireless router.
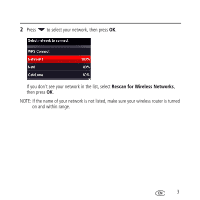
a
Press
to select
Generate WPS
PIN
, then press
OK
.
b
In your wireless router’s software,
locate the PIN screen.
c
Enter the PIN you received from the
LCD into the PIN screen.