Konica Minolta Kodak i1440 User Guide - Page 12
Attaching the input and output trays
 |
View all Konica Minolta Kodak i1440 manuals
Add to My Manuals
Save this manual to your list of manuals |
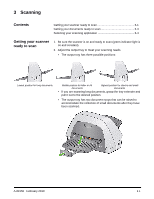
Page 12 highlights
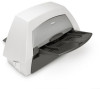
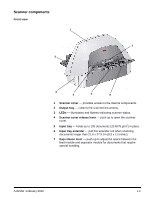
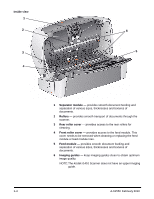
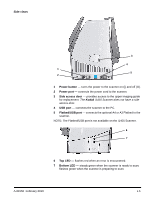
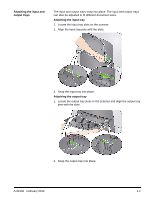
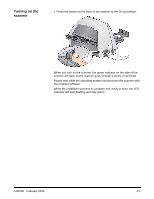
Attaching the input and output trays The input and output trays snap into place. The input and output trays can also be adjusted to fit different document sizes. Attaching the input tray 1. Locate the input tray slots on the scanner. 2. Align the input tray pins with the slots. 3. Snap the input tray into place. Attaching the output tray 1. Locate the output tray slots on the scanner and align the output tray pins with the slots. 2. Snap the output tray into place. A-61550 February 2010 2-3
-
 1
1 -
2
-
3
-
4
-
5
-
6
-
 7
7 -
 8
8 -
 9
9 -
 10
10 -
 11
11 -
 12
12 -
 13
13 -
 14
14 -
 15
15 -
 16
16 -
 17
17 -
18
-
19
-
20
-
21
-
22
-
23
-
24
-
25
-
26
-
27
-
28
-
29
-
30
-
31
-
32
-
33
-
34
-
35
-
36
-
37
-
38
-
39
-
40
-
41
-
42
-
43
-
44
-
45
-
46
-
47
-
48
-
49
-
50
-
51
-
52
-
53
-
54
-
55
-
56
-
57
-
58
-
59
 |
 |

A-61550
February 2010
2-3
Attaching the input and
output trays
The input and output trays snap into place. The input and output trays
can also be adjusted to fit different document sizes.
Attaching the input tray
1.
Locate the input tray slots on the scanner.
2.
Align the input tray pins with the slots.
3.
Snap the input tray into place.
Attaching the output tray
1.
Locate the output tray slots on the scanner and align the output tray
pins with the slots.
2.
Snap the output tray into place.