Konica Minolta bizhub 363 bizhub 423/363/283/223 Advanced Function Operations - Page 59
Reading a document, Scanning a document - scanning multi pages using glass
 |
View all Konica Minolta bizhub 363 manuals
Add to My Manuals
Save this manual to your list of manuals |
Page 59 highlights
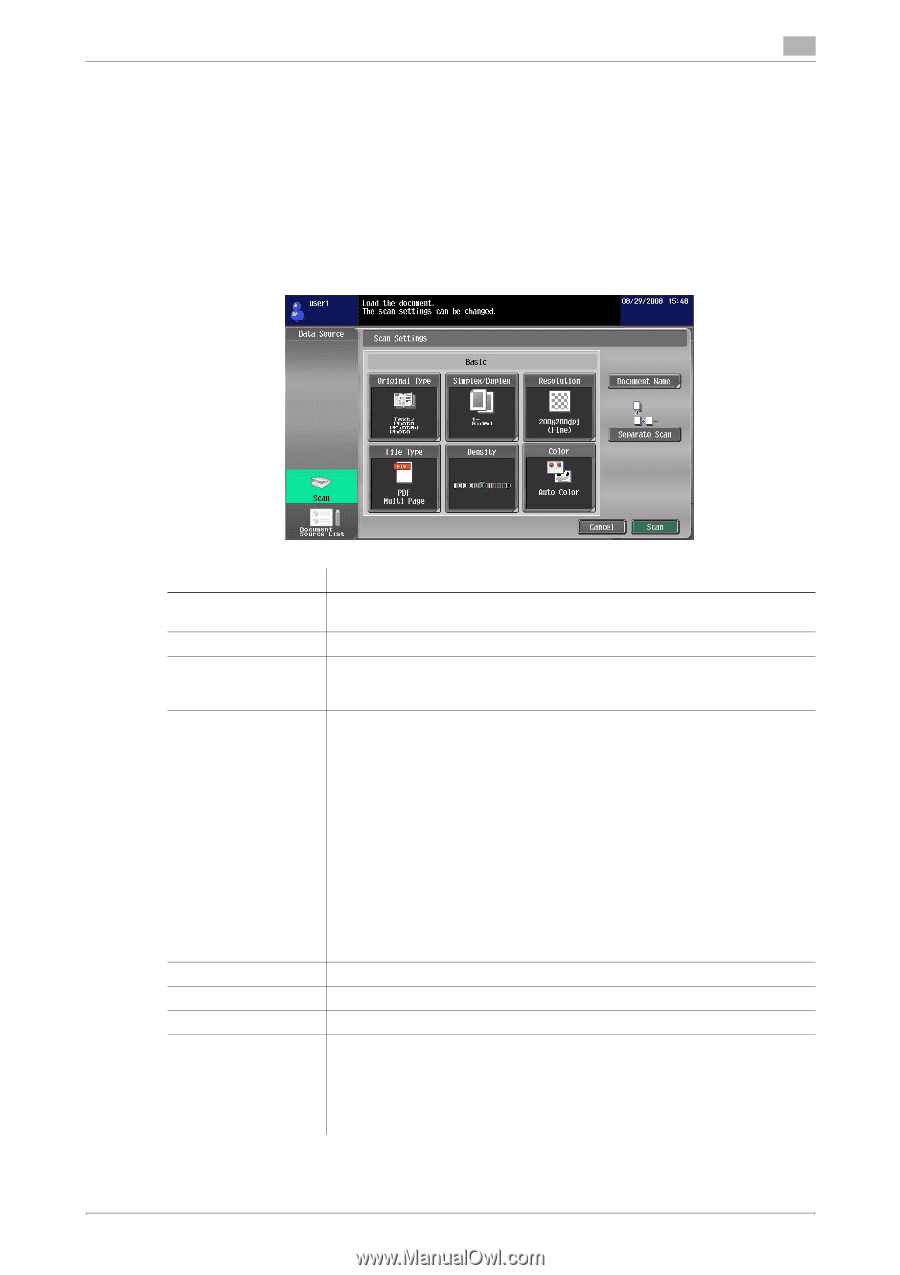
6.3 Operating Image Panel 6 6.3.3 Reading a document Scan a document, retrieve a document from a User Box or external memory, and send data from a cellular phone or PDA. Scanning a document Press [Scan] to display the Scan Settings screen. Configure the scan settings as needed, and then press [Scan]. Reference - Only one document can be scanned. Item [Original Type] [Simplex/Duplex] [Resolution] [File Type] [Density] [Color] [Document Name] [Separate Scan] Description Select the image quality from [Text], [Text/Photo], [Photo], [Dot Matrix Original] and [Copied Paper] according to the contents of the original to be scanned. Select either to scan a 1-sided original or 2-sided original. Select the scan resolution from [200 e 100dpi (Standard)], [200 e 200dpi (Fine)], [300 e 300dpi], [400 e 400dpi (Super Fine)] and [600 e 600dpi (Ultra Fine)]. Select a file type from [PDF], [Compact PDF], [TIFF], [JPEG], [XPS] and [Compact XPS]. Select whether to save the whole scanned pages as one file, or to divide a file in specified number of pages in order to save data. You cannot select [Multi Page] if [JPEG] is selected for file type. To send divided files by attaching them to an E-mail, specify [E-mail Attachment Method]. Select [All Files Sent as one (1) E-mail] to attach all divided files to one E-mail message. Select [One (1) File per E-Mail] to send E-mail messages for each divided file. Selecting [Compact PDF] for file type allows you to specify [Outline PDF]. If either i-Option LK-102 or i-Option LK-103 v2 is registered in the MFP, selecting [PDF] or [Compact PDF] for file type allows you to specify [Encryption] and [PDF Document Properties]. For details on the function, refer to page 7-2. If i-Option LK-105 is registered in the MFP, selecting [PDF] or [Compact PDF] for the file type allows you to specify [Searchable PDF]. For details on the function, refer to page 8-2. Adjust the density for scanning. Select the scan color from [Auto Color], [Full Color], [Gray Scale] and [Black]. Specify the document name. Press this button to divide scanning of the document into several times. It is useful for the following cases. • When the number of pages of a document is too many, and it cannot be loaded into the ADF • When placing the originals on the original glass • When 1-sided originals and 2-sided originals are mixed bizhub 423/363/283/223 6-7
-
 1
1 -
2
-
3
-
4
-
5
-
6
-
7
-
8
-
9
-
10
-
11
-
12
-
13
-
14
-
15
-
16
-
17
-
18
-
19
-
20
-
21
-
22
-
23
-
24
-
25
-
26
-
27
-
28
-
29
-
30
-
31
-
32
-
33
-
34
-
35
-
36
-
37
-
38
-
39
-
40
-
41
-
42
-
43
-
44
-
45
-
46
-
47
-
48
-
49
-
50
-
51
-
52
-
53
-
 54
54 -
 55
55 -
 56
56 -
 57
57 -
 58
58 -
 59
59 -
 60
60 -
 61
61 -
 62
62 -
 63
63 -
 64
64 -
65
-
66
-
67
-
68
-
69
-
70
-
71
-
72
-
73
-
74
-
75
-
76
-
77
-
78
-
79
-
80
-
81
-
82
-
83
-
84
-
85
-
86
-
87
-
88
-
89
-
90
-
91
-
92
-
93
-
94
-
95
-
96
-
97
-
98
-
99
-
100
-
101
-
102
-
103
-
104
-
105
-
106
-
107
-
108
-
109
-
110
-
111
-
112
 |
 |