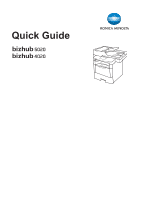
Konica Minolta bizhub 5020i bizhub 5020i/4020i Quick Guide
Konica Minolta bizhub 5020i Manual
 |
View all Konica Minolta bizhub 5020i manuals
Add to My Manuals
Save this manual to your list of manuals |
Konica Minolta bizhub 5020i manual content summary:
- Konica Minolta bizhub 5020i | bizhub 5020i/4020i Quick Guide - Page 1
Quick Guide - Konica Minolta bizhub 5020i | bizhub 5020i/4020i Quick Guide - Page 2
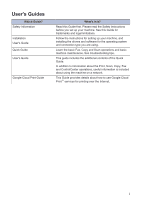
. Follow the instructions for setting up your machine, and installing the drivers and software for the operating system and connection type you are using. Learn the basic Fax, Copy and Scan operations and basic machine maintenance. See troubleshooting tips. This guide includes the additional - Konica Minolta bizhub 5020i | bizhub 5020i/4020i Quick Guide - Page 3
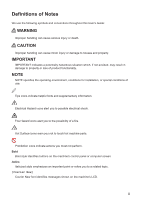
Definitions of Notes We use the following symbols and conventions throughout this User's Guide: WARNING Improper handling can cause serious injury or death. CAUTION Improper handling can cause minor injury or damage to houses and property. IMPORTANT IMPORTANT indicates a - Konica Minolta bizhub 5020i | bizhub 5020i/4020i Quick Guide - Page 4
Note User's Guide may not be reproduced in part or in full without permission. KONICA MINOLTA, INC. will not be held liable for any incidents caused by using this printing system or User's Guide. Information included in User's Guide is subject to change without notice. iii - Konica Minolta bizhub 5020i | bizhub 5020i/4020i Quick Guide - Page 5
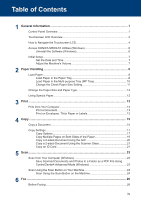
Table of Contents 1 General Information 1 Control Panel Overview 1 Touchscreen LCD Overview 3 How to Navigate the Touchscreen LCD 4 Access KONICA MINOLTA Utilities (Windows 6 Uninstall the Software (Windows 6 Initial Setup...7 Set the Date and Time 7 Adjust the Machine's Volume 7 2 Paper - Konica Minolta bizhub 5020i | bizhub 5020i/4020i Quick Guide - Page 6
or Delete Address Book Names or Numbers 32 Telephone Services and External Devices 33 Voice Mail ...33 Distinctive Ring Troubleshooting 38 Identify the Problem 38 Error and Maintenance Messages 38 Fax and Telephone Problems 44 Troubleshooting for Other Fax Problems 45 Print or Scan Problems - Konica Minolta bizhub 5020i | bizhub 5020i/4020i Quick Guide - Page 7
1 General Information Control Panel Overview 1 General Information 1. ID Card Reader (available only for bizhub 5020i) You can use card authentication by touching the ID card to the Reader on the control panel. 2. Touchscreen Liquid Crystal Display (LCD) Access menus - Konica Minolta bizhub 5020i | bizhub 5020i/4020i Quick Guide - Page 8
When the WiFi light is on, your machine is connected to a wireless access point. When the WiFi light blinks, the wireless connection is down, or your machine is in the process of connecting to a wireless access point. (For Ad-Hoc mode) The WiFi LED is always off. 2 - Konica Minolta bizhub 5020i | bizhub 5020i/4020i Quick Guide - Page 9
1 General Information Touchscreen LCD Overview You can select from two types of screens to set the Home screen: Function screens and Shortcuts screen. When a Function screen is displayed, swipe left or right or press d or c to display the other Function screens. The Home screen displays the machine - Konica Minolta bizhub 5020i | bizhub 5020i/4020i Quick Guide - Page 10
life. Press to access the [Toner] menu. 4. (Settings) Press to access the [Settings] menu. If Setting Lock has been turned on, a lock icon appears on the LCD. You must unlock the - Konica Minolta bizhub 5020i | bizhub 5020i/4020i Quick Guide - Page 11
1 General Information 2 Press [All Settings]. 3 Swipe up or down or press a or b to display the [General Setup] option, and then press [General Setup]. 7 Press . 4 Swipe up or down or press a or b to display the [LCD Settings] option, and then press [LCD Settings]. 5 Press [Backlight]. 6 Press [ - Konica Minolta bizhub 5020i | bizhub 5020i/4020i Quick Guide - Page 12
your machine. Uninstall the Software (Windows) 1 Launch Utilities). (KONICA MINOLTA 2 Click the drop-down list, and then select your model name (if not already selected). Click Tools in the left navigation bar, and then click Uninstall. Follow the instructions in the dialog box to uninstall the - Konica Minolta bizhub 5020i | bizhub 5020i/4020i Quick Guide - Page 13
Initial Setup Set the Date and Time 1 Press [Settings] > [All Settings] > [Initial Setup] > [Date & Time] > [Date]. 2 Enter the last two digits of the year using the LCD, and then press [OK]. 3 Enter the two digits for the month using the LCD, and then press [OK]. 4 Enter the two digits for the day - Konica Minolta bizhub 5020i | bizhub 5020i/4020i Quick Guide - Page 14
paper size. Change the paper size and paper type settings if needed, following the on-screen instructions. • When you load a different size and type of paper in the tray, you must with a release lever: 2 2 Press and slide the paper guides to fit the paper. Press the release levers to slide the paper - Konica Minolta bizhub 5020i | bizhub 5020i/4020i Quick Guide - Page 15
the front of the paper tray For automatic 2-sided printing (long edge binding) 6 Slowly push the paper tray completely into the machine. 7 Lift the support flap to prevent paper from sliding off the output tray. • face up • bottom edge toward the front of the paper tray • DO NOT load different - Konica Minolta bizhub 5020i | bizhub 5020i/4020i Quick Guide - Page 16
to prevent paper from sliding off the face down output tray. 3 Pull out the MP tray support (1) and unfold the flap (2). 2 1 4 Slide the MP tray paper guides to fit the width of the paper you are using. If the paper guide on the right side has a lever, press it and slide the paper - Konica Minolta bizhub 5020i | bizhub 5020i/4020i Quick Guide - Page 17
when you remove a paper tray or load paper using the MP tray, asking if you changed the paper size and paper type. The default setting is On. 1 Press [Settings] > [All Settings] > [General Setup] > [Tray Setting] > [Check Size]. 2 Press [On] or [Off]. 3 Press . Related Information • Print on - Konica Minolta bizhub 5020i | bizhub 5020i/4020i Quick Guide - Page 18
finish • that is damaged, creased or folded • that exceeds the recommended weight specification in this guide • with tabs and staples • with letterheads using low temperature dyes or thermography • that is multipart machine. This damage is not covered under any warranty or service agreement. 12 - Konica Minolta bizhub 5020i | bizhub 5020i/4020i Quick Guide - Page 19
3 Print Print from Your Computer Print a Document For labels, thick paper, and envelopes, set the paper size and paper type in the printer before printing the document. 1 From the document that you are trying to print, open the Print dialog. 2 If necessary, adjust the settings. 3 Print the - Konica Minolta bizhub 5020i | bizhub 5020i/4020i Quick Guide - Page 20
the MP tray and lower it gently. 6 Load paper or labels in the MP tray. 1 1 4 Pull out the MP tray support (1) and unfold the flap (2). 2 1 5 Slide the MP tray paper guides to fit the width of the paper that you are using. If • Make sure the paper is below the maximum paper - Konica Minolta bizhub 5020i | bizhub 5020i/4020i Quick Guide - Page 21
4 Copy 4 Copy Copy a Document 1 Make sure you have loaded the correct size paper in the paper tray. 2 Do one of the following: • Place the document face up in the ADF. (If you are copying multiple pages, we recommend using the ADF.) • Place the document face down on the scanner glass. 3 Press [ - Konica Minolta bizhub 5020i | bizhub 5020i/4020i Quick Guide - Page 22
• Current setting indications Press the following icons to change these settings for the next copy only. - [Enlarge/Reduce] - [2-sided Copy] - [Density] - [Tray Use] 5 Press [Start]. To stop copying, press . 16 - Konica Minolta bizhub 5020i | bizhub 5020i/4020i Quick Guide - Page 23
4 Copy Copy Settings Copy Options To change Copy settings, press [Options]. Menu selections Quality Enlarge/Reduce Density Contrast Stack/Sort Options Select the copy quality for your type of document. 100% - Enlarge Select an enlargement ratio for the next copy. Reduce Select a - Konica Minolta bizhub 5020i | bizhub 5020i/4020i Quick Guide - Page 24
2-sided Copy Select to copy on both sides of the paper. 1-sided → 2-sided 1 1 2 2 2-sided → 2-sided 1 1 2 2 2-sided Copy Page Layout (available only for bizhub 5020i) Tray Use Save as Shortcut The available options will vary depending on your model. Select long edge binding or short edge - Konica Minolta bizhub 5020i | bizhub 5020i/4020i Quick Guide - Page 25
4 Copy Copy Multiple Pages on Both Sides of the Paper • You must choose a layout option before you can start 2-sided copying. Portrait 1-sided to 2-sided (Long Edge Flip) 1 1 2 2 1-sided to 2-sided (Short Edge Flip) 1 1 2 2 2 Landscape 1-sided to 2-sided (Long Edge Flip) 1 1 2 1-sided to 2- - Konica Minolta bizhub 5020i | bizhub 5020i/4020i Quick Guide - Page 26
side and eject the paper, and then pull the paper back in to print the second side. Copy a 2-sided Document Using the ADF Related Models: bizhub 5020i When you use the ADF to copy a 2-sided document, you can make 2-sided copies automatically. 1 Make sure you have loaded the correct size paper - Konica Minolta bizhub 5020i | bizhub 5020i/4020i Quick Guide - Page 27
4 Copy Copy a 2-sided Document Using the Scanner Glass Related Models: bizhub 4020i • To copy a 2-sided document using the scanner glass, you must scan both sides of the document manually. Copy an ID Card Use the [2 in 1 ID Copy] feature to copy both sides of an identification card onto one page, - Konica Minolta bizhub 5020i | bizhub 5020i/4020i Quick Guide - Page 28
5 After the machine has scanned the first side, turn over the identification card. 6 Press [Continue] to scan the other side. 22 - Konica Minolta bizhub 5020i | bizhub 5020i/4020i Quick Guide - Page 29
ControlCenter4 Advanced Mode (Windows) Scan documents and save them to a folder on your computer as PDF files. 2 Click Start > All Programs > KONICA MINOLTA > KONICA MINOLTA Utilities, and then click the drop-down list and select your model name (if not already selected). Click Scan in the left - Konica Minolta bizhub 5020i | bizhub 5020i/4020i Quick Guide - Page 30
machine scans the document and saves the file in the folder you have selected. The folder opens automatically. For more detailed information, see the User's Guide: Scan from Your Computer. 1 Do one of the following: • Place the document face up in the ADF. (If you are scanning multiple pages, we - Konica Minolta bizhub 5020i | bizhub 5020i/4020i Quick Guide - Page 31
to a folder on your computer. For other Scan options, see the User's Guide: Scan Using the Scan Button on Your Machine. 4 Press . 5 If settings, press [Options], and then go to the next step. • To use the default settings, press [Start]. The machine scans the document. 7 Select the scan settings - Konica Minolta bizhub 5020i | bizhub 5020i/4020i Quick Guide - Page 32
6 Fax Before Faxing Set Your Station ID Set the machine to print your Station ID and the fax's date and time at the top of each fax you send. 1 Press [Settings] > [All Settings] > [Initial Setup] > [Station ID] > [Fax]. 2 Enter your fax number (up to 20 digits) using the LCD, and then press [OK]. 3 - Konica Minolta bizhub 5020i | bizhub 5020i/4020i Quick Guide - Page 33
Problems sending and receiving faxes due to possible interference on the telephone line may be solved by reducing the modem speed to minimize errors in fax transmission. If you are using a Voice over IP (VoIP) service Telephones. Manual Mode ([Manual] in the machine's menu) Manual Mode turns - Konica Minolta bizhub 5020i | bizhub 5020i/4020i Quick Guide - Page 34
a message on the external TAD. Related Information • Choose the Correct Receive Mode on page 29 • External and Extension Telephones on page 33 • Fax and Telephone Problems on page 44 28 - Konica Minolta bizhub 5020i | bizhub 5020i/4020i Quick Guide - Page 35
this product, different telephone companies may have other names for this service, such as Custom Ringing, RingMaster, Personalized Ring, Teen Ring, Fax/Tel Mode. • Do you expect to receive very few faxes? Choose [Manual] as your receive mode. You control the telephone line and must answer every - Konica Minolta bizhub 5020i | bizhub 5020i/4020i Quick Guide - Page 36
3 Press . Related Information • Receive Modes on page 27 • Voice Mail on page 33 • Distinctive Ring on page 33 • Connection of an External Telephone Answering Device (TAD) on page 33 • Fax and Telephone Problems on page 44 30 - Konica Minolta bizhub 5020i | bizhub 5020i/4020i Quick Guide - Page 37
Set the F/T Ring Time (Pseudo/Double-ring) When you set the Receive Mode to Fax/Tel Mode, if the call is a fax, your machine will automatically receive it. However, if it is a voice call, the machine will sound the F/T ring (pseudo/double-ring) for the time you set in the F/T Ring Time option. When - Konica Minolta bizhub 5020i | bizhub 5020i/4020i Quick Guide - Page 38
Store Numbers Store fax and telephone numbers in the machine for quick dialing and broadcasting faxes to groups. When you dial a stored number, the LCD displays the number. If you lose electrical power, the Address Book numbers that are in the machine's memory will not be lost. Store Address Book - Konica Minolta bizhub 5020i | bizhub 5020i/4020i Quick Guide - Page 39
For more information about each topic, see the User's Guide. Voice Mail If you have Voice Mail service and your machine on the same line, they will must either put this machine in Manual Mode or subscribe to your telephone company's Distinctive Ring service. Connection of an External Telephone - Konica Minolta bizhub 5020i | bizhub 5020i/4020i Quick Guide - Page 40
Send and Receive a Fax Using Your Machine Send a Fax 1 Do one of the following: • Place the document face up in the ADF. (If you are faxing multiple pages, we recommend using the ADF.) • Place the document face down on the scanner glass. 2 Press [Fax]. 3 Enter the fax number. • Using the dial - Konica Minolta bizhub 5020i | bizhub 5020i/4020i Quick Guide - Page 41
4 Press [Fax Start]. The machine scans and sends the document. If you placed the document on the scanner glass, follow the instructions in the table. Option Description Yes To scan the next page, press the Yes option, and then place the next page on the scanner glass. - Konica Minolta bizhub 5020i | bizhub 5020i/4020i Quick Guide - Page 42
see the User's Guide: PC-FAX for Windows. 1 From your application select File, and then Print. (The steps may vary depending on your application.) The Print dialog box appears. 2 Select KONICA MINOLTA XXXX PCFAX (where to the recipient. Contact the application's vendor if you need more support. 36 - Konica Minolta bizhub 5020i | bizhub 5020i/4020i Quick Guide - Page 43
model name (if not already selected). Click PC-FAX in the left navigation bar, and then click Receive. • (Windows 8.1 and windows 10) Launch (KONICA MINOLTA Utilities), and then click the dropdown list and select your model name (if not already selected). Click PC-FAX in the left navigation bar - Konica Minolta bizhub 5020i | bizhub 5020i/4020i Quick Guide - Page 44
Troubleshooting Use this section to resolve problems you may encounter when using your machine. Identify the Problem Even if there seems to be a problem with your machine, you can correct most problems instructions in the following table. 3. If you cannot resolve the error, see the User's Guide. - Konica Minolta bizhub 5020i | bizhub 5020i/4020i Quick Guide - Page 45
Reinstall the toner cartridge and imaging unit assembly in the machine. If the problem continues, contact customer support. The Troubleshooting The imaging unit or the toner cartridge and imaging unit assembly is not installed correctly. See the User's Guide: Clean the Corona Wire. If the problem - Konica Minolta bizhub 5020i | bizhub 5020i/4020i Quick Guide - Page 46
The paper is jammed inside the machine. Open the front cover, remove the toner cartridge and imaging unit assembly, and pull out all jammed paper. Close the front • Refill paper in the paper tray. Make sure the paper guides are set to the correct size. • If paper is in the tray, remove it - Konica Minolta bizhub 5020i | bizhub 5020i/4020i Quick Guide - Page 47
it and load it again. Make sure the paper guides are set to the correct size. The toner cartridge or the toner cartridge and imaging unit assembly is not installed correctly. Remove the toner cartridge and imaging unit assembly. Remove the toner cartridge from the imaging unit, and reinstall the - Konica Minolta bizhub 5020i | bizhub 5020i/4020i Quick Guide - Page 48
Low T3 Print Data Full Print Unable ## Received Fax ## Replace Toner Scan Unable Scan Unable ## Self-Diagnostic Cause The paper tray is few minutes, and then turn it on again. • If the problem continues, contact customer support. An unprinted received fax To print the received fax, load the is - Konica Minolta bizhub 5020i | bizhub 5020i/4020i Quick Guide - Page 49
the tray for that paper size. sided printing. Choose a paper size supported by 2- The paper in the tray is sided printing. not the instructions included with the drum was installed. new imaging unit. Supplies Toner Low If the LCD displays this message, you can still print. The toner - Konica Minolta bizhub 5020i | bizhub 5020i/4020i Quick Guide - Page 50
you can send and receive faxes when the telephone line is directly connected to the fax, the problem may be unrelated to the machine. Please contact your telephone service provider for connection issues. 2 Check the Receive Mode. See Related Information: • Receive Modes • Choose the Correct Receive - Konica Minolta bizhub 5020i | bizhub 5020i/4020i Quick Guide - Page 51
Troubleshooting for Other Fax Problems Difficulties Cannot send a fax. Cannot receive a fax. Suggestions Check all line cord connections. Make sure the telephone line cord is plugged into the telephone wall jack and the LINE jack of the machine. If you subscribe to DSL, VoIP, or MagicJack services - Konica Minolta bizhub 5020i | bizhub 5020i/4020i Quick Guide - Page 52
copy to check your machine's scanner operation. If the copy quality is not good, clean the scanner. For more detailed information, see the User's Guide: Clean the Scanner. Vertical black lines when sending. Black vertical lines on faxes you send are typically caused by dirt or correction fluid on - Konica Minolta bizhub 5020i | bizhub 5020i/4020i Quick Guide - Page 53
Guide: Other Problems 4 (Scan problem only) Confirm the machine is assigned with an available IP address. (Windows) a. Do one of the following: (Windows 7) Click (Start) > All Programs > KONICA MINOLTA > KONICA MINOLTA 10) Launch (KONICA MINOLTA Utilities), and the User's Guide. If you cannot - Konica Minolta bizhub 5020i | bizhub 5020i/4020i Quick Guide - Page 54
Document and Paper Jams Find the Jammed Document or Paper If your document or paper jams inside the machine, the LCD message will help you to find it. Clear the Document Jam The Document is Jammed in the Top of the ADF 1 Open the ADF cover. 2 Pull the jammed document out to the left. 1. Document - Konica Minolta bizhub 5020i | bizhub 5020i/4020i Quick Guide - Page 55
when you are adding new paper. This helps prevent multiple sheets of paper from feeding through the machine at one time and prevents paper jams. A Troubleshooting If the document rips or tears, remove all small paper scraps to prevent future jams. 6 Press . 49 - Konica Minolta bizhub 5020i | bizhub 5020i/4020i Quick Guide - Page 56
then put it back in the MP tray. 4 Reload paper in the MP tray and make sure the paper stays under the maximum paper height guides (1) on both sides of the tray. 1 2 Slowly pull out the jammed paper. 5 Press [Retry] to resume printing. Pulling the jammed paper downward using both hands - Konica Minolta bizhub 5020i | bizhub 5020i/4020i Quick Guide - Page 57
3 Fan the stack of paper to prevent further jams, and slide the paper guides to fit the paper size. Paper is Jammed in the Back of the Machine If the machine's control left and right sides toward you to release the fuser cover. 5 Put the paper tray firmly back in the machine. A Troubleshooting 51 - Konica Minolta bizhub 5020i | bizhub 5020i/4020i Quick Guide - Page 58
machine. 2 Open the front cover. 4 Use both hands to gently pull the jammed paper out of the fuser unit. 5 Close the fuser cover. 3 Remove the toner cartridge and imaging unit assembly. 6 Close the back cover until it locks in the closed position. 52 - Konica Minolta bizhub 5020i | bizhub 5020i/4020i Quick Guide - Page 59
WARNING HOT SURFACE The machine's internal parts will be extremely hot. Wait for the machine to cool down before touching them. 6 Close the front cover. A Troubleshooting 4 Pull out the jammed paper slowly. 5 Install the toner cartridge and imaging unit assembly into the machine. 53 - Konica Minolta bizhub 5020i | bizhub 5020i/4020i Quick Guide - Page 60
Paper is Jammed in the 2-sided Tray If the machine's control panel indicates that there is a jam in the 2-sided paper tray, follow these steps: 1 Leave the machine turned on for 10 minutes for the internal fan to cool the extremely hot parts inside the machine. 2 Pull the paper tray completely out - Konica Minolta bizhub 5020i | bizhub 5020i/4020i Quick Guide - Page 61
for the machine to cool down before touching them. 7 Use both hands to gently pull the jammed paper out of the back of the machine. A Troubleshooting 8 Close the back cover until it locks in the closed position. 55 - Konica Minolta bizhub 5020i | bizhub 5020i/4020i Quick Guide - Page 62
B Appendix How to Enter Text on Your Machine • When you must enter text on your machine, a keyboard appears on the LCD. • The characters that are available may differ depending on your country. • The keyboard layout may differ depending on the operation you perform. • Press to cycle between - Konica Minolta bizhub 5020i | bizhub 5020i/4020i Quick Guide - Page 63
• Press for each character you want to erase, or press and hold characters. Related Information • Set Your Station ID on page 26 to erase all the B Appendix 57 - Konica Minolta bizhub 5020i | bizhub 5020i/4020i Quick Guide - Page 64
27, 29 Receive Mode 27, 29 S Scan 23 T TAD (Telephone Answering Device), external 27, 33 Troubleshooting 38 document and paper jams 48 error and maintenance messages ..38 fax and telephone problems ...........44 print or scan problems 47 V Voice Mail 29, 33 VoIP systems 27, 33 Volume 7 58 - Konica Minolta bizhub 5020i | bizhub 5020i/4020i Quick Guide - Page 65
http://konicaminolta.com ACER-9906-00
-
 1
1 -
 2
2 -
 3
3 -
 4
4 -
 5
5 -
 6
6 -
 7
7 -
8
-
9
-
10
-
11
-
12
-
13
-
14
-
15
-
16
-
17
-
18
-
19
-
20
-
21
-
22
-
23
-
24
-
25
-
26
-
27
-
28
-
29
-
30
-
31
-
32
-
33
-
34
-
35
-
36
-
37
-
38
-
39
-
40
-
41
-
42
-
43
-
44
-
45
-
46
-
47
-
48
-
49
-
50
-
51
-
52
-
53
-
54
-
55
-
56
-
57
-
58
-
59
-
60
-
61
-
62
-
63
-
64
-
65
 |
 |
Quick Guide