Konica Minolta bizhub C3100P bizhub C3100P Quick Start User Guide
Konica Minolta bizhub C3100P Manual
 |
View all Konica Minolta bizhub C3100P manuals
Add to My Manuals
Save this manual to your list of manuals |
Konica Minolta bizhub C3100P manual content summary:
- Konica Minolta bizhub C3100P | bizhub C3100P Quick Start User Guide - Page 1
Quick Start Guide INDEX 1. Introduction 2. Overview of This Machine 3. Loading Paper 4. Initial Settings of This Machine 5. Basic Usage 6. Index - Konica Minolta bizhub C3100P | bizhub C3100P Quick Start User Guide - Page 2
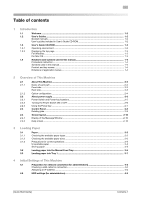
...1-2 User's Guides ...1-2 Booklet manuals ...1-2 User's guides included in User's Guide CD-ROM 1-2 User's Guide CD-ROM...1-3 Operating environment ...1-3 Displaying the top page ...1-3 For Windows ...1-3 For Mac OS...1-3 Notations and symbols used in this manual 1-4 Procedural instruction - Konica Minolta bizhub C3100P | bizhub C3100P Quick Start User Guide - Page 3
installation settings (Windows 7/8/8.1/Server 2008 R2/Server 2012/ Server 2012 R2) ...5-4 Installing the printer driver ...5-5 Initial settings of the printer driver ...5-7 How to print ...5-8 Printing a file stored in USB memory 5-9 Supported USB memory devices ...5-9 How to print ...5-10 6 Index - Konica Minolta bizhub C3100P | bizhub C3100P Quick Start User Guide - Page 4
Chapter 1 1 Introduction - Konica Minolta bizhub C3100P | bizhub C3100P Quick Start User Guide - Page 5
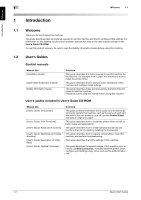
troubleshooting. This guide describes the Utility settings of this machine. This guide describes the special usages of this machine such as how to use Web Connection, manually install the printer driver, configure print settings using Linux, and use the authentication unit. 1-2 [Quick Start Guide - Konica Minolta bizhub C3100P | bizhub C3100P Quick Start User Guide - Page 6
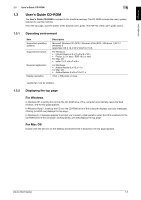
guide. The PDF file of the user's guide opens. 1.3.1 Operating environment Item Supported operating systems Supported browsers* Required application Display resolution Description Microsoft Windows XP (SP3) / Windows Vista (SP2) / Windows 7 (SP1) / Windows 8 Apple Mac OS X 10.4/10.5/10.6/10.7/10 - Konica Minolta bizhub C3100P | bizhub C3100P Quick Start User Guide - Page 7
indicates a supplementary explanation of a procedural instruction. Symbols used in this manual NOTICE This symbol indicates a risk that may in this manual [ ] Bold text Description This presents a key name in the Message Window or computer screen, or the name of a user's guide. This presents - Konica Minolta bizhub C3100P | bizhub C3100P Quick Start User Guide - Page 8
Chapter 2 2 Overview of This Machine - Konica Minolta bizhub C3100P | bizhub C3100P Quick Start User Guide - Page 9
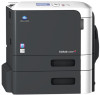
Overview of This Machine Chapter 2 2 2 Overview of This Machine 2.1 About This Machine 2.1.1 Name of each part Front side 3 2 1 About This Machine 2.1 5 4 No. Name 1 Control Panel 2 Output Tray 3 Output Stopper 4 Manual Feed Tray 5 Tray 1 2-2 [Quick Start Guide] - Konica Minolta bizhub C3100P | bizhub C3100P Quick Start User Guide - Page 10
2 Rear side 7 1 6 5 4 3 2 No. Name 1 USB Port (Type A) 2 Power Switch 3 Power Connection 4 USB Port (Type B) 5 Ethernet (LAN) Port (1000Base-T/100Base-TX/10Base-T) 6 USB Port (for authentication unit) 7 Ventilation Grill [Quick Start Guide] 2-3 - Konica Minolta bizhub C3100P | bizhub C3100P Quick Start User Guide - Page 11
1 Authentication Unit Performs user authentication by scanning information recorded on AU-201 the IC card. 2 Lower Feeder Unit PF-P14 available when an optional Hard Disk is installed. 7 i-Option LK-111 Supports the ThinPrint function, which is one of a number of advanced functions. - Konica Minolta bizhub C3100P | bizhub C3100P Quick Start User Guide - Page 12
on or off, or when restarting this machine. Press this key to switch this machine to Power Save mode. This function reduces power consumption and has more significant power saving effect. For details, refer to page 2-7. data or communicating data as well as queued jobs. [Quick Start Guide] 2-5 - Konica Minolta bizhub C3100P | bizhub C3100P Quick Start User Guide - Page 13
displays the screen showing that the machine is running the start-up process. When Message Window appears in the [READY], it indicates that this machine is ready to run. 4 Power Switch off and on again after 10 or more seconds have elapsed. Not doing so may result in an operation failure. 2-6 - Konica Minolta bizhub C3100P | bizhub C3100P Quick Start User Guide - Page 14
machine is in Sleep mode, you can select whether or not to shift to Deep Sleep mode that reduces power consumption further than when in Sleep mode. To configure settings: Menu/Select - [ADMIN SETTINGS] - [SYSTEM SETTINGS] - [POWER SUPPLY] [CONSUMPTION] (Default: [ENABLED]) [Quick Start Guide] 2-7 - Konica Minolta bizhub C3100P | bizhub C3100P Quick Start User Guide - Page 15
Window a registered user with user au- thentication enabled, hold down this key on the main screen to log out. • Deletes jobs. For details, refer to page 2-9. Note This key is referred to as Cancel/Access in the manual manual mode or returns it from Power Save mode. For details - Konica Minolta bizhub C3100P | bizhub C3100P Quick Start User Guide - Page 16
JOB] [ALL JOBS] Description Continues printing without deleting jobs. Deletes the active job. Deletes all jobs. Tips When deleting all standby jobs with user authentication enabled, you need to enter the administrator password after pressing the Cancel/Access key on the login screen. [Quick Start - Konica Minolta bizhub C3100P | bizhub C3100P Quick Start User Guide - Page 17
firmware and update pro- gress are displayed. 4 Displays the key operation guidance. 5 Displays the approximate toner level. 2.4.2 Help screen If an error such as a paper jam has occurred, press the error processing. key; the help screen appears to help you perform 2-10 [Quick Start Guide - Konica Minolta bizhub C3100P | bizhub C3100P Quick Start User Guide - Page 18
Chapter 3 3 Loading Paper - Konica Minolta bizhub C3100P | bizhub C3100P Quick Start User Guide - Page 19
Manual Feed Tray: 20 sheets Tray 1: 20 sheets Manual Feed Tray: 20 sheets Tray 1: 20 sheets Manual Feed Tray: 20 sheets Tray 1: 20 sheets Manual Feed Tray: 20 sheets Tray 1: 20 sheets Manual Feed Tray: 10 sheets Manual Otherwise, it may result in a paper jam or image error. 3-2 [Quick Start Guide] - Konica Minolta bizhub C3100P | bizhub C3100P Quick Start User Guide - Page 20
the optimal result, configure the custom size setting so that an image is included in the printable area of this machine. - Specify the custom size in the range of the numeric values shown in the table above using the printer driver. - When custom-size paper over width 8-1/4 inches (210 mm) and - Konica Minolta bizhub C3100P | bizhub C3100P Quick Start User Guide - Page 21
quality, a paper jam, or machine damage. - Paper that has been printed on using a heat-transfer printer or an inkjet printer - Folded, curled, wrinkled, or torn paper - Paper that has been left unwrapped for a long out a trial print to check the printing quality in advance. 3-4 [Quick Start Guide] - Konica Minolta bizhub C3100P | bizhub C3100P Quick Start User Guide - Page 22
Tray, load paper and specify the paper type. 0 For details on the available paper types and sizes, refer to page 3-2. 1 Open the Manual Feed Tray. 2 Spread out the paper guide. 3 Push up the center of the flip-top plate until the lock latches (white) at the right and left are locked. [Quick - Konica Minolta bizhub C3100P | bizhub C3100P Quick Start User Guide - Page 23
Loading Paper Chapter 3 3 Loading paper into the Manual Feed Tray 3.2 4 With the side to be printed on facing down, insert the paper as far as possible into the feed slot. NOTICE Load paper within the guide indicating the upper limit. If paper is curled, flatten it before loading. 5 Align the - Konica Minolta bizhub C3100P | bizhub C3100P Quick Start User Guide - Page 24
types and sizes, refer to page 3-2. 0 Tray 2 is available when the optional Lower Feeder Unit is installed. For details on how to load paper into Tray 2, refer to Chapter 5 "Loading Paper" in the [User's Guide: Introduction]. 1 Pull out Tray 1. 2 Press the flip-top plate down until it is locked - Konica Minolta bizhub C3100P | bizhub C3100P Quick Start User Guide - Page 25
to the point where the top of the stack is higher than the , mark. If paper is curled, flatten it before loading. 5 Align the paper guide to the paper size. 6 Close Tray 1. 7 Change the paper type and paper size on the Control Panel. When loading custom sized paper, also specify the - Konica Minolta bizhub C3100P | bizhub C3100P Quick Start User Guide - Page 26
Chapter 4 4 Initial Settings of This Machine - Konica Minolta bizhub C3100P | bizhub C3100P Quick Start User Guide - Page 27
page 2-3. Assigning an IP address If this machine has a fixed IP address, manually enter the IP address, subnet mask, and default gateway address. In the Control Panel, select Menu/Select - [ADMIN SETTINGS] - [EXPERT ADJUSTMENT] - [ETHERNET] [TCP/IP] - [IPV4 SETTINGS], then configure the following - Konica Minolta bizhub C3100P | bizhub C3100P Quick Start User Guide - Page 28
erased. Therefore, we recommend that you finish an HDD encryption setting before using this machine. To configure settings: Menu/Select - [ADMIN SETTINGS] - [SYSTEM SETTINGS] - [SECURITY SETTINGS] - [HDD ENCRYPTION] Tips This function is available when an optional Hard Disk is installed. Initial - Konica Minolta bizhub C3100P | bizhub C3100P Quick Start User Guide - Page 29
4 HDD settings (for administrators) 4.2 Initial Settings of This Machine Chapter 4 4-4 [Quick Start Guide] - Konica Minolta bizhub C3100P | bizhub C3100P Quick Start User Guide - Page 30
Chapter 5 5 Basic Usage - Konica Minolta bizhub C3100P | bizhub C3100P Quick Start User Guide - Page 31
is often used in graphics and light printing applications where good color reproducibility is important. Developed after Windows Vista, this driver supports XML Paper Specification (XPS). This driver has several advantages, including highquality reproduction of translucence. 5.1.2 Preparation for - Konica Minolta bizhub C3100P | bizhub C3100P Quick Start User Guide - Page 32
or [Secure Printing] (IPPS). For details on the printing method, refer to Chapter 2 "Printing in the Windows Environment" in [User's Guide: Print Functions]. % Among the connected printers, only the target model is automatically detected and displayed. If multiple target models are displayed, check - Konica Minolta bizhub C3100P | bizhub C3100P Quick Start User Guide - Page 33
correctly. dReference When you finish installing the printer driver, configure the default settings of the printer driver. For details, refer to page 5-7. 5.1.3 Preparation for printing (USB connection) Changing the installation settings (Windows 7/8/8.1/Server 2008 R2/Server 2012/Server 2012 - Konica Minolta bizhub C3100P | bizhub C3100P Quick Start User Guide - Page 34
then go to Step 3. % If the installer does not start, open the printer driver folder on the CD-ROM, double-click [Setup.exe], then go to Step 4. % If the [User Account Control] window appears, click [Continue] or [Yes]. 3 Click [Printer]. 4 Read the license agreement, then click [AGREE]. 5 Check the - Konica Minolta bizhub C3100P | bizhub C3100P Quick Start User Guide - Page 35
10 If necessary, change the printer name or print a test page, then click [Finish]. Installation of the printer driver is then completed. Settings [Review] [Rename Printer printer driver, configure the default settings of the printer driver. For details, refer to page 5-7. 5-6 [Quick Start Guide] - Konica Minolta bizhub C3100P | bizhub C3100P Quick Start User Guide - Page 36
printer driver so that it contains information such as what options are installed on this machine and whether or not authentication settings have been configured. 1 Display the printer window. % In Windows 8.1, click [ ] in the Start window in Windows XP or Server 2003 environment, manually configure - Konica Minolta bizhub C3100P | bizhub C3100P Quick Start User Guide - Page 37
settings you have changed here return to the default values when you exit the application software. % For details on the print settings of the printer driver, refer to Chapter 2 "Printing in the Windows Environment" in [User's Guide: Print Functions]. 5 Click [Print]. Printing is executed. Basic - Konica Minolta bizhub C3100P | bizhub C3100P Quick Start User Guide - Page 38
Hard Disk is installed. Supported USB memory devices USB memory devices that have the following specifications can be connected to this machine. Item Supported media File system File Type Specifications USB memory device (USB 2.0 supported) FAT32 PDF, Compact PDF, JPEG, TIFF, XPS, Compact - Konica Minolta bizhub C3100P | bizhub C3100P Quick Start User Guide - Page 39
the USB port of this machine. appears on the upper right of the Message Window, and the menu of the external memory appears. 2 Connect a USB memory device to the USB port of this machine. 3 Select [LIST OF FILES collate func- tion. 6 Select [PRINT]. Basic Usage Chapter 5 5-10 [Quick Start Guide] - Konica Minolta bizhub C3100P | bizhub C3100P Quick Start User Guide - Page 40
6 Index Chapter 6 - Konica Minolta bizhub C3100P | bizhub C3100P Quick Start User Guide - Page 41
C Control Panel 2-8 L Loading paper Manual Feed Tray 3-5 Tray 1 3-7 M Manual Feed Tray 3-5 N Name of each Printer driver 5-2 Initial settings 5-7 Install (network connection 5-2 Install (USB connection 5-4 S Screen layout 2-10 T Tray 1 3-7 U USB memory 5-9 How to print 5-10 User's Guide - Konica Minolta bizhub C3100P | bizhub C3100P Quick Start User Guide - Page 42
http://konicaminolta.com A6DR-9211-01 © 2013 Printed in Thailand 2014. 2
-
 1
1 -
 2
2 -
 3
3 -
 4
4 -
 5
5 -
 6
6 -
 7
7 -
8
-
9
-
10
-
11
-
12
-
13
-
14
-
15
-
16
-
17
-
18
-
19
-
20
-
21
-
22
-
23
-
24
-
25
-
26
-
27
-
28
-
29
-
30
-
31
-
32
-
33
-
34
-
35
-
36
-
37
-
38
-
39
-
40
-
41
-
42
 |
 |

INDEX
1. Introduction
2. Overview of This Machine
3. Loading Paper
4. Initial Settings of This Machine
5. Basic Usage
6. Index
Quick Start Guide