Kyocera 1030DN Operation Guide - Page 32
MP Tray, Loading Paper, OPERATION GUIDE
 |
View all Kyocera 1030DN manuals
Add to My Manuals
Save this manual to your list of manuals |
Page 32 highlights
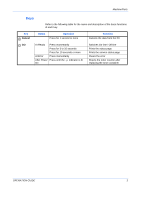
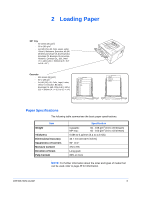
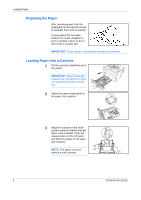
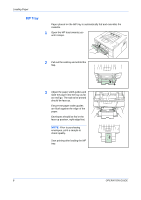
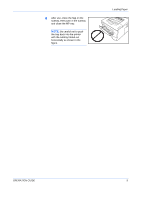
Loading Paper MP Tray Paper placed on the MP tray is automatically fed and overrides the cassette. 1 Open the MP tray towards you until it stops. 2 Pull out the subtray and unfold the flap. 3 Adjust the paper width guides and slide the paper into the tray as far as it will go. The side to be printed should be face up. Ensure the paper width guides are flush against the edge of the paper. Envelopes should be fed in the face-up position, right edge first. NOTE: Prior to purchasing envelopes, print a sample to check quality. Start printing after loading the MP tray. 8 OPERATION GUIDE
-
 1
1 -
2
-
3
-
4
-
5
-
6
-
7
-
8
-
9
-
10
-
11
-
12
-
13
-
14
-
15
-
16
-
17
-
18
-
19
-
20
-
21
-
22
-
23
-
24
-
25
-
26
-
 27
27 -
 28
28 -
 29
29 -
 30
30 -
 31
31 -
 32
32 -
 33
33 -
 34
34 -
 35
35 -
 36
36 -
 37
37 -
38
-
39
-
40
-
41
-
42
-
43
-
44
-
45
-
46
-
47
-
48
-
49
-
50
-
51
-
52
-
53
-
54
-
55
-
56
-
57
-
58
-
59
-
60
-
61
-
62
-
63
-
64
-
65
-
66
 |
 |
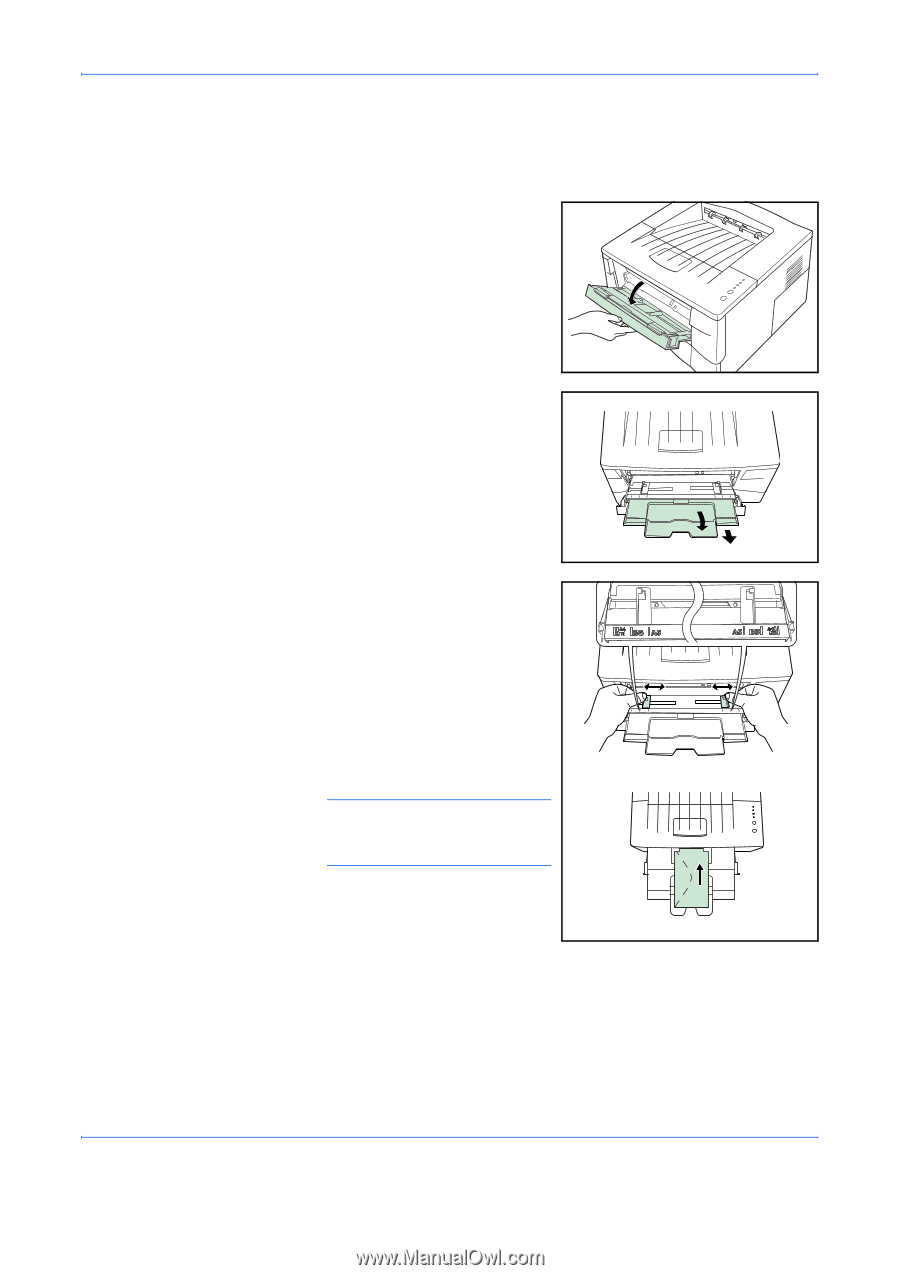
Loading Paper
8
OPERATION GUIDE
MP Tray
Paper placed on the
MP tray
is automatically fed and overrides the
cassette.
1
Open the MP tray towards you
until it stops.
2
Pull out the subtray and unfold the
flap.
3
Adjust the paper width guides and
slide the paper into the tray as far
as it will go. The side to be printed
should be face up.
Ensure the paper width guides
are flush against the edge of the
paper.
Envelopes should be fed in the
face-up position, right edge first.
NOTE:
Prior to purchasing
envelopes, print a sample to
check quality.
Start printing after loading the
MP
tray
.