Kyocera 9530DN Operation Guide - Page 64
Changing Serial Interface Modes, Interface, Network, Serial
 |
View all Kyocera 9530DN manuals
Add to My Manuals
Save this manual to your list of manuals |
Page 64 highlights
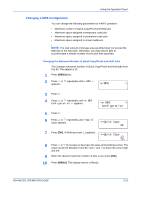
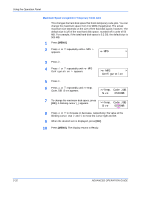
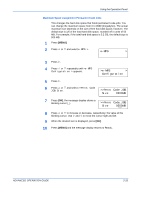
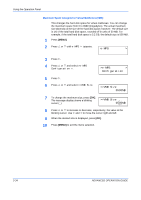
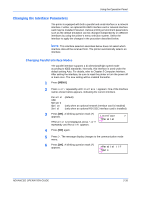
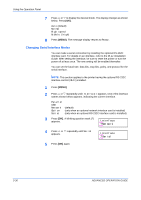
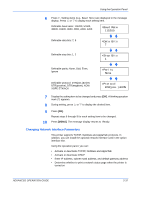
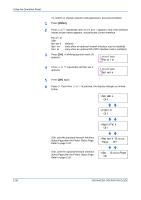
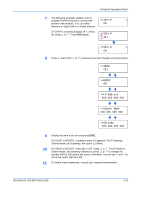
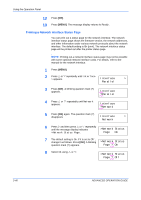
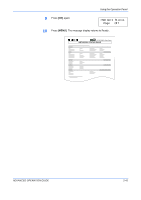
Using the Operation Panel 7 Press U or V to display the desired mode. The display changes as shown below. Press [OK]. Auto (default) Normal High speed Nibble (high) 8 Press [MENU]. The message display returns to Ready. Changing Serial Interface Modes You can make a serial connection by installing the optional RS-232C interface card. For details on an interface, refer to the IB-11 Installation Guide. After setting the interface, be sure to reset the printer or turn the power off at least once. The new setting will be enabled thereafter. You can set the baud rate, data bits, stop bits, parity, and protocol for the serial interface. NOTE: This section applies to the printer having the optional RS-232C interface card kit (IB-11) installed. 1 Press [MENU]. 2 Press U or V repeatedly until Interface > appears. One of the interface names shown below appears, indicating the current interface. Parallel USB Network Option Serial (default) (only when an optional network interface card is installed) (only when an optional RS-232C interface card is installed) 3 Press [OK]. A blinking question mark (?) appears. Interface ?Network 4 Press U or V repeatedly until Serial appears. Interface ?Serial 5 Press [OK] again. 2-36 ADVANCED OPERATION GUIDE
-
 1
1 -
2
-
3
-
4
-
5
-
6
-
7
-
8
-
9
-
10
-
11
-
12
-
13
-
14
-
15
-
16
-
17
-
18
-
19
-
20
-
21
-
22
-
23
-
24
-
25
-
26
-
27
-
28
-
29
-
30
-
31
-
32
-
33
-
34
-
35
-
36
-
37
-
38
-
39
-
40
-
41
-
42
-
43
-
44
-
45
-
46
-
47
-
48
-
49
-
50
-
51
-
52
-
53
-
54
-
55
-
56
-
57
-
58
-
 59
59 -
 60
60 -
 61
61 -
 62
62 -
 63
63 -
 64
64 -
 65
65 -
 66
66 -
 67
67 -
 68
68 -
 69
69 -
70
-
71
-
72
-
73
-
74
-
75
-
76
-
77
-
78
-
79
-
80
-
81
-
82
-
83
-
84
-
85
-
86
-
87
-
88
-
89
-
90
-
91
-
92
-
93
-
94
-
95
-
96
-
97
-
98
-
99
-
100
-
101
-
102
-
103
-
104
-
105
-
106
-
107
-
108
-
109
-
110
-
111
-
112
-
113
-
114
-
115
-
116
-
117
-
118
-
119
-
120
-
121
-
122
-
123
-
124
-
125
-
126
-
127
-
128
-
129
-
130
-
131
-
132
-
133
-
134
-
135
-
136
-
137
-
138
-
139
-
140
-
141
-
142
-
143
-
144
-
145
-
146
-
147
-
148
-
149
-
150
-
151
-
152
-
153
-
154
-
155
-
156
-
157
-
158
-
159
-
160
-
161
-
162
-
163
-
164
-
165
-
166
-
167
-
168
-
169
-
170
 |
 |