LG HBLG1003R Service Manual - Page 7
Installation
 |
View all LG HBLG1003R manuals
Add to My Manuals
Save this manual to your list of manuals |
Page 7 highlights
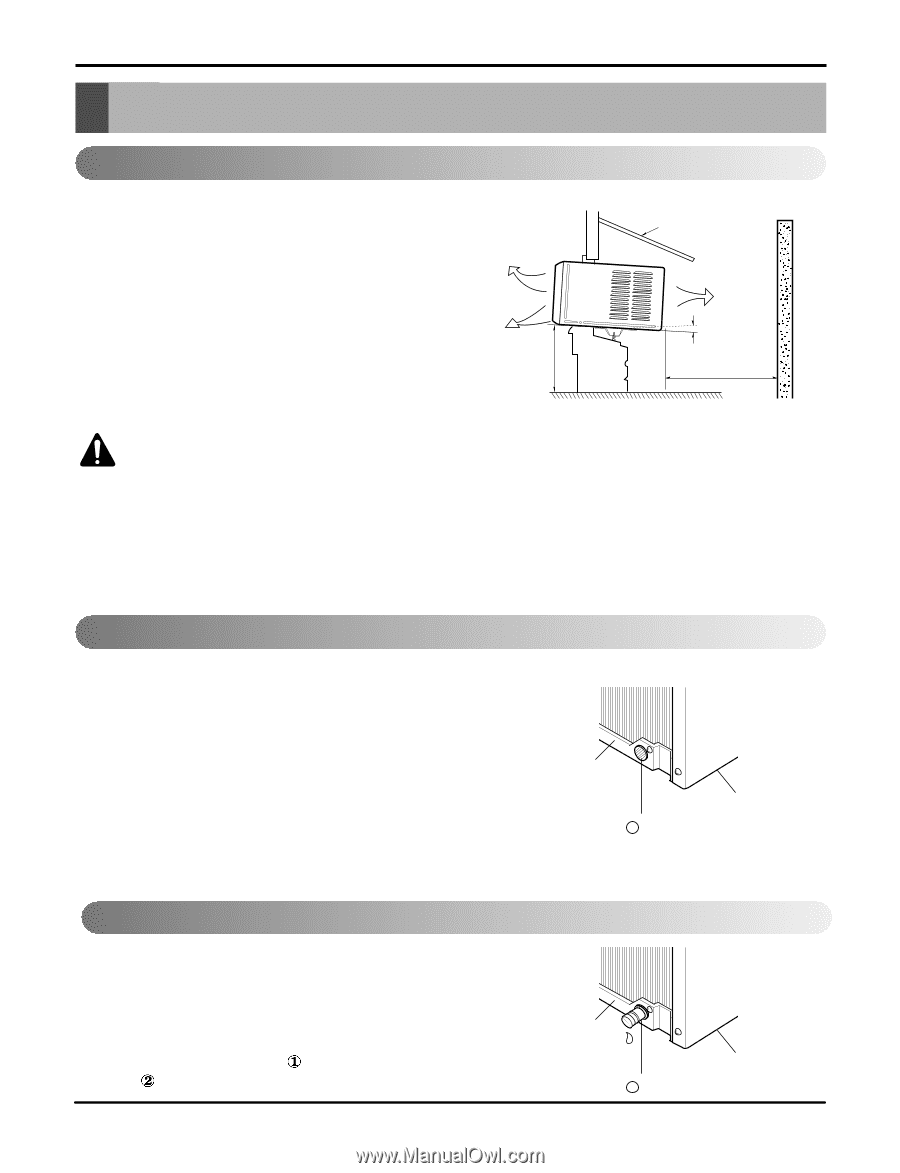
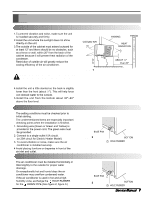
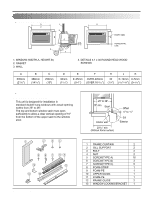
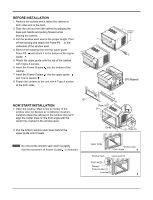
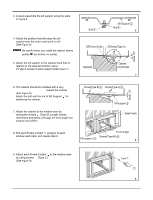
Installation Select the Best Location 1.To prevent vibration and noise, make sure the unit is installed securely and firmly. 2.Install the unit where the sunlight does not shine directly on the unit. 3.The outside of the cabinet must extend outward for at least 12" and there should be no obstacles, such as a fence or wall, within 20" from the back of the cabinet because it will prevent heat radiation of the condenser. Restriction of outside air will greatly reduce the cooling efficiency of the air conditioner. COOLED AIR 30"~60" CAUTION: All side louvers of the cabinet must remain exposed on the outdside of the structure. Figure 1 Installation AWNING FENCE HEAT RADIATION ABOUT 1/2" Over 20" 4.Install the unit a little slanted so the back is slightly lower than the front (about 1/2"). This will help force con-densed water to the outside. 5.Install the unit from the bottom about 30"~60" above the floor level. Installation Check The setting conditions must be checked prior to initial starting. The undermentioned items are especially important checking points when the installation is finished. 1. Grounding wire (Green or Green and Yellow) is provided in the power cord. The green wire must be grounded. 2. Connect to a single-outlet 15A circuit. (or 20A circuit for Electric Heater Model) 3. To avoid vibration or noise, make sure the air conditioner is installed securely. 4 Avoid placing furniture or draperies in front of the air inlet and outlet. How to Secure the Drain Pipe The air conditioner must be installed horizontally or tilted slightly to the outside for proper water drainage. On exceptionally hot and humid days the air conditioner may overflow condensed water. If the air conditioner is used in hot and a high humidity zone, exchange the HOLE RUBBER for the DRAIN PIPE.(See figure 2, figure 3.) BASE PAN Figure 2 BOTTOM 1 HOLE RUBBER BASE PAN Figure 3 BOTTOM 2 HOLE RUBBER Service Manual 7
-
 1
1 -
 2
2 -
 3
3 -
 4
4 -
 5
5 -
 6
6 -
 7
7 -
 8
8 -
 9
9 -
 10
10 -
 11
11 -
 12
12 -
13
-
14
-
15
-
16
-
17
-
18
-
19
-
20
-
21
-
22
-
23
-
24
-
25
-
26
-
27
-
28
-
29
-
30
-
31
-
32
-
33
-
34
-
35
-
36
-
37
-
38
-
39
-
40
-
41
 |
 |