LG LCFC26XSS Owners Manual - Page 18
Removing/Assembling, Doors and Drawers
 |
View all LG LCFC26XSS manuals
Add to My Manuals
Save this manual to your list of manuals |
Page 18 highlights
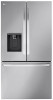
18 INSTALLATION 2 Place the handle on the door by fitting the handle footprints over the mounting fasteners and tightening the set screws b with a 3/32 in. Allen wrench. • For models shipped with the handles assembled, use a 1/8 in. Allen wrench. located at the bottom of the front side of the cover with a flat-head screwdriver. Removing/Assembling Doors and Drawers If the entrance door is too narrow for the refrigerator to pass through, remove the refrigerator doors and move the refrigerator sideways through the doorway. WARNING • Use two or more people to remove and install the refrigerator doors and drawers. • Disconnect the electrical supply to the refrigerator before installing. • Do not put hands, feet or other objects into the air vents or bottom of the refrigerator. • Be careful when handling the hinge and hinge lever. • Remove food and bins before detaching the doors and drawers. • Do not hold the handle when removing or replacing the doors and drawers as the handle may come off. • Tools Needed - Phillips screwdriver - Flat-head screwdriver Removing the Hinge Cover Remove the screws from the hinge cover at the top of the refrigerator. Lift the hook (not visible), Removing the Left Refrigerator Door 1 The water supply is connected to the upper right part of the rear surface of the refrigerator. Remove the clip in the joint area. Hold the water supply connection and gently push the collet a to detach the water supply line as shown. NOTE • Disassembling/Assembling the Water Lines b Collet c Tube d Insert line e Clip 2 Pull out the water supply lines f. Disconnect all the wire harnesses g . Unscrew the ground wire h.
-
 1
1 -
2
-
3
-
4
-
5
-
6
-
7
-
8
-
9
-
10
-
11
-
12
-
 13
13 -
 14
14 -
 15
15 -
 16
16 -
 17
17 -
 18
18 -
 19
19 -
 20
20 -
 21
21 -
 22
22 -
 23
23 -
24
-
25
-
26
-
27
-
28
-
29
-
30
-
31
-
32
-
33
-
34
-
35
-
36
-
37
-
38
-
39
-
40
-
41
-
42
-
43
-
44
-
45
-
46
-
47
-
48
-
49
-
50
-
51
-
52
-
53
-
54
-
55
-
56
-
57
-
58
-
59
-
60
-
61
-
62
-
63
-
64
-
65
-
66
-
67
-
68
-
69
-
70
-
71
-
72
 |
 |
