LG LFX25974SW Owner's Manual - Page 31
Humidity Controlled Crisper, and Glide'N'Serve, Detaching and Assembling the, Storage Bins - lowes
 |
View all LG LFX25974SW manuals
Add to My Manuals
Save this manual to your list of manuals |
Page 31 highlights
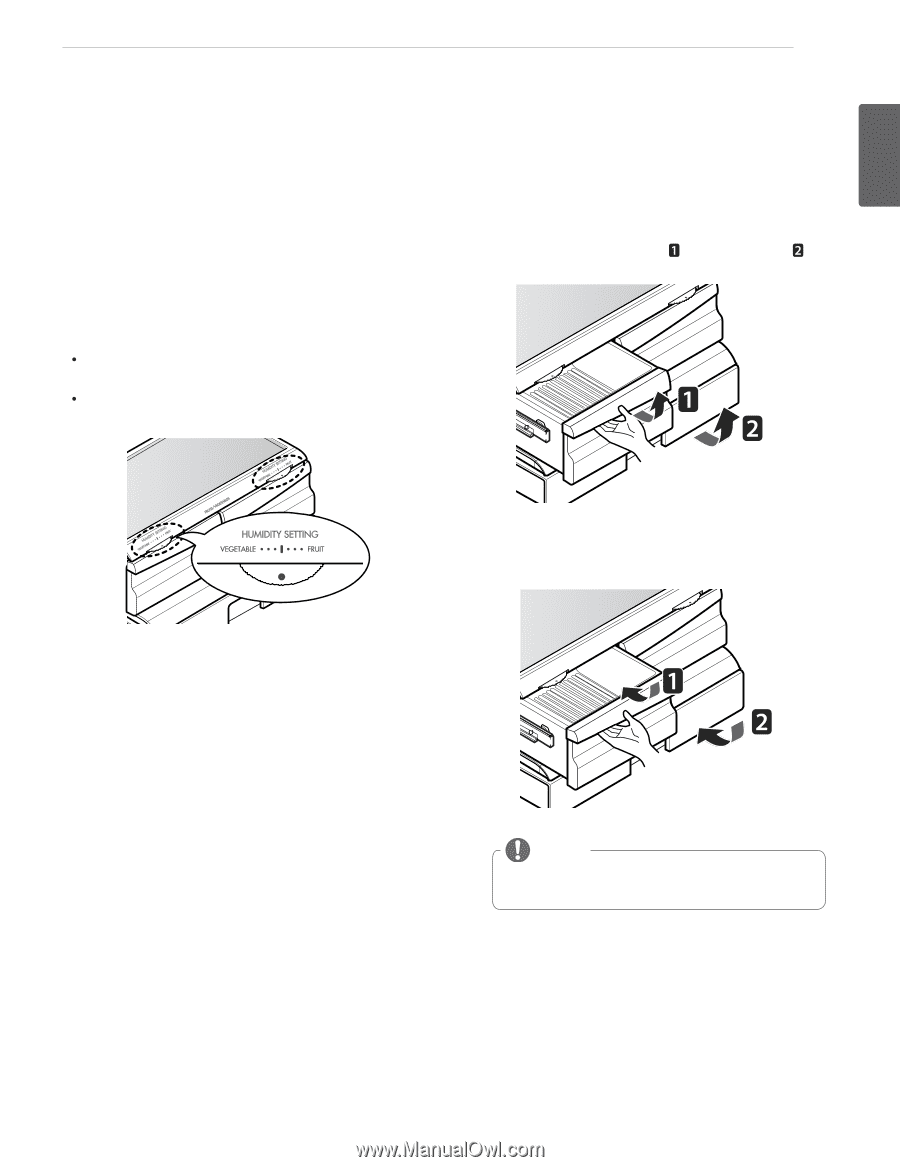
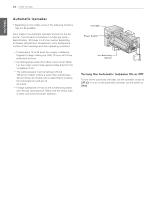
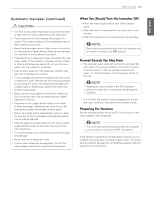
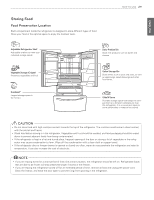
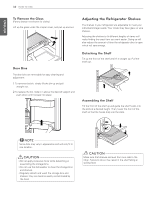
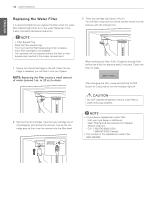
ENGLISH HOW TO USE 31 Humidity Controlled Crisper and Glide'N'Serve Humidity Controlled Crisper * Depending on the model, some of the following functions may not be available. The crispers provide fresher tasting fruit and vegetables by letting you easily control humidity inside the drawer. You can control the amount of humidity in the moisturesealed crispers by adjusting the control to any setting between HIGH and LOW. y HIGH keeps moist air in the crisper for best storage of fresh, leafy vegetables. y LOW lets moist air out of the crisper for best storage of fruit. Detaching and Assembling the Storage Bins Glide'N'Serve and Humidity Controlled Crisper To remove the Humidity Controlled Crisper and the Glide'N'Server, pull out the Crisper and Glide'N'Server to full extension, lift the front up, and pull straight out. To install, slightly tilt up the front, insert the drawer into the frame and push it back into place. NOTE Storage Bins may vary in appearance, depending on your model.
-
 1
1 -
2
-
3
-
4
-
5
-
6
-
7
-
8
-
9
-
10
-
11
-
12
-
13
-
14
-
15
-
16
-
17
-
18
-
19
-
20
-
21
-
22
-
23
-
24
-
25
-
 26
26 -
 27
27 -
 28
28 -
 29
29 -
 30
30 -
 31
31 -
 32
32 -
 33
33 -
 34
34 -
 35
35 -
 36
36 -
37
-
38
-
39
-
40
-
41
-
42
-
43
-
44
-
45
-
46
-
47
-
48
-
49
 |
 |