LG LSC27990TT User Guide - Page 8
Water connection instruction guide
 |
View all LG LSC27990TT manuals
Add to My Manuals
Save this manual to your list of manuals |
Page 8 highlights
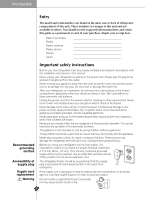
Installation Connecting the refrigerator to a water source Warning Water connection instruction guide Read all directions carefully before you begin. Connect to potable water supply only. IMPORTANT • If operating the refrigerator before installing the water connection, turn the icemaker to the OFF position to prevent operation without water. • All installations must be in accordance with local plumbing code requirements. • Use copper tubing and check for leaks. • Install copper tubing only in areas where temperatures will remain above freezing. • It may take up to 24 hours for your icemaker to begin producing ice. Tools required Standard screwdriver 7/16-inch and 1/2-inch open-end wrenches or two adjustable wrenches 1/4-inch nut driver 1/4-inch drill bit Hand drill or electric drill (properly grounded) NOTE • Your refrigerator dealer has a kit available with a 1/4-inch saddle-type shut-off valve, a union, and copper tubing. Before purchasing, make sure a saddle-type valve complies with your local plumbing codes. Do not use a piercing-type or 3/16-inch saddle valve which reduces water flow and clogs more easily. Cold water supply The icemaker water valve contains a flow washer which is used as a water pressure regulator. The icemaker needs to be connected to a cold water line with water pressure 21 psi (lb/inch2) 8
-
 1
1 -
2
-
 3
3 -
 4
4 -
 5
5 -
 6
6 -
 7
7 -
 8
8 -
 9
9 -
 10
10 -
 11
11 -
 12
12 -
 13
13 -
14
-
15
-
16
-
17
-
18
-
19
-
20
-
21
-
22
-
23
-
24
-
25
-
26
-
27
-
28
-
29
-
30
-
31
-
32
-
33
-
34
-
35
-
36
-
37
-
38
-
39
-
40
-
41
-
42
-
43
-
44
-
45
-
46
-
47
-
48
-
49
-
50
-
51
-
52
-
53
-
54
-
55
-
56
-
57
-
58
-
59
-
60
-
61
-
62
-
63
-
64
-
65
-
66
-
67
-
68
-
69
-
70
-
71
-
72
-
73
-
74
-
75
-
76
-
77
-
78
-
79
-
80
-
81
-
82
-
83
-
84
-
85
-
86
-
87
-
88
-
89
-
90
-
91
-
92
-
93
-
94
-
95
-
96
 |
 |
