LG WD205CK Owners Manual - Page 13
Leveling The Washing Machine
 |
View all LG WD205CK manuals
Add to My Manuals
Save this manual to your list of manuals |
Page 13 highlights
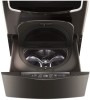
INSTALLATION INSTRUCTIONS 13 ENGLISH LEVELING THE WASHING MACHINE The washer tub of your new washing machine spins at very high speeds. To minimize vibration, noise, and unwanted movement, the floor must be perfectly level and solid. • Check that the washing machine is level. - Check for levelness by rocking the top edges of the washing machine or placing a level on the washing machine. The slope beneath the washing machine must not exceed 1/2", and all four leveling feet must rest firmly on the floor. Level • Check again that the washing machine is level. - Push or rock the top edges of the washing machine gently to make sure that the washing machine does not rock. - If the washing machine rocks, repeat steps 1 to 3. WARNING yyUsing the washing machine without leveling may cause it to malfunction, producing excess vibration and noise. yyWhen stacking the full-size washing machine on the pedestal washer, use the leveling feet on the pedestal washer to level both. The full-size washing machine´s leveling feet should be minimized and the locknuts turned counterclockwise to secure them. yyUse the leveling feet only when you level the washing machine. If you raise the leveling feet unnecessarily, it may cause abnormal vibration of the washing machine. 1/2" • Turn the lower leveling feet clockwise to level the washing machine. - Turning the lower leveling feet clockwise raises the washing machine. Raise • Turn the locknuts counterclockwise and tighten them when the washing machine is level. USING NON-SKID PADS (OPTIONAL) If you install the washing machine on a slippery surface, it may move because of excessive vibration. Incorrect leveling may cause malfunction through noise and vibration. If this occurs, lay the non-skid pads under the leveling feet and adjust the level. • Clean the floor to attach the non-skid pads. - Use a dry rag to remove foreign objects or moisture. If moisture remains, the non-skid pads may slip. • Adjust the level after placing the washing machine in the installation area. • Place the adhesive side of the non-skid pad on the floor. - It is most effective to install the non-skid pads under the front legs. If it is hard to place the pads under the front legs, place them under the back legs. This side up Tighten all 4 lock nuts securely using the wrench. Adhesive side Remove backing • Check again that the washing machine is level. - Push or rock the top edges of the washing machine gently to make sure that the washing machine does not rock. If the washing machine rocks, level the washing machine again.
-
 1
1 -
2
-
3
-
4
-
5
-
6
-
7
-
 8
8 -
 9
9 -
 10
10 -
 11
11 -
 12
12 -
 13
13 -
 14
14 -
 15
15 -
 16
16 -
 17
17 -
 18
18 -
19
-
20
-
21
-
22
-
23
-
24
-
25
-
26
-
27
-
28
-
29
-
30
-
31
-
32
-
33
-
34
-
35
-
36
-
37
-
38
-
39
-
40
-
41
-
42
-
43
-
44
-
45
-
46
-
47
-
48
-
49
-
50
-
51
-
52
-
53
-
54
-
55
-
56
-
57
-
58
-
59
-
60
-
61
-
62
-
63
-
64
-
65
-
66
-
67
-
68
 |
 |
