Lenovo 41U3074 User Guide - Page 17
Product, Description, Installing, Mouse, Suite, software - mouse driver
 |
UPC - 882861702572
View all Lenovo 41U3074 manuals
Add to My Manuals
Save this manual to your list of manuals |
Page 17 highlights
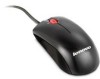
Chapter 3. 800 DPI Optical 3-Button ScrollPoint Pro Mouse PS/2 and USB This guide contains installation, usage, and maintenance information for the 800 DPI Optical 3-Button ScrollPoint® Pro Mouse PS/2 and USB. Product Description The 800 DPI Optical 3-Button ScrollPoint Pro Mouse PS/2 and USB includes a ScrollPoint to control scrolling and other functions. The mouse includes a PS/2 and USB connector and can be connected to any enabled USB port. The mouse works with computers that use the following operating systems: v Microsoft® Windows® 2000 Professional v Microsoft Windows XP v Microsoft Windows Vista™ v Operating systems that support USB connectivity v PS/2 ports on computers using the Microsoft Windows NT ® Workstation operating system. This package contains: v An 800 DPI Optical 3-Button ScrollPoint Pro Mouse PS/2 with a USB connector v CD-ROM containing installation software for the 800 DPI Optical 3-Button ScrollPoint Pro Mouse PS/2 and USB online User's Manual v A USB to PS/2 adapter Installing the Mouse Suite software Included in your package is a CD-ROM containing installation software for the mouse. To install the Mouse Suite Software: 1. Turn on the computer and start Windows. 2. Insert the Device Driver CD into your CD-ROM drive. Click the Driver arrow. Follow the on-screen instructions on your screen. If the setup program does not open, go to steps 3-6. If the setup program opens, go to step 6. 3. Click Start. 4. Click Run. 5. In the command line, type X:/setup where X is the drive letter for your CD-ROM drive. For example, if the letter of your CD-ROM drive is (E:)type E\:Setup. 6. Click OK. 7. Follow the onscreen instructions to complete the Mouse Suite software installation. Note: When you are prompted to select an interface, click PS/2 if you will be connecting the mouse to the standard mouse connector or click USB interface if you will be connecting the mouse to a USB connector. The Mouse Suite Software installation is complete. Go to Installing the Mouse. Installing the Mouse This section contains information installing the mouse in PS/2 mode and in USB mode. Installing the mouse in PS/2 Mode 1. Turn off your computer. © Lenovo 2005, 2007. Portions © IBM Corp. 2005. 3-1
-
 1
1 -
2
-
3
-
4
-
5
-
6
-
7
-
8
-
9
-
10
-
11
-
 12
12 -
 13
13 -
 14
14 -
 15
15 -
 16
16 -
 17
17 -
 18
18 -
 19
19 -
 20
20 -
 21
21 -
 22
22 -
23
-
24
-
25
-
26
-
27
-
28
-
29
-
30
-
31
-
32
-
33
-
34
-
35
-
36
-
37
-
38
-
39
-
40
-
41
-
42
 |
 |
