Lenovo 7515-J9U User Guide - Page 42
Replacing the secondary hard disk drive, the proper position.
 |
UPC - 884942137211
View all Lenovo 7515-J9U manuals
Add to My Manuals
Save this manual to your list of manuals |
Page 42 highlights
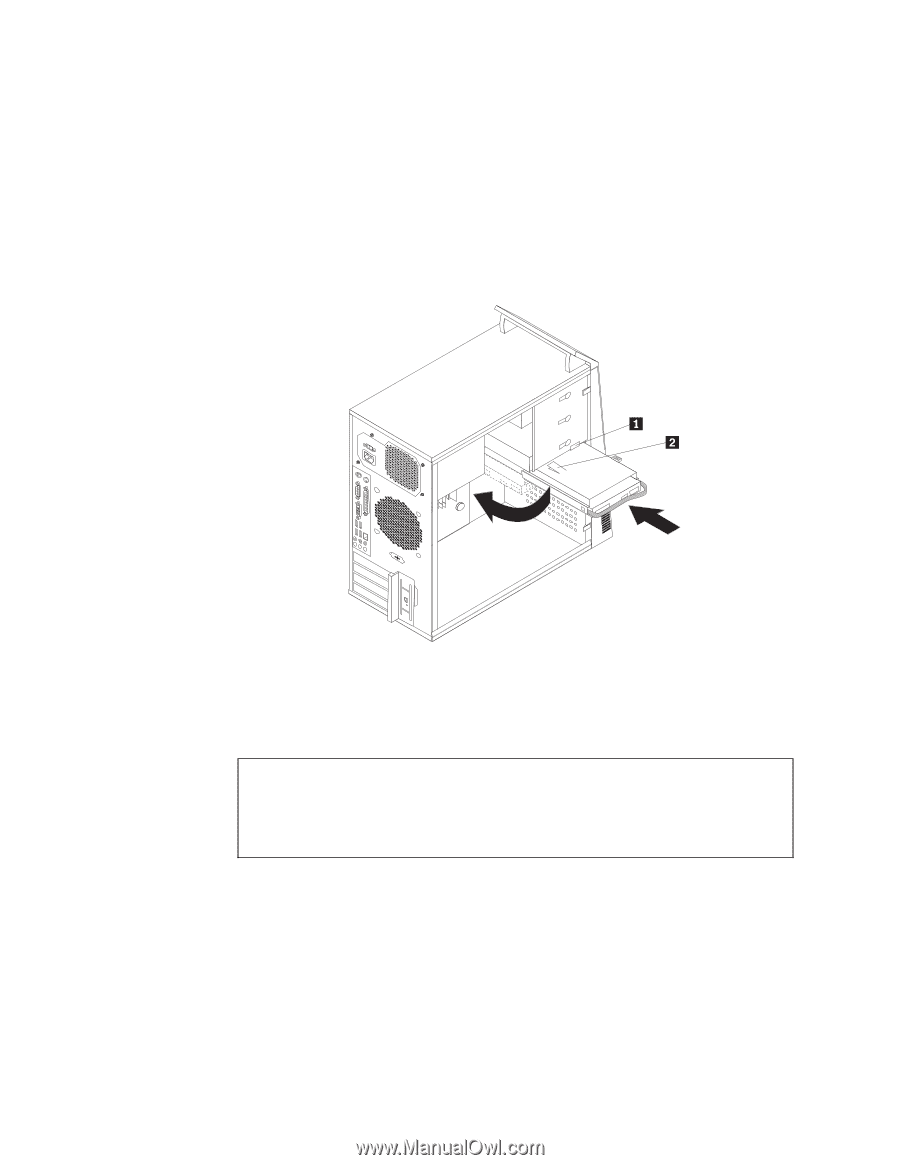
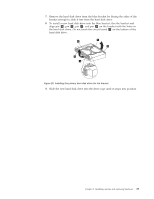
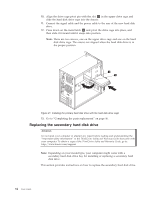
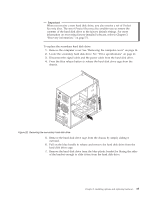
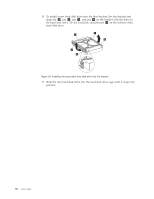
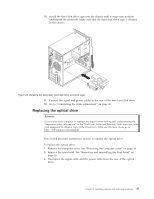
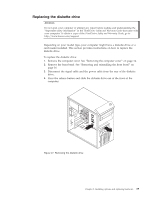
10. Align the drive cage pivot pin with the slot 1 in the upper drive cage and slide the hard disk drive cage into the chassis. 11. Connect the signal cable and the power cable to the rear of the new hard disk drive. 12. Press down on the metal latch 2 and pivot the drive cage into place, and then slide it forward until it snaps into position. Note: There are two arrows, one on the upper drive cage and one on the hard disk drive cage. The arrows are aligned when the hard disk drive is in the proper position. Figure 21. Installing the primary hard disk drive with the hard disk drive cage 13. Go to "Completing the parts replacement" on page 46. Replacing the secondary hard disk drive Attention Do not open your computer or attempt any repair before reading and understanding the "Important safety information" in the ThinkCentre Safety and Warranty Guide that came with your computer. To obtain a copy of the ThinkCentre Safety and Warranty Guide, go to: http://www.lenovo.com/support Note: Depending on your model type, your computer might come with a secondary hard disk drive bay for installing or replacing a secondary hard disk drive. This section provides instructions on how to replace the secondary hard disk drive. 34 User Guide
-
 1
1 -
2
-
3
-
4
-
5
-
6
-
7
-
8
-
9
-
10
-
11
-
12
-
13
-
14
-
15
-
16
-
17
-
18
-
19
-
20
-
21
-
22
-
23
-
24
-
25
-
26
-
27
-
28
-
29
-
30
-
31
-
32
-
33
-
34
-
35
-
36
-
 37
37 -
 38
38 -
 39
39 -
 40
40 -
 41
41 -
 42
42 -
 43
43 -
 44
44 -
 45
45 -
 46
46 -
 47
47 -
48
-
49
-
50
-
51
-
52
-
53
-
54
-
55
-
56
-
57
-
58
-
59
-
60
-
61
-
62
-
63
-
64
-
65
-
66
-
67
-
68
-
69
-
70
-
71
-
72
-
73
-
74
-
75
-
76
-
77
-
78
-
79
-
80
-
81
-
82
-
83
-
84
-
85
-
86
-
87
-
88
-
89
-
90
-
91
-
92
 |
 |