Lenovo Storage S3200 (Multilingual) Getting Started Guide - Lenovo Storage S32
Lenovo Storage S3200 Manual
 |
View all Lenovo Storage S3200 manuals
Add to My Manuals
Save this manual to your list of manuals |
Lenovo Storage S3200 manual content summary:
- Lenovo Storage S3200 | (Multilingual) Getting Started Guide - Lenovo Storage S32 - Page 1
, Basic Troubleshooting)* • Lenovo Safety, Support and Warranty* • Lenovo Important Notices* • Lenovo Storage Product Regulatory Compliance and Safety* • Lenovo Storage Rackmount Bracket Kit Installation • Lenovo Storage S3200/S2200 Setup Guide • Lenovo Storage Manager Guide • Lenovo Storage CLI - Lenovo Storage S3200 | (Multilingual) Getting Started Guide - Lenovo Storage S32 - Page 2
configure and provision the storage system. As described in Setup Guide Storage Manager Guide * If you cannot access the Setup Guide, use the following 2015 Copyright Lenovo 2015. LIMITED AND RESTRICTED RIGHTS NOTICE: If data or software is delivered pursuant a General Services Administration "GSA - Lenovo Storage S3200 | (Multilingual) Getting Started Guide - Lenovo Storage S32 - Page 3
存储 S3200/S2200 入门 Lenovo PDF http://support.lenovo.com。 产品文档 • Lenovo 文档 CD Lenovo Lenovo Lenovo Lenovo Lenovo 存储 S3200/S2200 Lenovo Lenovo 存储 CLI Lenovo Lenovo 存储 CRU Lenovo 存储 VSS Lenovo 存储 S3200/S2200 产品设置 Lenovo 2 1 SAS 2 条) 任务 14 15 16 a b c d 17 SFP - Lenovo Storage S3200 | (Multilingual) Getting Started Guide - Lenovo Storage S32 - Page 4
, !manage 控制器 IP 值 A IP 地址 10.0.0.2 B IP 地址 10.0.0.3 255.255.255.0 ; 网关 10.0.0.1 A 的 IP set net ip IP-address netmask subnet-mask gateway gateway-address controller a 2015 年 5 月 Copyright Lenovo 2015 GSA GS-35F-05925 Lenovo、Lenovo 徽标、BladeCenter、Flex System、NeXtScale System 和 System - Lenovo Storage S3200 | (Multilingual) Getting Started Guide - Lenovo Storage S32 - Page 5
visitez le site Web http://support.lenovo.com. Documentation produit • Lenovo - CD de documentation (Guide d'utilisation et consignes de ; Annexe B du guide de configuration Annexe C du guide de configuration Instructions fournies dans le kit de pattes de fixation Guide de configuration Référence - Lenovo Storage S3200 | (Multilingual) Getting Started Guide - Lenovo Storage S32 - Page 6
SFP homologués. Instructions fournies avec Guide du gestionnaire de stockage * Si vous ne pouvez pas accéder au Guide Services Administration (« GSA »), l'utilisation, la reproduction et la divulgation sont soumises aux restrictions stipulées dans le contrat n° GS-35F-05925. Lenovo et le logo Lenovo - Lenovo Storage S3200 | (Multilingual) Getting Started Guide - Lenovo Storage S32 - Page 7
Informationen angegeben sind. Die PDF-Versionen der Produktdokumentation finden Sie unter http://support.lenovo.com. Produktdokumentation • Lenovo Dokumentations-CD (Benutzerhandbuch mit Hinweisen zur Wiederverwertbarkeit, Sicherheitsinformationen, Rack-Sicherheitshinweisen, Sicherheitsetiketten und - Lenovo Storage S3200 | (Multilingual) Getting Started Guide - Lenovo Storage S32 - Page 8
subnet-mask gateway gateway-address controller a Erstes Ausgabe, Mai 2015 Copyright Lenovo 2015. HINWEIS ZU EINGESCHRÄNKTEN RECHTEN: Werden Daten oder Software gemäß einem GSA-Vertrag (General Services Administration) ausgeliefert, unterliegt die Verwendung, Vervielfältigung oder Offenlegung den in - Lenovo Storage S3200 | (Multilingual) Getting Started Guide - Lenovo Storage S32 - Page 9
per eseguire ogni attività. Per ottenere versioni PDF della documentazione del prodotto, visitare http://support.lenovo.com. Documentazione del prodotto • CD di documentazione Lenovo (Informazioni ambientali e guida per l'utente, Informazioni sulla sicurezza, Sicurezza del rack, Etichette per la - Lenovo Storage S3200 | (Multilingual) Getting Started Guide - Lenovo Storage S32 - Page 10
in base alle disposizioni che regolano il contratto "GSA" (General Services Administration), l'uso, la riproduzione o la divulgazione è soggetta alle limitazioni previste dal contratto n. GS-35F-05925. Lenovo, il logo Lenovo, BladeCenter, Flex System, NeXtScale System e System x sono marchi di - Lenovo Storage S3200 | (Multilingual) Getting Started Guide - Lenovo Storage S32 - Page 11
S3200/S2200 入門 Lenovo PDF http://support.lenovo.com • Lenovo Documentation CD • Lenovo Lenovo Lenovo Lenovo Lenovo S3200/S2200 Lenovo Lenovo CLI Lenovo Lenovo CRU Lenovo VSS Lenovo S3200/S2200 Lenovo 2 1 SAS に 2 本) タスク 66 ます。 B 67 C 68 - Lenovo Storage S3200 | (Multilingual) Getting Started Guide - Lenovo Storage S32 - Page 12
netmask subnet-mask gateway gateway-address controller a 第 1 版、 2015 年 5 月 Copyright Lenovo 2015. GSA: General Services Administration GS-35F-05925 Lenovo、 Lenovo ロ ゴ、 BladeCenter、 Flex System、 NeXtScale System System x は、 Lenovo Printed in China P/N: 00WE605 12 P/N 00WE605、 2015 年 5 月 - Lenovo Storage S3200 | (Multilingual) Getting Started Guide - Lenovo Storage S32 - Page 13
S3200/S2200 Lenovo PDF http://support.lenovo.com • Lenovo 문서 CD Lenovo Lenovo Lenovo Lenovo Lenovo S3200/S2200 Lenovo Lenovo CLI Lenovo Lenovo CRU Lenovo VSS Lenovo S3200/S2200 Lenovo 2 1개) • SAS 2개) 작업 79 B 80 C 81 a b c d - Lenovo Storage S3200 | (Multilingual) Getting Started Guide - Lenovo Storage S32 - Page 14
ip IP-address netmask subnet-mask gateway gateway-address controller a 초판판, 2015년 5월 Copyright Lenovo 2015. GSA(General Services Administration GS-35F-05925 Lenovo, Lenovo 로고, BladeCenter, Flex System, NeXtScale System 및 System x Lenovo Printed in China P/N: 00WE605 14 P/N 00WE605, 2015년 5월 - Lenovo Storage S3200 | (Multilingual) Getting Started Guide - Lenovo Storage S32 - Page 15
van de taken die in de productdocumentatie worden beschreven. Ga naar http://support.lenovo.com als u een PDF-versie van de productdocumentatie wilt downloaden. Productdocumentatie • Lenovo-documentatie-cd (Milieuaantekeningen en gebruikershandleiding, veiligheidsinformatie, veiligheid van rek - Lenovo Storage S3200 | (Multilingual) Getting Started Guide - Lenovo Storage S32 - Page 16
software word(t)(en) geleverd conform een "GSA"-contract (General Services Administration), zijn gebruik, vermenigvuldiging en openbaarmaking onderhevig aan beperkingen zoals beschreven in Contractnr. GS-35F-05925. Lenovo, het Lenovo-logo, BladeCenter, Flex System, NeXtScale System en System x zijn - Lenovo Storage S3200 | (Multilingual) Getting Started Guide - Lenovo Storage S32 - Page 17
do produto para realizar cada tarefa. Para obter versões em PDF da documentação do produto, acesse http://support.lenovo.com. Documentação do produto • CD da Documentação Lenovo (Avisos Ambientais e Guia do Usuário, Informações sobre Segurança, Segurança do Rack, Etiquetas de Segurança, Informações - Lenovo Storage S3200 | (Multilingual) Getting Started Guide - Lenovo Storage S32 - Page 18
endereços IP do controlador A: set net ip IP-address netmask subnet-mask gateway gateway-address controller a Primero Edição, Mayo de 2015 Copyright Lenovo 2015. AVISO DE DIREITOS LIMITADOS E RESTRITOS: Se dados ou software forem fornecidos de acordo com um contrato de Administração de Serviços - Lenovo Storage S3200 | (Multilingual) Getting Started Guide - Lenovo Storage S32 - Page 19
S3200/S2200 Lenovo PDF http://support.lenovo.com. Lenovo Lenovo Lenovo Lenovo Lenovo Lenovo S3200/S2200 Lenovo CLI Lenovo Lenovo CRU Lenovo VSS Lenovo Lenovo S3200/S2200 Lenovo PH 2 Ethernet SAS 118 119 120 a b c d B C 00WE605 - Lenovo Storage S3200 | (Multilingual) Getting Started Guide - Lenovo Storage S32 - Page 20
IP B: 10.0.0.3 255.255.255.0; шлюз: 10.0.0.1 IP A. set net ip IP-address netmask subnet-mask gateway gateway-address controller a 2015 г. © Lenovo, 2015 GSA GS-35F-05925. Lenovo Lenovo, BladeCenter, Flex System, NeXtScale System и System x Lenovo 00WE605 20 00WE605, май 2015 г. - Lenovo Storage S3200 | (Multilingual) Getting Started Guide - Lenovo Storage S32 - Page 21
paso en la documentación del producto. Para obtener versiones en PDF de la documentación del producto, visite http://support.lenovo.com. Documentación de producto • CD de documentación Lenovo (Avisos del medio ambiente y Guía del usuario, Información de seguridad, Seguridad de bastidor, Etiquetas de - Lenovo Storage S3200 | (Multilingual) Getting Started Guide - Lenovo Storage S32 - Page 22
o software se suministran según el contrato "GSA" (General Services Administration), la utilización, reproducción o divulgación están sujetas a las restricciones establecidas en el Contrato Núm. GS-35F-05925. Lenovo, el logotipo de Lenovo, BladeCenter, Flex System, NeXtScale System y System x son - Lenovo Storage S3200 | (Multilingual) Getting Started Guide - Lenovo Storage S32 - Page 23
儲存體 S3200/S2200 入門 Lenovo PDF http://support.lenovo.com。 產品文件 Lenovo 文件 CD Lenovo Lenovo Lenovo Lenovo Lenovo 儲存體 S3200/S2200 Lenovo Lenovo CLI Lenovo Lenovo CRU Lenovo VSS Lenovo 儲存體 S3200/S2200 產品安裝 Lenovo 2 1 條) • SAS 2 條) 作業 144 145 146 a b c d 147 - Lenovo Storage S3200 | (Multilingual) Getting Started Guide - Lenovo Storage S32 - Page 24
IP set net ip IP-address netmask subnet-mask gateway gateway-address controller a 第一版,2015 年 5 月 Copyright Lenovo 2015 General Services Administration, GSA GS-35F-05925 Lenovo、Lenovo 標誌、BladeCenter、Flex System、NeXtScale System 及 System x 是 Lenovo 中國印製 P/N:00WE605 24 P/N 00WE605,2015 年 5 月 - Lenovo Storage S3200 | (Multilingual) Getting Started Guide - Lenovo Storage S32 - Page 25
S3200/S2200 Lenovo PDF http://support.lenovo.com CD Lenovo Lenovo Lenovo Lenovo Lenovo S3200/S2200 Lenovo Lenovo CLI Lenovo Lenovo CRU Lenovo VSS Lenovo S3200/S2200 Lenovo Lenovo 2 Ethernet SAS - Lenovo Storage S3200 | (Multilingual) Getting Started Guide - Lenovo Storage S32 - Page 26
-mask gateway gateway-address controller a CLI ،manage manage VT100 ANSI Terminal None 80 : COM3 115,200 8 None 1 None 2015 Lenovo 2015 GSA GS-35F-05925 Lenovoﻭ ،Lenovo logoﻭ ،BladeCenterﻭ ،Flex Systemﻭ ،NeXtScale Systemﻭ System
-
 1
1 -
 2
2 -
 3
3 -
 4
4 -
 5
5 -
 6
6 -
 7
7 -
8
-
9
-
10
-
11
-
12
-
13
-
14
-
15
-
16
-
17
-
18
-
19
-
20
-
21
-
22
-
23
-
24
-
25
-
26
 |
 |
P/N 00WE605, May 2015
1
Storage S3200/S2200
Getting Started
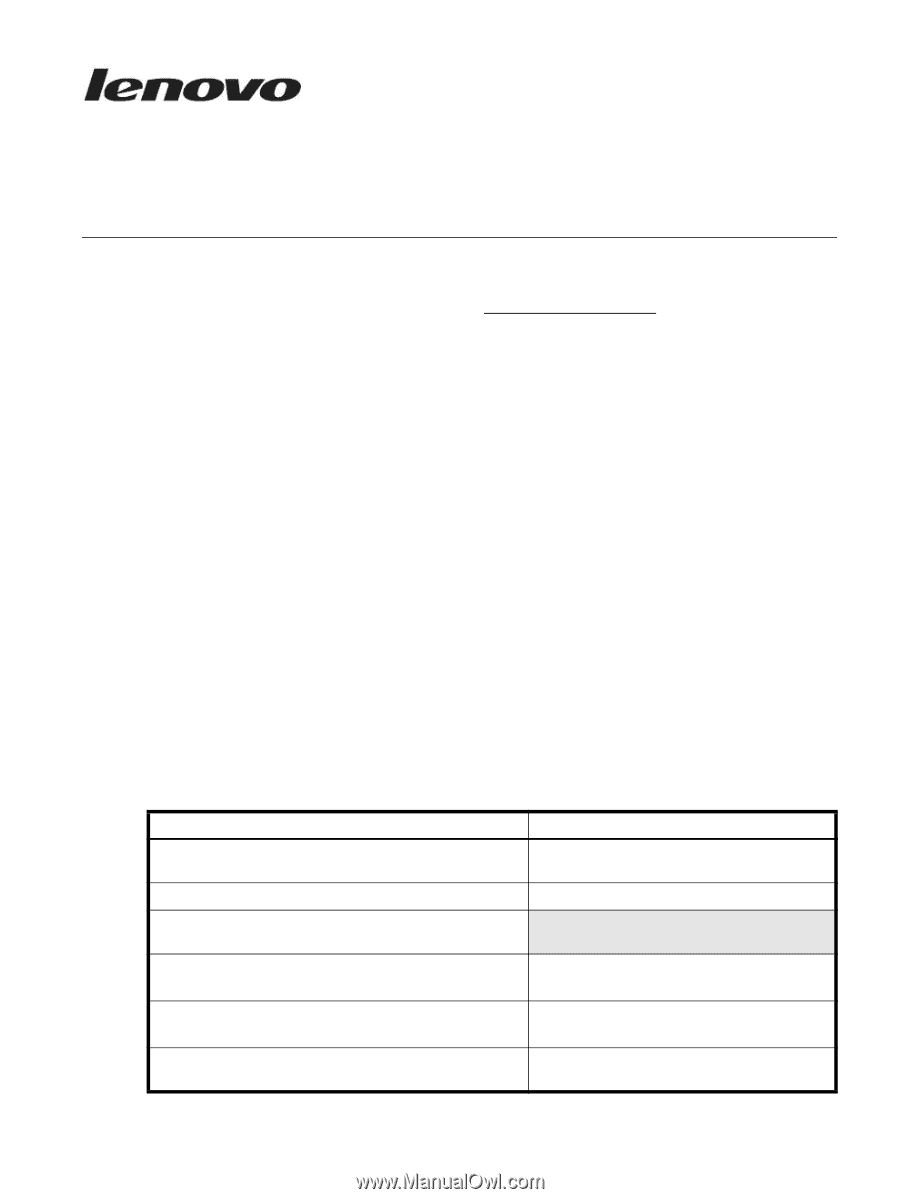
Thank you for purchasing a Lenovo storage product. This document provides an overview of product setup
tasks and specifies where information to accomplish each task is described in product documentation. To
obtain PDF versions of product documentation, visit
.
Product documentation
•
Lenovo Documentation CD (Environmental Notices and User Guide, Safety Information, Rack Safety,
Safety Labels, Basic Troubleshooting)
*
•
Lenovo Safety, Support and Warranty
*
•
Lenovo Important Notices
*
•
Lenovo Storage Product Regulatory Compliance and Safety
*
•
Lenovo Storage Rackmount Bracket Kit Installation
•
Lenovo Storage S3200/S2200 Setup Guide
•
Lenovo Storage Manager Guide
•
Lenovo Storage CLI Reference Guide
•
Lenovo Storage Event Descriptions Reference Guide
•
Lenovo Storage CRU Installation and Replacement Guide
•
Lenovo Storage VSS Hardware Provider Installation Guide
•
Lenovo Storage S3200/S2200 Release Notes
* Printed document also included in product shipkit.
Product setup
Lenovo assumes that the person using these instructions is qualified in the installation and servicing of storage
products. You must supply the following items if they are not present in your shipkit:
•
Antistatic protection devices
•
#2 Phillips screwdriver
•
Ethernet cables (1 per controller module)
•
SAS cables, if installing drive enclosures (2 per drive enclosure)
Task
As described in
1.
Verify that the installation site meets product requirements.
Product Regulatory Compliance and Safety;
Setup Guide appendix B
2.
Prevent electrostatic discharge.
Setup Guide appendix C
3.
Install the controller enclosure and optional drive enclosures
in a rack:
a.
Install the rail kit provided with the controller enclosure.
b.
Install enclosures and secure them into the rack.
Instructions provided in the rackmount bracket kit
c.
Connect the enclosures.
d.
Install enclosure bezels.
Setup Guide
4.
Install additional disk drives and options, including
qualified SFP transceivers.
Instructions provided with the option