Lenovo ThinkCentre M55 (English) User guide - Page 19
Setting, computer
 |
View all Lenovo ThinkCentre M55 manuals
Add to My Manuals
Save this manual to your list of manuals |
Page 19 highlights
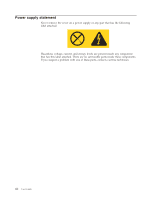
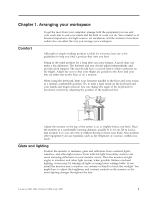
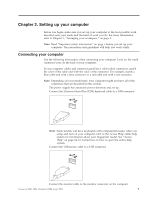
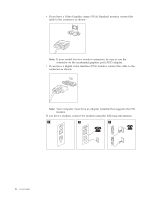
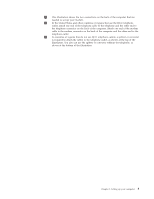
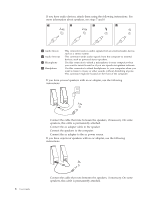
Chapter 2. Setting up your computer Before you begin, make sure you set up your computer in the best possible work area that suits your needs and the kind of work you do. For more information, refer to Chapter 1, "Arranging your workspace," on page 1. Note: Read "Important safety information" on page v before you set up your computer. The precautions and guidelines will help you work safely. Connecting your computer Use the following information when connecting your computer. Look for the small connector icons on the back of your computer. If your computer cables and connector panel have color-coded connectors, match the color of the cable end with the color of the connector. For example, match a blue cable end with a blue connector or a red cable end with a red connector. Note: Depending on your model type, your computer might not have all of the connectors that are described in this section. 1. The power supply has automatic power detection and set up. 2. Connect the Universal Serial Bus (USB) keyboard cable to a USB connector. Note: Some models will have keyboards with a fingerprint reader. After you setup and turn on your computer, refer to the Access Help online help system for information about your fingerprint reader. See "Access Help" on page 54 for instructions on how to open the online help system. 3. Connect the USB mouse cable to a USB connector. 4. Connect the monitor cable to the monitor connector on the computer. © Lenovo 2005, 2006. Portions © IBM Corp. 2005. 3
-
 1
1 -
2
-
3
-
4
-
5
-
6
-
7
-
8
-
9
-
10
-
11
-
12
-
13
-
 14
14 -
 15
15 -
 16
16 -
 17
17 -
 18
18 -
 19
19 -
 20
20 -
 21
21 -
 22
22 -
 23
23 -
 24
24 -
25
-
26
-
27
-
28
-
29
-
30
-
31
-
32
-
33
-
34
-
35
-
36
-
37
-
38
-
39
-
40
-
41
-
42
-
43
-
44
-
45
-
46
-
47
-
48
-
49
-
50
-
51
-
52
-
53
-
54
-
55
-
56
-
57
-
58
-
59
-
60
-
61
-
62
-
63
-
64
-
65
-
66
-
67
-
68
-
69
-
70
-
71
-
72
-
73
-
74
-
75
-
76
-
77
-
78
-
79
-
80
-
81
-
82
-
83
-
84
-
85
-
86
 |
 |