Lenovo ThinkPad 130 ThinkPad 130, 1200, 1300 - Hardware Maintenance Manual (Oc - Page 47
Checking the AC Adapter, Connect the AC Adapter.
 |
View all Lenovo ThinkPad 130 manuals
Add to My Manuals
Save this manual to your list of manuals |
Page 47 highlights
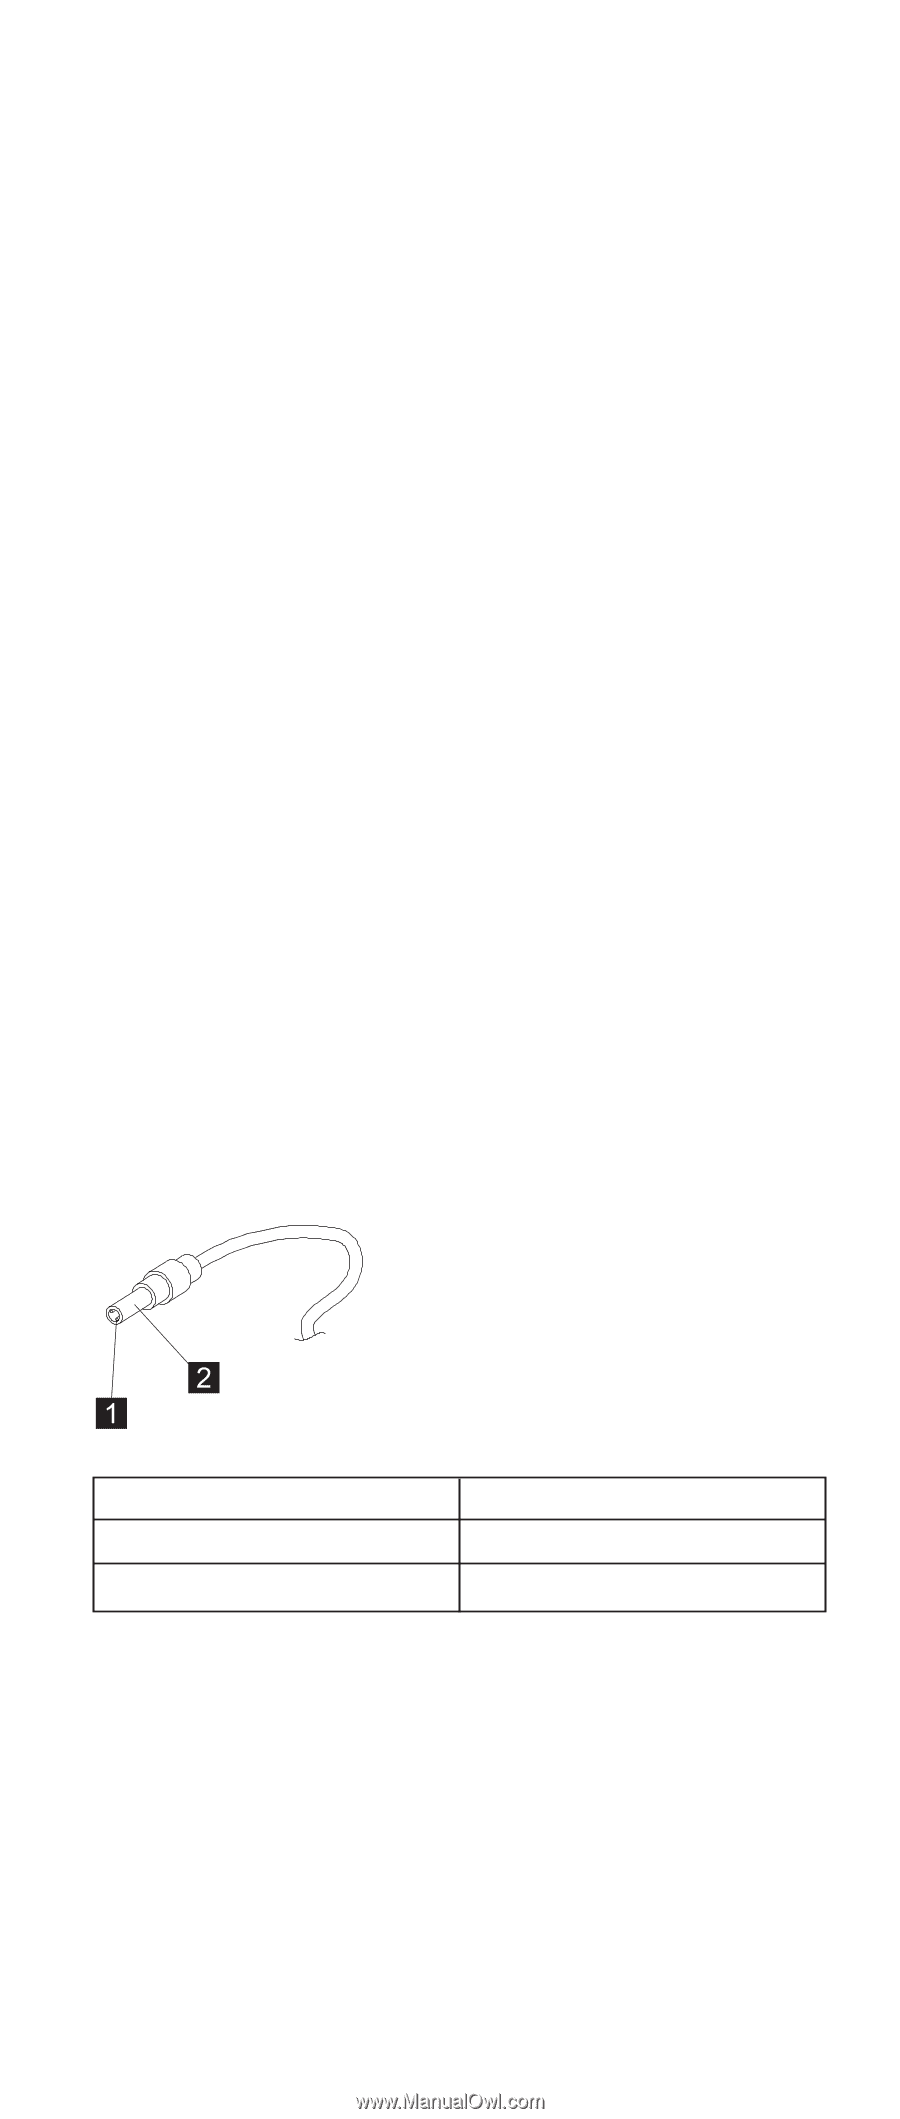
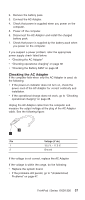
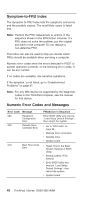
2. Remove the battery pack. 3. Connect the AC Adapter. 4. Check that power is supplied when you power on the computer. 5. Power off the computer. 6. Disconnect the AC Adapter and install the charged battery pack. 7. Check that power is supplied by the battery pack when you power on the computer. If you suspect a power problem, refer the appropriate power supply check listed below: v "Checking the AC Adapter" v "Checking operational charging" on page 38 v "Checking the Battery ASM" on page 38 Checking the AC Adapter If the computer fails when only the AC Adapter is used, do the following: v If the power-on indicator does not turn on, check the power cord of the AC Adapter for correct continuity and installation. v If the operational charge does not work, go to "Checking operational charging" on page 38. Unplug the AC Adapter cable from the computer and measure the output voltage at the plug of the AC Adapter cable. See the following figure: Pin Voltage (V dc) 1 15.5 V. - 17.0 V. 2 Ground If the voltage is not correct, replace the AC Adapter. If the voltage is within the range, do the following: v Replace the system board. v If the problems still persist, go to "Undetermined Problems" on page 47. ThinkPad i Series 1200/1300 37
-
 1
1 -
2
-
3
-
4
-
5
-
6
-
7
-
8
-
9
-
10
-
11
-
12
-
13
-
14
-
15
-
16
-
17
-
18
-
19
-
20
-
21
-
22
-
23
-
24
-
25
-
26
-
27
-
28
-
29
-
30
-
31
-
32
-
33
-
34
-
35
-
36
-
37
-
38
-
39
-
40
-
41
-
 42
42 -
 43
43 -
 44
44 -
 45
45 -
 46
46 -
 47
47 -
 48
48 -
 49
49 -
 50
50 -
 51
51 -
 52
52 -
53
-
54
-
55
-
56
-
57
-
58
-
59
-
60
-
61
-
62
-
63
-
64
-
65
-
66
-
67
-
68
-
69
-
70
-
71
-
72
-
73
-
74
-
75
-
76
-
77
-
78
-
79
-
80
-
81
-
82
-
83
-
84
-
85
-
86
-
87
-
88
-
89
-
90
-
91
-
92
-
93
-
94
-
95
-
96
-
97
-
98
-
99
-
100
-
101
-
102
-
103
-
104
-
105
-
106
-
107
-
108
-
109
-
110
-
111
-
112
-
113
-
114
-
115
-
116
-
117
-
118
-
119
-
120
-
121
-
122
-
123
-
124
-
125
-
126
-
127
-
128
-
129
-
130
-
131
-
132
-
133
-
134
-
135
-
136
-
137
-
138
-
139
-
140
-
141
-
142
-
143
-
144
-
145
-
146
-
147
-
148
-
149
-
150
-
151
-
152
-
153
-
154
-
155
-
156
-
157
-
158
-
159
-
160
-
161
-
162
-
163
-
164
-
165
-
166
-
167
-
168
-
169
-
170
-
171
-
172
-
173
-
174
-
175
-
176
-
177
-
178
-
179
-
180
-
181
-
182
-
183
-
184
-
185
-
186
-
187
-
188
-
189
-
190
-
191
-
192
-
193
-
194
-
195
-
196
-
197
-
198
-
199
-
200
-
201
-
202
-
203
-
204
-
205
-
206
-
207
-
208
-
209
-
210
-
211
-
212
-
213
-
214
-
215
-
216
-
217
-
218
-
219
-
220
-
221
-
222
-
223
-
224
-
225
-
226
-
227
-
228
-
229
-
230
-
231
-
232
-
233
 |
 |